

Why should you raise chickens?
Once upon a time, humans thought it a jolly good idea to chase all manners of herbivores all over the face of the earth as they migrated this way and that. They didn’t do it because they were bored or thought that gazelle had nice butts, although they did. They did this because of the reoccurring gurgling sound and all around hollow feeling you get when you’re hungry.
Then one day, someone got a bright idea. “What if we simply catch some of these animals and trap them in a largish boxish thing so they can’t run away. Let’s call it a… paddock, yes a paddock! Then, when our bellies make the awful gurgling hollow sound and our heads go all dizzy, we can milk or eat one of them!” Lets call our hero Ugh. When Ugh suggested this with his series of guttural grunts and clicks, all the others in his nomadic tribe were dumbfounded. They feared him a demon of some sorts and instantly beat him to death with a large rock. So it goes for Ugh.
But it was too late, the idea had formed in the backs of their heads like a tiny spark and then exploded into the possibilities of living a life of leisure. Without running this way and that, they could now sit down and fart and scratch! “Perhaps we were harsh on Ugh. Let’s give it a go!”
So they did, and it was super classy! Now, they sat around their fire pit chewing on the bones of their captured food stuffs looking awkwardly at one another. Grunts and clicks were no longer enough to convey the ever increasing range of thoughts and feelings that they could now devote the time to learn how to express. Words began to form. Cranial capacity began to increase. Waist sizes as well.
This was the dawn of mankind. The dawn of culture. And it all came from sitting on your ass and eating trapped animals. Then they wanted a little something green to eat with their animals. They liked that particular leafy whatsit over on the other side of the mountain. But it was so far away, and they already had their jammies on for the night so they stewed and thought and talked. The next day, they sent someone to get a few of those leafy whatsits and bring them back to the burgeoning village. They studied it, hit it with large rocks and slapped each other with it. Nothing.
Finally, one of them noticed that from under one of their favorite beating rocks, one of the leafy whatsits seemed to be getting larger somehow. The whatsit had enough turned soil and water to take root. So they began to try to duplicate the process. Some of them actually grew and there was much rejoicing that day! Thusly, farming and animal husbandry were born.
Fast forward 10,000 years and now we go to large squarish buildings where all of these food stuffs, and some that aren’t really food stuffs, are conveniently prepackaged in smallish foam boxish things. We have come a long way. Yet, we have also forgotten quite a bit about what that initial jubilation was all about. We’ve lost sight as to what it feels like to harvest and corral our own food stuffs. Ugh would be very saddened and confused if he could see us now. Laden with chemicals in such a saturated capacity that we will be preserved in death longer than any mummy ever could. Sick and fattened so that our very bodies betray us all the time.
Why am I telling you all of this? Because I want to help you be more like Ugh! All it takes is one tiny first step and everything else will fall into place. You will taste food again like it’s supposed to taste. Your inner Ugh will rejoice in this new found rejuvenation. I know, fairly lofty for a DIY on chicken coops, but it’s important to me to put things in perspective so that you can truly see WHY you should raise your own chickens and grow your own veggies. This shouldn’t be a fad or a way to brag to your hipster friends while combing out your massive beard as your legs atrophy from poor trouser circulation. This should be your duty as a human being. To yourself and your family. Break free from the chains of industrialized mankind and embrace your ancestry! After all, it is your patriotic duty!

Fine, shut up and tell me how to build a chicken coop!
Alright, I will. Don’t be so pushy!
I’ll go over some must haves for your coop and then show you what I did in greater detail which will help you decide what works best for your needs and space. The first part will be slightly cursory but I’ll provide you with more detailed information when needed.
The first thing you need to work out is location. How much space you have determines how many chickens you can safely and humanely care for. Weather and sunlight are a factor as well. You don’t want them too exposed to the elements were cold winter drafts will chill them to the bones or blazing summer sun will fry them extra crispy. Crap, now I’m thinking about KFC. Be right back…
Tasty! Where was I? Oh yes, location location location. Chickens don’t need a huge amount of room, but should never be kept like they are in slaughterhouses either. Happy chickens make for healthy and tasty eggs. Free ranging chickens help out in the garden by eating pests, turning soil and adding some rich fertilizer.
Chicken poop is great for fertilizer, just make sure you compost it first or else it would be too potent and could cause your roots to burn like Richard Pryor’s head after a crack binge.
[youtube https://www.youtube.com/watch?v=bjD4PHojNBU?rel=0&controls=0&showinfo=0&w=300&h=225]
Free ranging chickens are okay because they tend to deposit only small amounts and spread it out thinly.
Depending on what part of the world you live in, the next biggest hurdle is predators! If you want to free range your chickens and you live somewhere where predators are, you need to make sure that they can’t get into your coop or run (the enclosed outside area). Raccoons, coyote, skunks, dogs, cats (for little chickens), foxes, owls, hawks and falcons are the typical suspects. Skunks tend to only eat the heads for some reason. Too much Black Sabbath I imagine. Chicken wire will not keep out any of these predators save the winged ones. Hardware cloth is much better to use and worth the extra investment. Don’t forget that many predators dig as well, so you’ll have to take that into account by either burying the hardware cloth or pouring a cement pad for your coop and run. You can also use netting for the roof of the run to keep the birds of prey out.
In my yard, there are virtually no predators. I am surrounded by city scape as well as stray cats and just about everyone has a dog in every yard surrounding me. I have yet to see a single raccoon, skunk or possum anywhere as a result and my girl Sasha watches over my girls like the cute protector that she is.

Good ol’ eagle eyes won’t let anyone get near her little sisters! It is for this reason alone that I run the risk of using only chicken wire in my coop and run. I am in a rare inner city location though, so please act according to your surroundings. Even here I get the occasional falcon watching over my flock while licking his “lips”. My girls are too big for him though. At least that’s what I tell myself. I get owls at night from time to time but the girls are safely in their roost by then.
The essentials for happy chickens.
Chickens are a very simple animal to raise. They don’t eat too much, especially if they free range, so once you’re set up it’s not too expensive to keep them. They do, however, need certain key elements in order to be happy and healthy. I’m going to just scrape the surface of raising chickens because this is a post about my coop. For more detailed information on the actual husbandry keep checking back for new posts. Another extremely useful source of information as well as a huge community of super helpful chicken folk is Backyard Chickens. This is a perfect resource for the beginner as well as the expert. I use them often.
Essentially chickens will need food, water and shelter. In their shelter, they need a place to roost as well as a place to lay eggs. The roost can be any kind of stick that’s at least 2″ in diameter and should be the highest point inside the coop. They love to have the high vantage point when they are getting ready to fall asleep. The nesting box should be relatively dark and private so as to not stress the girls out. It should also be easy for you to access so that you can harvest your eggs with little effort. Food can be as simple as a tray or large dish, but the chickens will knock over anything that isn’t nailed down so bear that in mind. Water presents another challenge because the chickens will not respect your need for tidiness and you will find yourself in a constant and daily state of maidhood trying to keep the water clean and fresh if you simply fill up a water dish and place it in the coop. I highly recommend you take the time to set up a gravity fed PVC system and use chicken nipples. Yep, chicken nipples. I know, I still chuckle every time I hear it as well. They look like this:

Once you show your chickens how to use these just once, they’ll catch on quickly. Using a gravity method will really stretch your water budget because there is no evaporation and no spillage from the chickens. It’s also an enclosed watering system so you’ll never have to clean bits of hay and poop out of the water every day. This truly is the difference between creating an additional daily chore and having a more time to watch and play with your girls. I’ll show you my system in the next section.
Well, that’s the bare bones basics of what you’ll be dealing with. Again, for more detailed information on all of the essentials, go to Backyard Chickens. Now lets move on to how I went about designing and building my coop.
The Design.
I’ve mentioned in another post that I’ve always had the idea of raising chickens in the back of my head for years. When I was developing my arrangement in the back yard, I would always be checking to see where the best place would be to build it. As it turned out, my favorite spot was right where an annoying hill was along the property line.
I should mention here that you need to check your own city codes for any and all regulations before building. Technically, mine should be 10′ away from the property line, but I talked with my neighbor before hand and got the blessing. Which is easy to do when you offer free fresh eggs! The number of chickens you can raise as well as whether or not you can have a rooster will all depend on the footprint of your property as well as city regulations. Many cities are getting more lax about this burgeoning hobby.
That said, I began to slowly and painstakingly remove the hill to better suit my needs. I did this all by hand because it’s a great workout and I’m a cheap bastard. But can you argue with these results?

Manual labor when done properly can keep you away from the gym. Here’s the hill removal at about halfway through:

Holy Crap, this was some serious work. Every pick axe strike would hit a rock and send sparks out. The clay was thick and dry and compacted beyond reckoning. After several painstaking months I finally got the last of the dirt placed along the back of the property to form my berm.

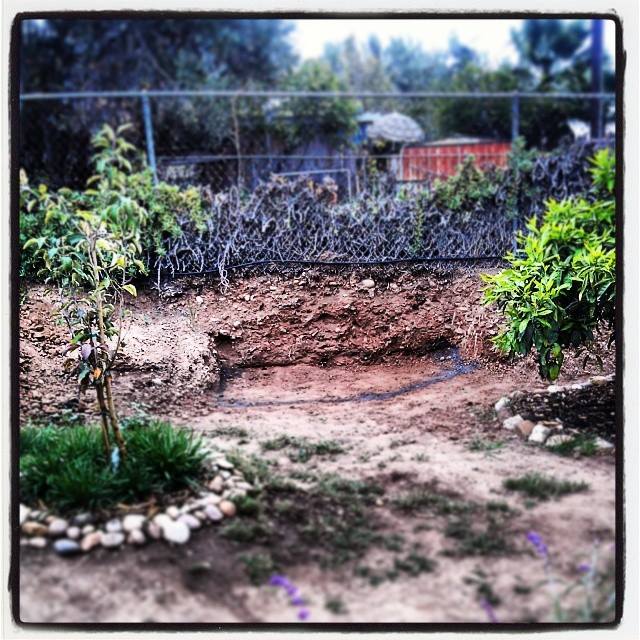
You can kind of make out the gray spray paint footprint for the future coop in the images above. Now, after so much waiting, I was ready to design my coop based on the space provided by my sore back and dulled pick axe!
I did a few sketches on paper to get the basic needs down but I began to realize that this will be a bit more complicated and I needed to work out bugs before investing money on lumber so I sat down to learn how to use SketchUp, a 3D rendering program. A bit of a learning curve, but I was able to get the basics enough to begin my design. This was all foreign and new to me so I wanted to get it right the first time. Here are some different views of the final product as well as a virtual tour of the chicken coop! I know, how futuristic is that!?


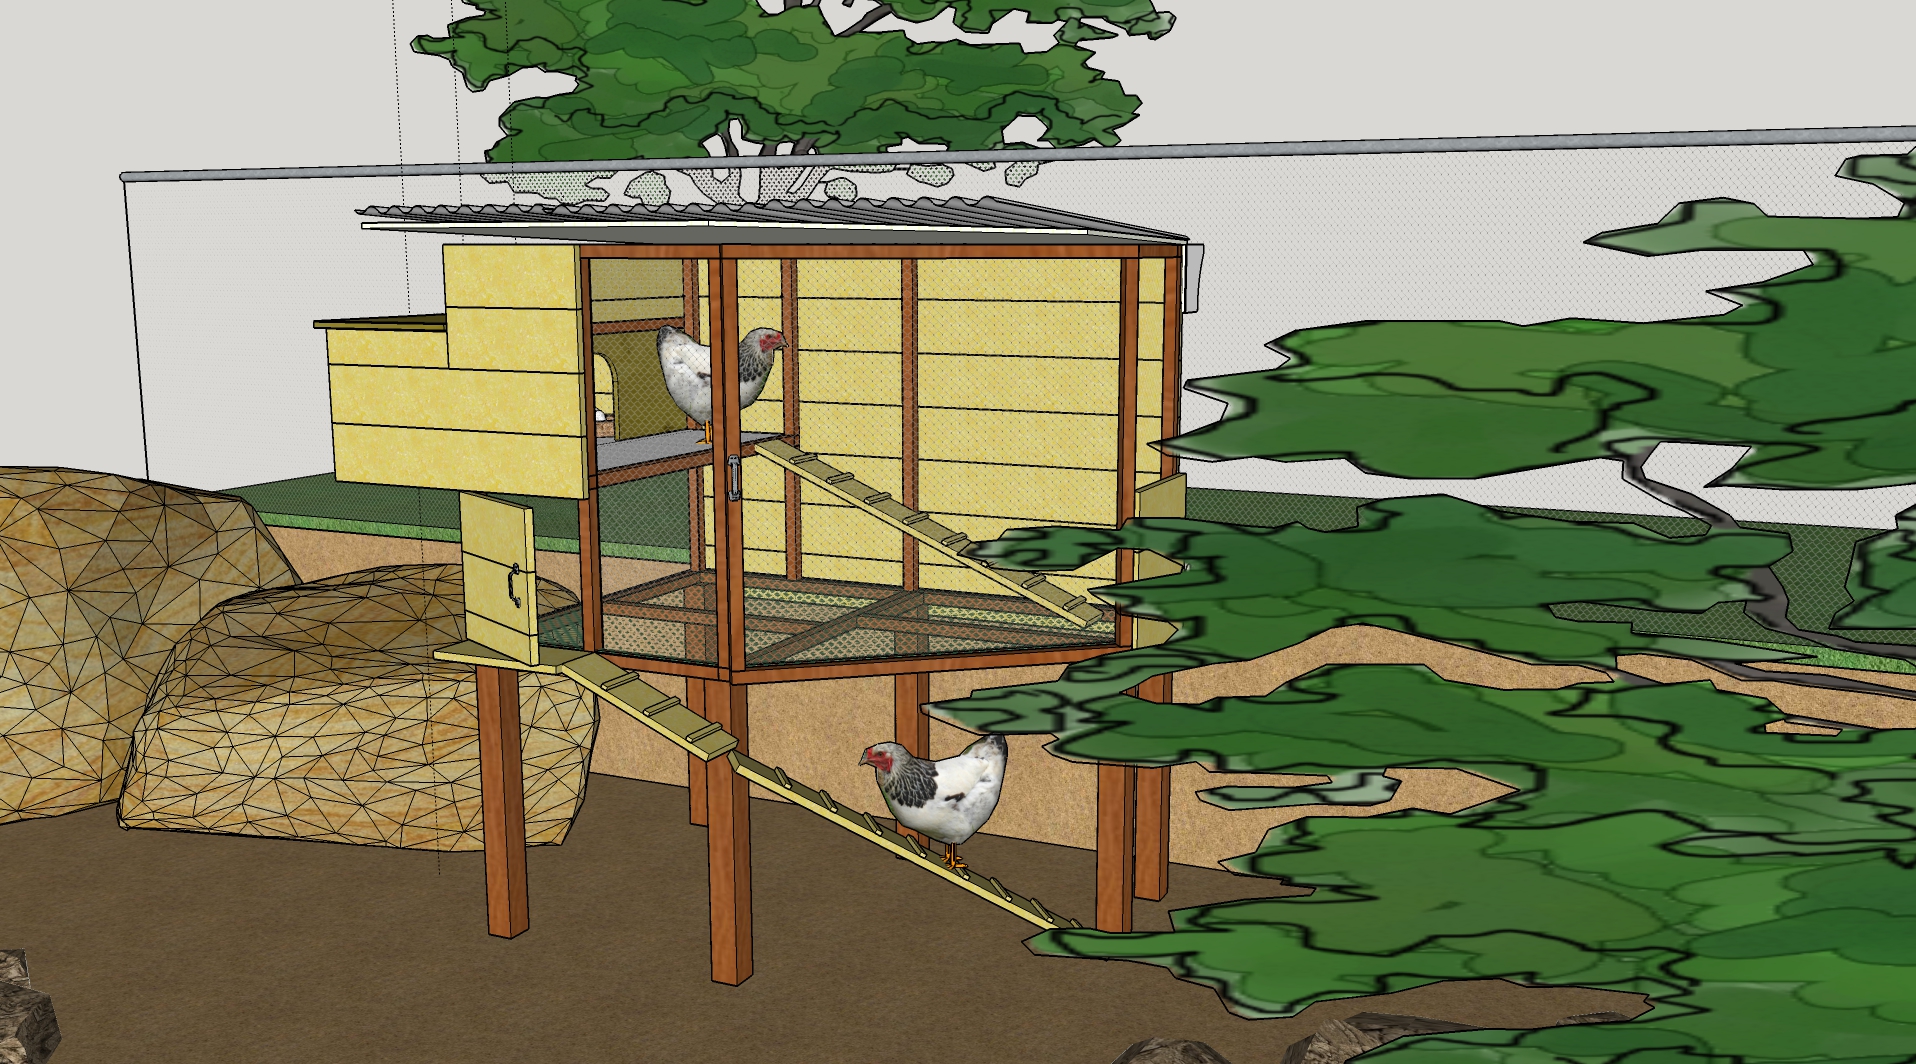
I instantly fell in love with SketchUp and I highly recommend it for your projects! You can do so much with it even beyond the crazy futuristic virtual walkthrough above. Before you ask, no, I am not from the future. This technology is available right now!
Using a 3D rendering program allowed me to open doors, test measurements and figure out my cut list as well as my wood yield. This was all essential for saving money on supplies before stepping foot into the Home Depot. I also discovered that having a ladder on the front of the coop wouldn’t work very well, so I moved it to the side. You could also hide certain elements so you can see only the frame work which helped me deal with multiple issues when doing the final construction.
For example, the nesting box was to hang over the structure with no support underneath. In order to allow for that, I needed to arrange the horizontal supports to extend into the coop so the weight would be supported.

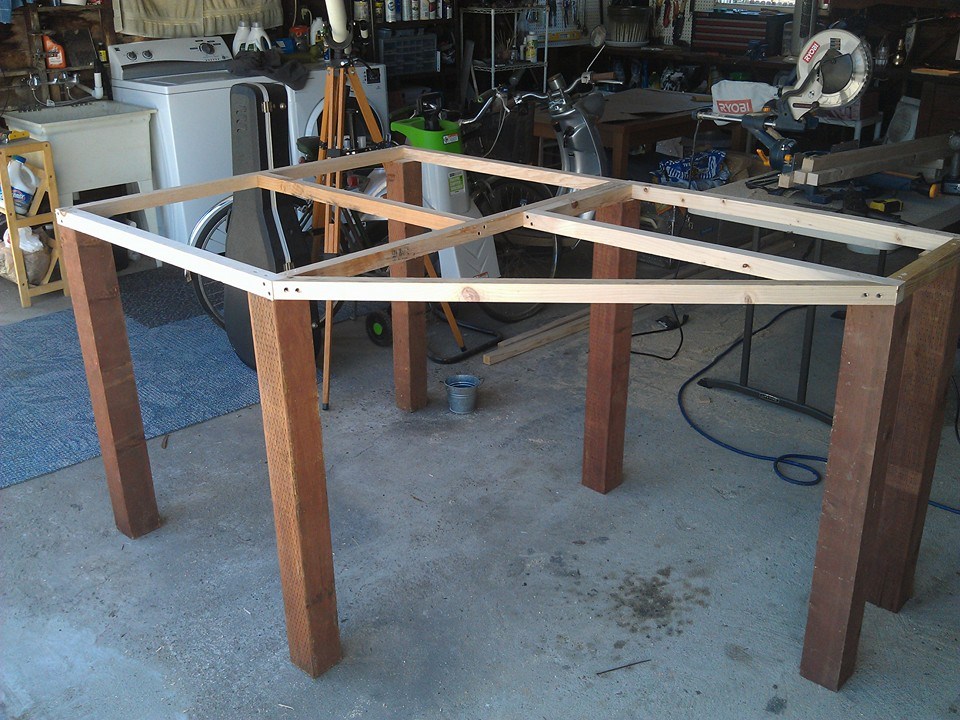
Once I got all the bugs worked out, I hid everything but the wooden frame so I can begin building using 2 x 2’s. This is what the design looks like bare framed.

From here I can make all the measurements needed and develop my cut list. I then moved into the garage to begin building at long last!

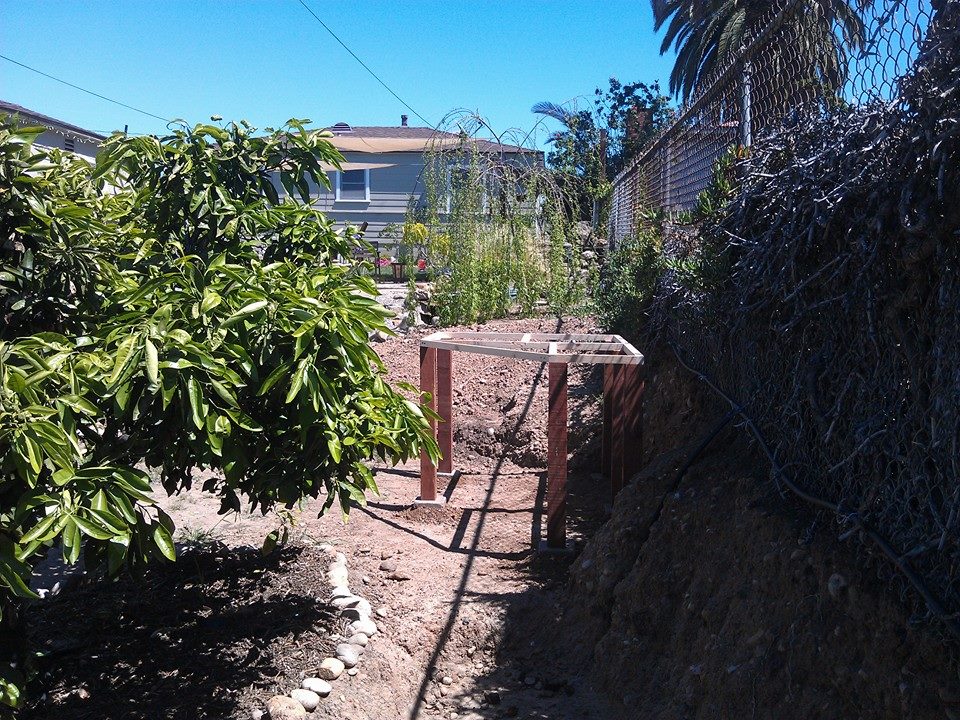

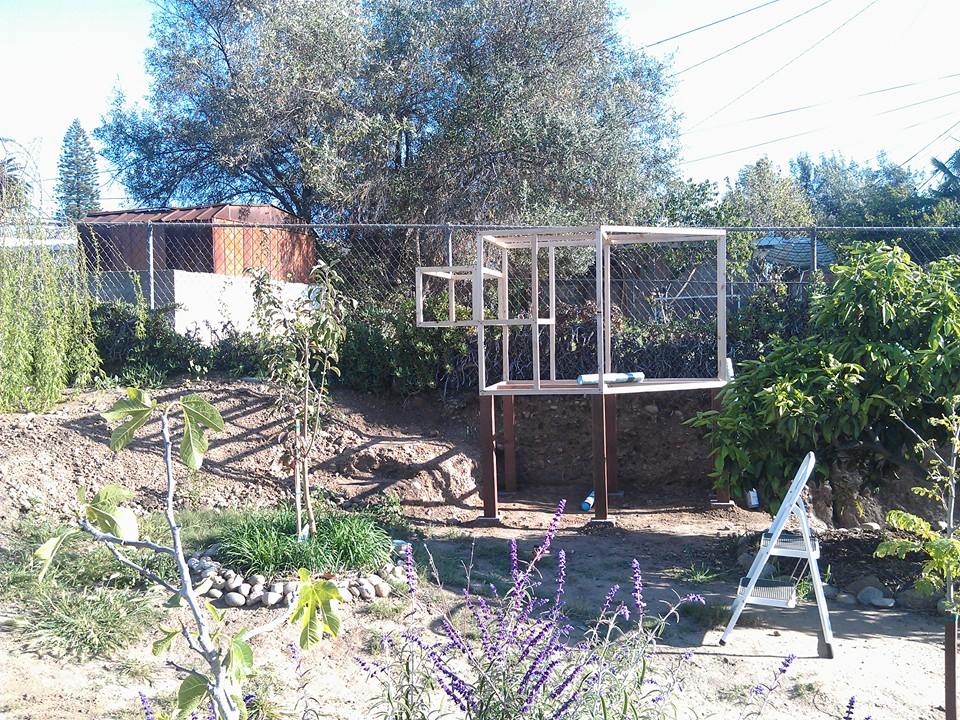
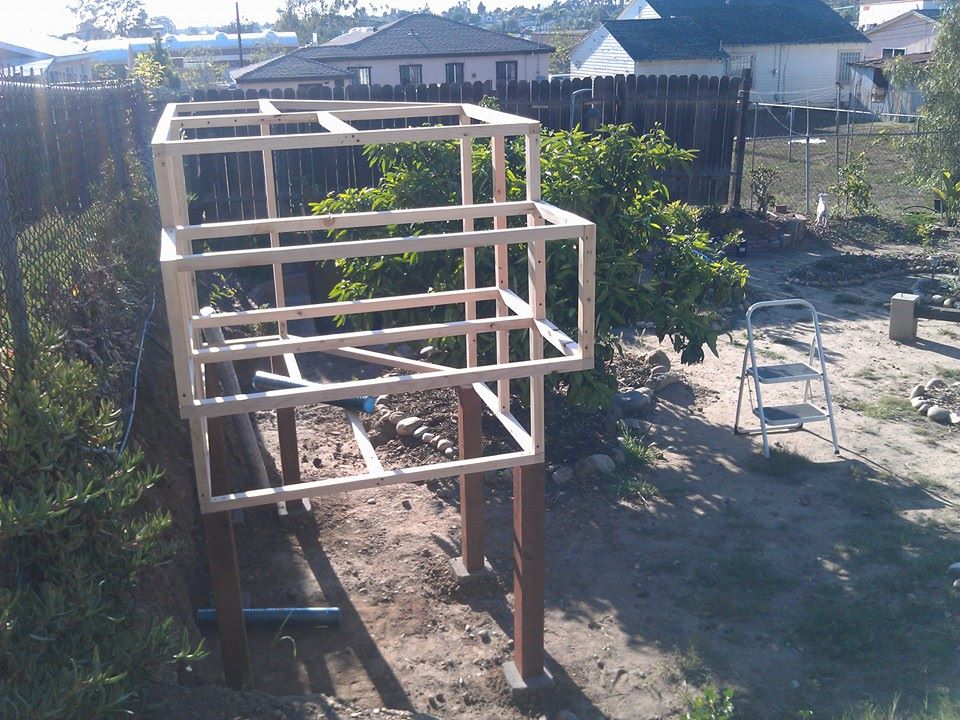
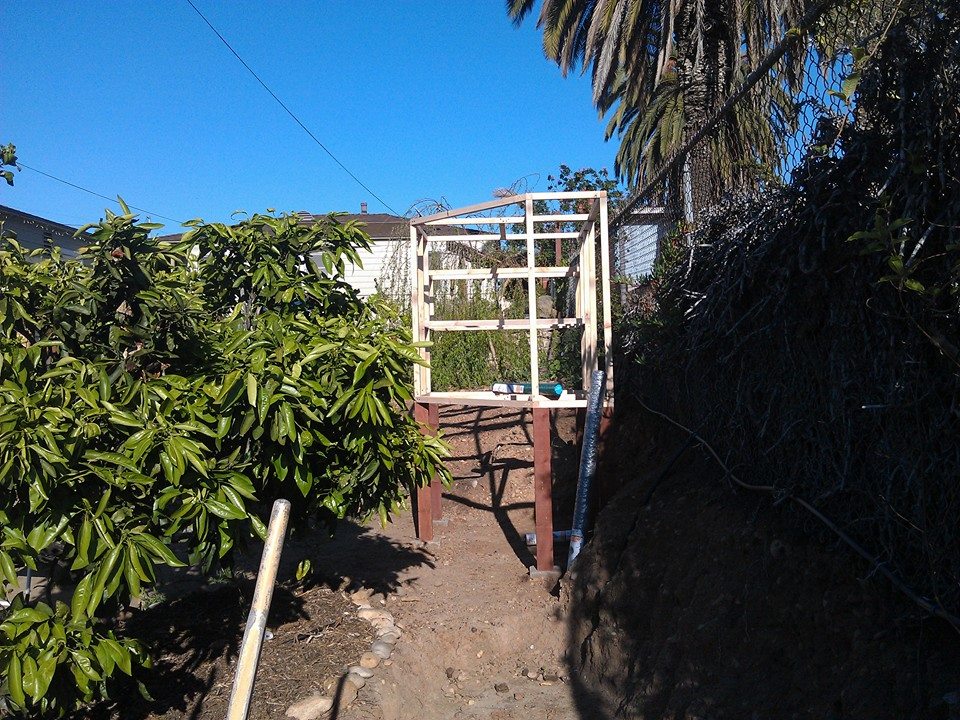
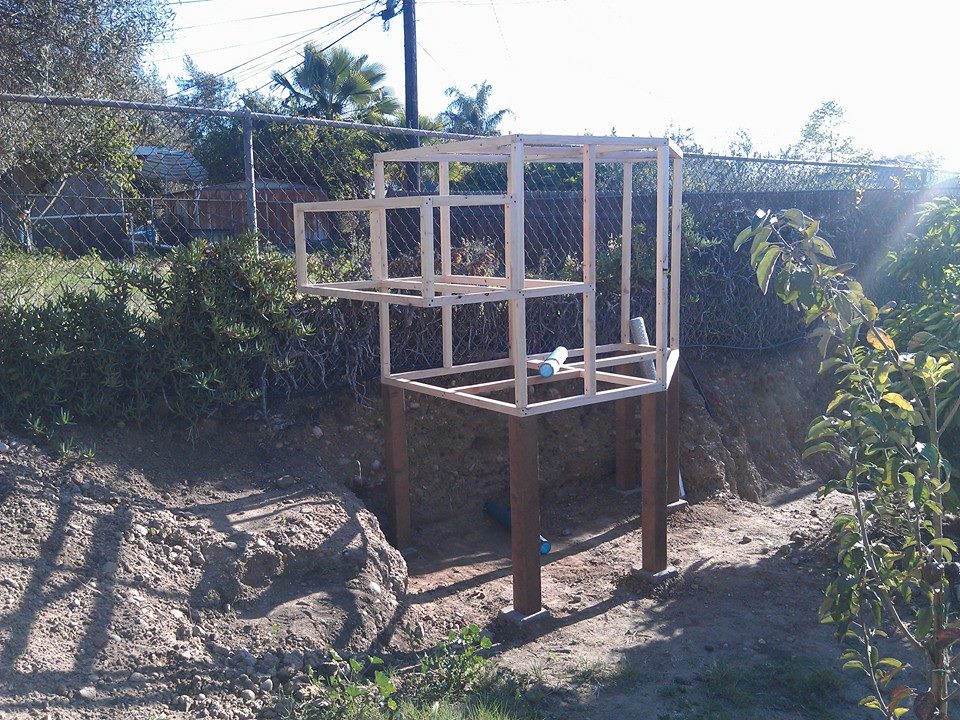
I decided it was best to keep the structure free standing in case the city comes down on me for having it along the property line. This way, I can pick it up (with help from a friend) and move it to another location in a pinch. Apart from that, the frame was solid and ready for its skin. Here’s the side by side of the 3D drawing and the actual coop frame.

As you can see, it was right on the money! For the skin, I used some reclaimed cedar planks I got from an exhibit at The San Diego Museum of Art. It was some old floorboards that they were going to toss. I still have some and use it for many projects like this and this! You gotta love free! The parts that needed chicken wire were then added and I used some plastic coated hardware cloth for the floor. The reason I wanted the coop to be raised up and the floor to be hardware cloth was simple. I wanted to easily have access to the valuable manure for composting. The theory was that if I clean the coop, all of the poop would fall down into the hay below and I could rake it up and add both the manure and the hay to the compost pile with ease. So far it’s working like a charm! I used Dibond for the nesting box and second floor flooring for easy cleanup. Basically, its a thin sheet of PVC sandwiched between two thin sheets of aluminum. Water proof, strong and a smooth surface for easy cleaning. Here’s the first iteration of the skin:

I added some corrugated plastic roofing to keep the rain out and tilted it back slightly. Before the winter rains begin, I plan on adding a small gutter system to collect the rainfall and add it to the gravity watering system I talked about earlier. Speaking of which, now would be a good time to show you that!

All I have to do is fill up the 5 gallon bucket about once a month! The water feeds down the tube into a PVC pipe. Then when the chickens peck at the chicken nipples (hee hee) they get a nice cold drink of fresh water! The system is all enclosed so there is no evaporation and no contamination from the outside. You can also see in this photo another salvaged part. The brass door for egg collection is actually a sideways fire extinguisher hatch that was once used in my museum. They threw it away after a renovation several years ago and I garbage picked it. I knew that one day I’d want to buy a house and subsequently build a chicken coop and that this would make a fine and fancy door from which to gather my eggs from. Now that’s some forward thinking for you!
Here are some more details of the watering system:


And yes, I did add some electrical to the coop for lighting. If I ever want to push the laying season a bit, I have a timer and an internal light source to fool the chickens into thinking the days are longer than they are. I can also add a heat lamp if I ever decide to have babies and need to add a little heat on “cold” winter nights. Or disco lights.
Some interior shots reveal the entry way to the laying box as well as the roosting stick. I made the roosting stick out of a branch of a pepper tree on my neighbors yard that intruded over mine. Pepper trees are evil and destroy the ground beneath them so nothing will ever grow. I cut it back often! I do so with my battle ready katana that I have in case of a zombie outbreak (not a joke). This is to show the pepper tree that there will be no sanctions and it will bend to my will! Judge if you must. I’ll wait.


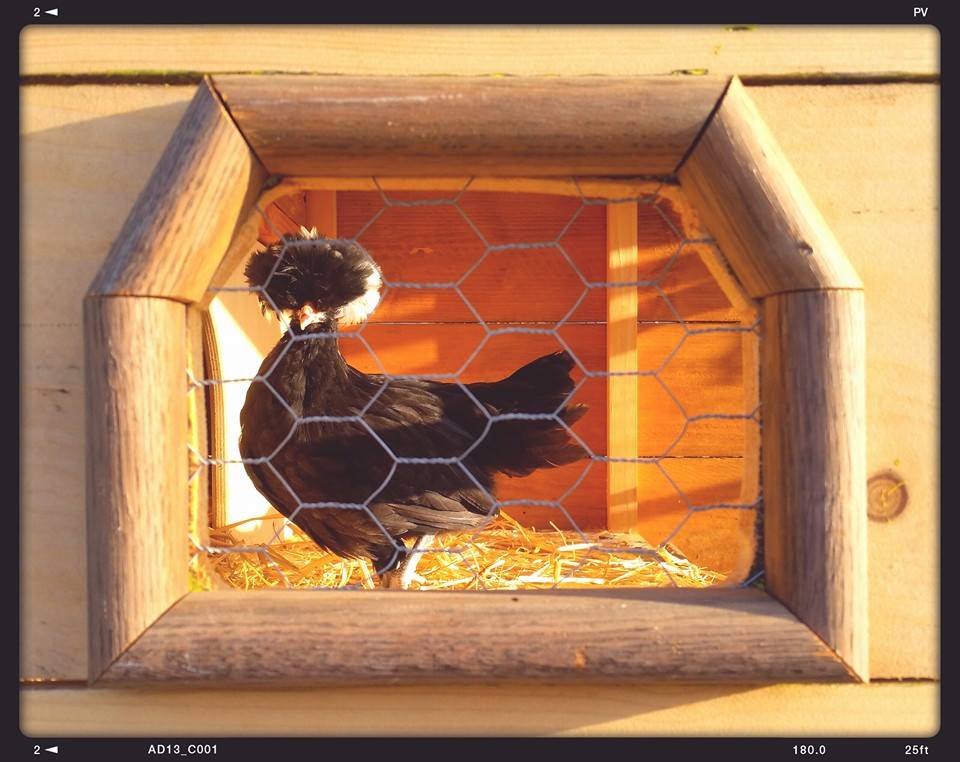
Now I had the basics all dialed in, I focused on some details. I wanted to add a little window so my girls can watch me from the second floor while I was working in the yard. Here’s Tesla doing just that!
I began to sand off the ugly paint on the cedar to get a more natural feel. I also needed to build some sort of run to contain my girls so they didn’t attack my veggie garden. Oh, and I needed to build their ladder so they could actually get in and out of the coop.

Here it is with some of the paint removed with a ladder and part of the paddock walls. This is before I was babysitting Hamilton the pig so the walls haven’t been fortified yet. Here are some shots of the ladder and paddock. Again, all pre-Hamilton.

I ended up extending the ladder from my original design because poor Piper, the silkie, had some trouble getting up and down. Here’s the silkies learning how to use it.
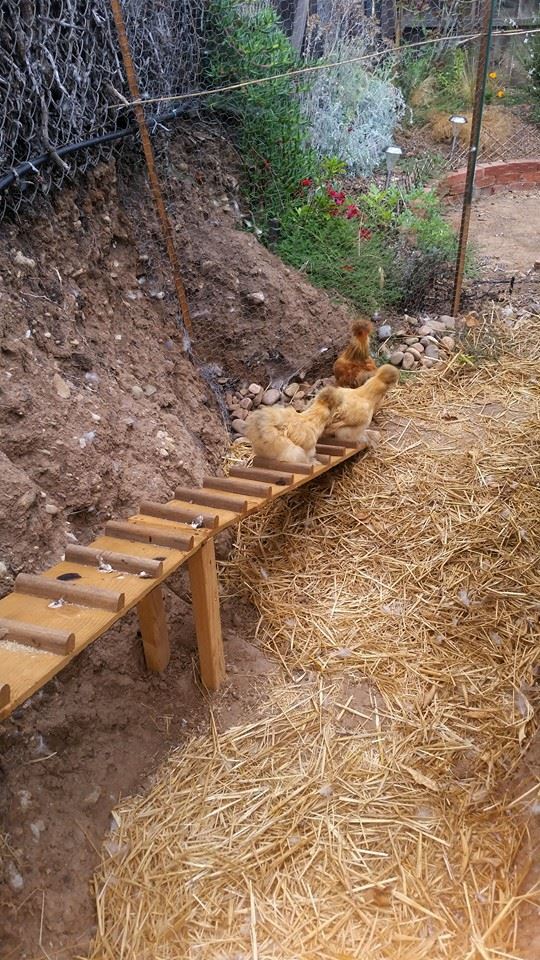
A bit of a learning curve getting the silkies on board with the ladder training. The other girls got it down right away. The ladder itself is made from more of the reclaimed cedar as well as some half round oak that I also got from the museum. Nothing goes to waste!

Here’s a shot of the paddock itself (pre-Hamilton). I added an old tire and filled it with loose dirt so the girls can take dust baths. The tree is a marvelous Satsuma Orange tree that was the only established tree on the property. The fruits from this tree are the best oranges I’ve ever eaten in my life. It’s also the only plant that the chickens have 24/7 access to. They love climbing up in the branches and chasing each other around it all day long. Under the tree, I planted a variety of chicken treats which they munched on and destroyed right away. It was a house warming present.
From the branches, I hung several CD’s on strings. Why you ask? Well, the sunlight hits the CD’s which are spinning in the wind and sends out a light show all over the yard. The chickens love it and they also love reflections. I did it as a way to enrich their life a bit and provide some entertainment while I’m away at work.
Along the edges of the paddock I’ve planted green beans and blueberries so the chickens can peck away as needed on their side, and I can harvest some treats on my side of the fence. So far, it’s all been working perfectly. They get to free range all day long and then retire to their loft apartment in the sky for a night of cooing and clucking. I don’t have a lot of chicken experience, but I recognize a happy animal when I see one and these girls are having a blast in there! For the sake of staying current, I wanted to add photos I took today so you can see the post-Hamilton coop and run…


Here it is as of a few hours ago. As you can see, I’ve added a wall alongside my grassy knoll so I can better harvest eggs, control erosion and give Sasha a place to sit and observe the wacky chickens. You can also see some of the rest of the yard in it’s semi completed state. I’m working my way backwards creating paths and beds while I wait for my trees to grow in and provide me with a bit more shade. It’s a work in progress.
When all was said and done, I was able to build the entire chicken set up for around $200. It took several hours to construct, and then re-construct once Hamilton got in there. I’m keeping the paddock fairly ghetto and lightweight for now. I may make a more permanent fence once the pathways are developed and the plants begin to fill in. This was kind of a test run because I didn’t really know what to expect with raising chickens. It’s all very experimental at this stage and I haven’t even harvested a single egg yet. They should begin laying next month though!
I will say this though, at first I found it difficult to relate to the chickens. They seemed so odd and unlike any animal I’ve had in the past. Over the last several months, I’ve really grown to love them and their individual personalities. They amuse me, my friends and my dog greatly. Sasha has been trained to not chase them and now views them as part of the family and someone who she needs to protect. Every morning when I wake up the first thing I do is grab the dog and walk outside to see the day. The girls instantly begin clucking and yelling and cooing at me and wait by the front door of the paddock for me to come inside and say good morning. It’s become part of my daily routine. I find it both ridiculous as well as primally appealing that I’m engaging in such a non-city boy activity in such an urban environment. I had no idea how much I would be drawn to raising chickens in my yard, but here I am. I love those crazy weird little birds and will never go back to not having chickens. After all, it is my patriotic duty.
If I had a time machine, I would go back 10,000 years ago and give Ugh a big high five. Although, that would probably scare the shit out of him and cause the entire Space/Time continuum to collapse upon itself and when I returned to 2014 you would all be wearing helmets made of potato salad, worshipping the rock that didn’t crush Ugh’s head and eating your own toes. Space/Time hindsight is 20/20. I will go to the garage and destroy my time machine as soon as I post this. Too dangerous!
This is a really nice tutorial. I just framed in the back half of my shed and made it a chicken home. I find your watering system very interesting, but as winter is here, now, I have a rubber feed dish with a heat lamp over it to keep it from freezing solid. Much easier than beating it to death!
HI Becky! Thanks for your comment, I’m glad you liked the article. I keep forgetting that there are places in the world that have below freezing temperatures. I shouldn’t be whereas I was born and raised in Buffalo, NY. Perhaps I am repressing the memories of snow and freezing rain.
I think they have small heating elements that you can add to water systems like mine that would be more energy efficient then using a heat lamp. I’ve seen them on forums before and remember thinking to myself, “Ha, don’t need that anymore!” I’d love to see some photos of your converted shed if you have them! I love seeing other peoples designs and problem solving.
Thanks again for your comment. Getting people to leave comments on this blog has been like pulling teeth. They love to send me private messages on Facebook with the best questions ever. I ask them to leave a comment on the blog and they say “Definitely! Great idea!” Then they never do. Oh fickle interweb people, why not share your thoughts and feelings?
This is a really great post! Your place looks great… You are multi talented and so funny. Glad I never found a headless chicken, ugh. Other than that, this gets me wanting to have a go at chickens again
Hey thanks so much Cynthia! There are two typical reactions to my humor. Ether it’s, “damn, that’s some funny s@%t right there!” or it’s, “Get the axe, it’s coming towards us!”. I, of course, prefer the former!
All of this is really new and exciting to me. The yard work, the chicken raising and especially the blogging. I often feel lost and really useless and stupid. I’m trying really hard to build an audience and actually make myself helpful to people that are looking for some decent tips as well as a good laugh. If I can accomplish both, then I don’t feel as useless and stupid.
In short, thank you so much for your kind comment! Please do get chickens again! The best part is how ridiculous your life becomes. For example, not more than an hour ago, I was chasing my Rhode Island Red around the backyard in my underwear. She had gotten out this morning and refused to go back in the easy way. So, I’m chasing her, my dog is chasing me and my neighbors are taking photos. You can’t pay for that level of silliness. Well, maybe you can…
Lol!! Moving on to new things and being out of our comfort zones has a way of making us feel useless and stupid and in my case, embarrassed . Trouble is, once we get comfortable and feeling smart the time comes to try something new.. It’s all good!! I hope your blogging lasts a good long time because I do learn a lot and get a good laugh too!
Cynthia, you speak the truth. And also warm my heart. Thank you for the encouragement!
So happy to see Ugh has made it into your chicken coop blog. I have always felt a closer tie than most to our not so distant relative Ugh. Maybe its my ugh like physical attributes, or my occasional self induced Ugh like mind state I place myself into for recreation. Either way glad your keeping his dreams and ideas alive. Cant wait till I have a place to get my hands in the dirt and do the same. Until then, I will stay tuned on what your up to. Its always entertaining.
Thanks my boy blue! Perhaps I’ll have Ugh as a reoccurring character! Until you get a place of your own, you are always welcome to come over and dig in my yard. I could use the help and there’s no shortage of projects going on at the Gielow estates. Please do stay tuned! I try to post at least once a week. I’m a newbie to this whole blogging thing and I want to really get a good amount of posts on here to cover as much ground as I can. I also have a huge backlog of all the projects I’ve done since I bought the house 2 years ago, so I have no shortage of material or photos. Thanks for visiting and come back often!!
yours,
James
James- I just discovered your blog and am enjoying your writer’s “voice” and sense of humor. And, of course, your information. Last year I moved from the suburbs of Portland to a rural location and am dreaming of my future chickens once the house is in order (big remodel). I love your coop and can’t wait to show it to my husband so we can put one up. Since we are rural, we have predators including raccoons and coyotes, and several hawks that are helpful in keeping some of the vermin population at bay. Although, I swear one was circling me when walking Miles the Wheaten terrier (35 #s) last fall. We ducked into a tree hedge so the raptor could move on. I did not want to fight a hungry (angry?) bird! And Miles will need to be trained to not chase the hens (thanks to that post too). Although he did a very poor job of keeping the field mice out of our lovely sodded backyard – so I’m not sure how aggressive he’ll be with the chickens. BTW I’m also a docent at the Portland Art Museum and appreciate all that our prep team manages there! Cindy
So many things to love about this comment! Firstly, thank you for being a docent! A perfect connection between the patrons and the amazing objects we care for. Making culture accessible and approachable is an amazing asset to all museums.
Some thoughts on your coop design: yours will have to be much more secure than mine is. A fully enclosed chicken run and coop will be needed. Chicken wire will not be strong enough for most predators, so you’ll want to use hardware cloth instead. With small openings as well. Many predators will reach into the hardware cloth and grab the hens for a quick meal.
You’ll also want to extend the hardware cloth below the surface of the ground and outward avout two feet to protect from digging predators. Raccoons are absolute geniuses when it comes to latches as well. I recommend a lock of sorts to keep them out.
As for Miles. He’s a terrier and will really want to chase those hens! But of he’s introduced in the proper way to the baby chicks, he should be able to understand that they are part of the pack. Just always remember to remove him from the stimulus when he gets too excited. Actually before he gets excited would be best. Patience, caution and repetition will be your best assets. If it helps, take some video of the interactions in the beginning and I’ll review it and offer tips.
Thanks again Cindy for your warm thoughts and you comment. I’m here whenever you need a helping hand!
There are countless designs online to choose from. In all my chicken years, I’ve never lost any to predation, but I can assure you that I am an anomaly. I imagine it can be heartbreaking to lose an entire flock in one night.
Thanks for your tips James! I’d read about burying the wire but not extending it out, which we will do. I would sure hate to lose the girls to the wild and hungry, although know that’s a definite possibility, and I fear there will be a learning curve.
Extending it outward goes a long way in causing the predator a huge bummer vibe. Most animals will be willing to dig deeper than you’ll be in the chicken run construction phase. It’s instinctual and of they’re hungry enough, they’ll keep digging downward.
Outward, however, seems to escape them conceptually. They dog down and are then met with hardware cloth. They say to themselves, “hey, fox-self, stop diggin man. Clearly the entire planet is coated in this hardware cloth. No need to investigate further.” and they move on.
This leaves them pooped and demoralized while you and the husband sit on the couch laughing and your hens make cute little sleepy cooing noises all safe and sound.