A word about the role of compost
Dark and nutrient rich compost is a must have for any gardener. In this day and age, chemical fertilizers are destroying commercial farming, polluting our groundwater and are very costly. I will never ever recommend you using chemicals in your yard (or even in your home for that matter). Your children and pets play in the yard and will be exposed to all of those chemicals. My girl Sasha is way too cute to be slowly poisoned just because I want to take the easy way out. Would you poison this little girl? Yeah, me either. I mean, look at that sweet face. Hold on, I need to go scratch her belly real quick. Got myself all a’twitterpated.


Okay, I’m back. Where were we? Oh yes, compost. Compost, when applied properly, will aid in the soils drainage, provide essential nutrients and help to retain enough water for your plants to drink. You don’t really want to treat your compost as you would mulch. They are different animals altogether.
Compost works best when it’s mixed into the first few inches of soil and can get close to the roots Vs. Mulch which works best on top of the soil to retain temperature, moisture as well as block out most of your weeds.
We’ll cover mulch in another post.
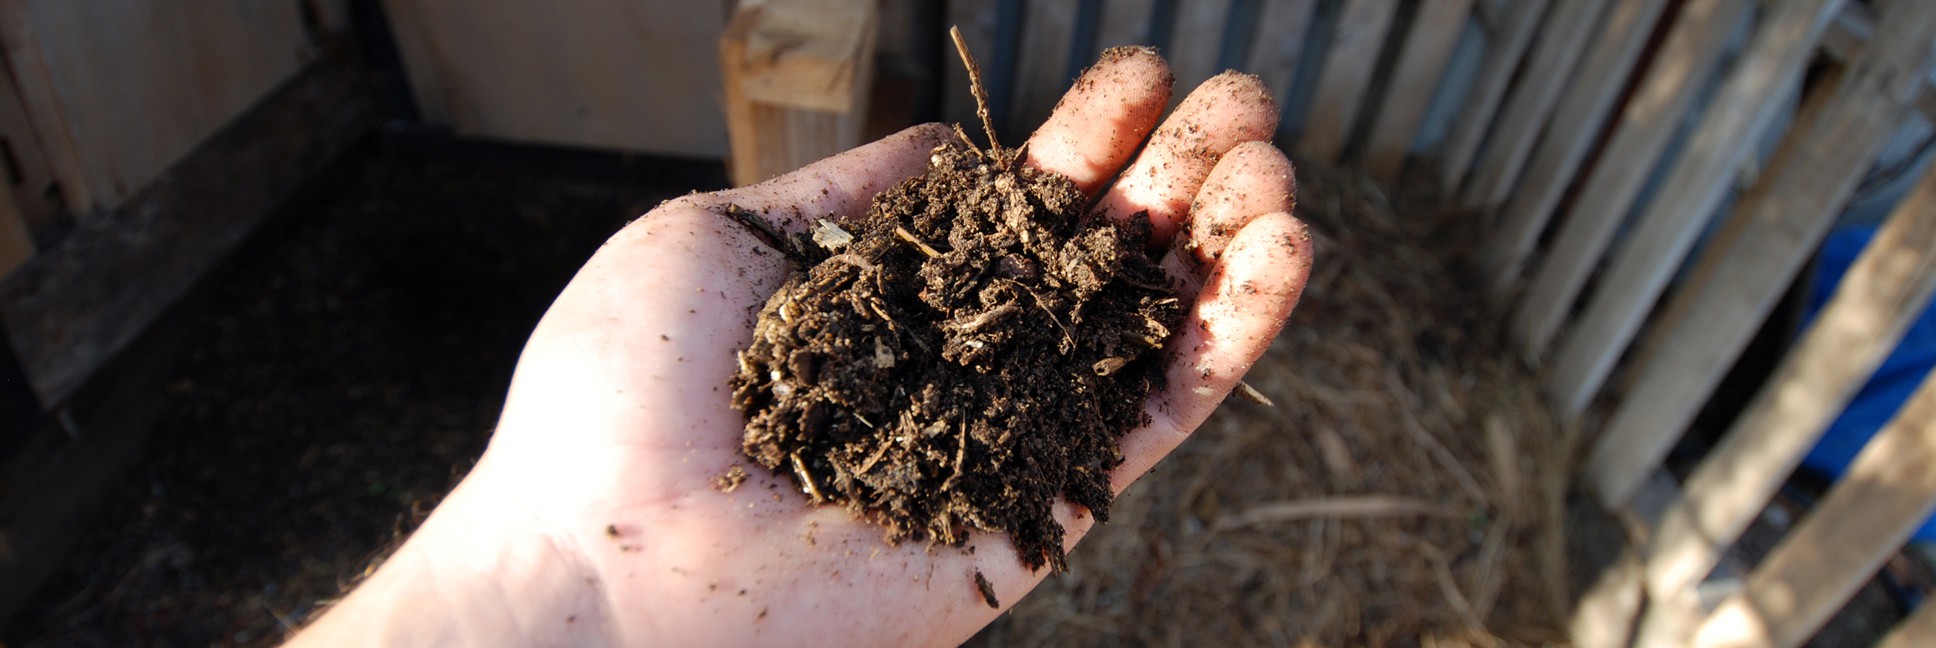
In order for compost to be effective, it has to be completely broken down. That means no more recognizable pieces of leaf or twig remain. It’s dark like spent coffee grounds and smells good and earthy. When you try using compost before its ready you will actually do more harm than good with your plants. Why you ask? Because in order to break down the material in compost, you need nitrogen. If you’ve mixed unfinished compost into your topsoil around a plant, it will take the available nitrogen from the soil to finish the job. That means less nitrogen for your plants and they will become stunted and sad. Sad plants make for sad gardeners.
Great, so how do I make it?
The good news is that it’s so ridiculously simple to make compost. Or I should say, it’s as simple as you allow it to be. What will determine your level of difficulty will be time. If you’re not in a hurry, you can simply pile up material in a back corner of the yard and leave it at that. It will take a year or so, but it will work. If you want to have compost in a few weeks then there are some tips you’ll need to know. I’m going to tell you what to do in order to get some rich dark compost in no time at all and you can decide how much time you want to invest. I’m also going to tell you how to do this without spending a lot of money (or any money at all). Those fancy bins that turn on a swivel are great for making this an easier process, but wholly unnecessary and costly. If you have the space and money to throw around, go nuts. I live on a tight budget so most of my techniques will reflect that. Here’s what you need:
Greens (nitrogen), Browns (carbon), water, air and temperature monitoring.
That’s it essentially. Let’s break that down for clarification…
Greens:
- Lawn clippings
- Vegetable scraps
- Fruit peels (easy on the citrus buddy)
- Coffee and tea grounds
- Houseplants
- Feathers or hair
- Herbivore manure (no cat or dog poop please)
- Hay or alfalfa meal
- plant prunings
- bone meal
- weeds (before they go to seed)
Browns:
- Dry leaves
- Aged hay or straw
- newspaper
- cardboard egg cartons
- chipped wood
- dried grass clippings
- shredded paper
- coffee filters
- sawdust (nothing with chemical treatments)
- wood ash (not too much of this though)
- pine needles
Water:
- Moisture levels are very important as well. Too much water and the material will become a stinky mess, too little water and the whole process comes to a standstill. You want the working compost to have the water levels similar to a slightly damp sponge. If you grab a handful and squeeze it out, only a drop or two should come out. I’m a strong advocate, living in a drought ridden San Diego, of not using hose water to accomplish this moisture level. I use grey water from my washing machine or shower. If you live in an area with heavy rains, get yourself a rain barrel and use that. For arid places like mine, I put a small breathable tarp on top to help retain the water. If you get heavy rains, you may not need to add any water. Just be sure to check it from time to time to make sure it’s not getting too saturated or cover it up to keep it dryer.
Air:
- The microbes that breakdown your compost are like you and me, they need to breathe. Airflow is just as important as any of the above ingredients. We’ll cover the structure of your pile below which will show you how to build it to maximize air flow. however, you will have to provide a good airflow during the process. They sell nice little composting aerators which aid in this endeavor, but you can also simply use a pitchfork and turn the pile yourself to bring the air into those stifled areas of your pile. You should also start your first layer of materials in your pile with larger sticks and twigs. About 6 inches or so should do the trick. This will allow air to be pulled up through the pile from below.
Temperature monitoring:
- Okay, here’s the one thing that you should definitely purchase. A composting thermometer.
They’re similar to meat thermometers except they have a long stem (about two feet) so they can probe deeply into your pile. If you’re looking to make some compost in a jiffy, you simply must have one of these to know when it’s time to turn your pile. As you can see above, mine is ready to be turned right now. So, maybe I should get off of the computer and do it. Okay, maybe later. Let’s first break down the different ranges of heat:
- Low (80-100 degrees): This means that your pile has slowed down the process and very little work is being done. This is the time you need to get your pitchfork and turn over your materials. This will get the needed air to flow throughout the pile and get those lazy microbes back to work!
- Medium (100-130 degrees): This is a decent range to be in. This means that material is being broken down properly, but it’s not hot enough to destroy any seeds that may be in the pile, especially if you’ve added weeds in as part of your mix. If you kept it at this range, and then added the finished compost to your soil, you may get some unwanted sprouts and weeds in your garden.
- Hot (130-160 degrees): Ahh, now this is the good stuff right here! Things are in high gear production and once you get up to 160 degrees, all of those pesky weed seeds will be utterly vanquished! Huzzah! Less weeds means less weeding. Egads, do I hate weeding. This temperature range is really hard to perfect and will take some trial an error. A hot pile will get you finished compost in weeks instead of months.


Okay, we’ve got all our ingredients out of the way. It’s very similar to cooking or baking. You want to get your ratios right or else the end product doesn’t taste so good. Those little magical organisms also like their food prepared the right way. Again, I want this to be as simple and un-daunting as possible so you won’t overthink it. Here’s a really simple rule of thumb for the ratio between your browns and greens. 30:1.
That’s it. But it’s not quite what you think. I don’t mean you need 30 buckets of leaves and 1 bucket of grass clippings. This 30:1 ratio can translate into 2 parts nitrogen and 1 part carbon. It all depends on the particular materials you are working with. It can get a bit confusing at times, so a good safe bet is this, for every 2 piles of green, add 1 pile of brown.
I won’t go into too many examples here, but if you want some good recipes or examples, check out what Professor Rot has to say about the Carbon to Nitrogen ratio in this insightful article about this complex mixture.
You can also create some storage areas to save up materials until you are ready with a complete batch. If you have the room to do so that is. Here’s how I did my bins. I have three of them. One is the material waiting room, one is the working composting factory and the last is for the final product.

As I mentioned earlier, you can send a lot of money to accomplish this, or none at all. I used old salvaged pallets to build my bins. You can get them from any store that lets you “borrow” them. Home Depot likes to reuse theirs, so you have to give them the puppy dog eyes. I’m good at that. These pallets help me to keep everything separated. You can also use chicken wire or just have a pile with nothing else. Whatever you do, remember to keep that air flow!
Here’s my material waiting room.

I like to keep this one a bit out in the open because I’m always adding to it while working in the yard. In order to speed up the whole process, it’s a good idea to break up this material before adding it to the working pile. You can use a wood chipper if you have one, or put the material on the lawn and run it over with the mower a few times to shred it up a bit. Again, not essential to do, but it makes the job go faster when it comes to getting your final compost.
Here’s the working compost factory bin.

I’ve illustrated here how fast the material will break down if you keep your temps up. This bin has been running in the medium range with a few periods of hot. I like to get it hot to kill off the seeds that are in there because I add weeds all the time. This is where your ratios really come into play. For best results, you want to layer the materials. It’s not essential though, and when you turn it all, it gets all mixed together anyways. It’s just a good starting point to make sure you have a good ratio to begin with. Again, I can’t stress enough that it’s okay if you don’t have this all exact. Don’t over think it too much.
I’ve made a little graphic in SketchUp to help illustrate:
As you can see, start off with your twigs and sticks for good air flow, then add some brown material, then some green materials and give it a good spray of water between each layer. You can add some compost on top of that to speed things up, or a little dirt, but it’s not essential. The micro organisms will be present regardless. Just make sure that you are doing your pile on the bare ground and you’ll get all the micro organisms you’ll need. Then just repeat the process, brown, green, brown, green etc. watering each layer as you go. Remember, not soaking wet. Just damp like a moist sponge.
The size of the pile is not meant to be exact, just a rough idea of how big you want. If your pile is too small, it won’t work as fast because it won’t have enough material to create that hot core temp you need. If the pile is too big, you’ll never be able to turn it without breaking your back. This is a good size to begin with. Once it starts working, the pile will shrink drastically. Like, crazy shrinkage going on over here! Yes, it shrinks.

The waiting game
Now you sit back and relax for a day or two. This is a great time to use your thermometer to see how things are progressing. The temps should climb dramatically overnight if all is mixed properly. I enjoy doing this maybe more than I should. It’s like some crazy science experiment. I get giddy watching that little needle climb. You can even stick your hand in the pile to see the process happening after a day or two. It should look like this:

See how it’s starting to turn brown? That’s a good sign. Also, when you stick your hand in, it should be borderline uncomfortably hot. On a cold morning, it’ll even let off a good steam. Ah, the power of nature is quite a force!
So now, you’ll simply monitor the temps and when it begins to drop down into the lower temp (80-100 degrees), all you do is turn the material. This means that the micro organisms need more air flow. Use a decent pitch fork for easier work, or you can use a rake or a shovel in a pinch. Hell, get in there with your hands up to your elbows if you’re a dirty gardener like I am! There will be bugs though.
Keep an eye on the moisture levels while you do this. The process is finished is when you don’t see anything that’s really recognizable as plant stuff anymore. As I said above, it’ll be rich and dark and smell like good earth. Nothing quite like that smell is there? You should also be ecstatic about what you’re accomplishing. You’re doing the good noble work here friend. Turning this scorched earth into a nutrient rich Eden. You’re actively replenishing the topsoil and making the world cleaner and healthier in the process. This isn’t just about feeding the plants folks, this is more like re-terraforming the planet. Okay, getting a bit lofty here, anyways, here’s what you’re looking for:

Well, that’s pretty much it. In a few weeks or months, you should have some nutrient rich and completely free compost. Better than anything you can buy off the shelf and you made it with stuff that most people throw away. Aren’t you the smart gardener! Oh, that reminds me. If you have trouble finding materials because you lack deciduous trees that provide leaves, or your just starting out and don’t have enough clippings, just drive around the neighborhood and grab those clear plastic bags from your neighbors. I like to call them Stupid People Bags. Because people will rake their leaves, bag them up and throw them away. Then, they’ll go to Home Depot and buy bags of compost to add to their beds. A fool and his money are easily parted right?
Here’s a little tidbit you may find interesting too; every year that a tree grows, its roots are reaching farther down into the dirt and pulling up new sources of nutrients that it couldn’t reach the year before. These nutrients flow up the tree into the leaves. When the leaves drop, they are loaded with new and exciting nutrients just waiting for you to compost. To throw those away is simply madness!
You stick with me, and I’ll make sure you never become one of those gardeners. Until the next tasty tidbit, remember to mind your dirt!
This is a great post! I worm compost in a compact, little bin on my balcony and *love* it! My dirty little secret is sometimes when the compost is ready in the bottom tray, I rub it all over my hands and forearms. It feels so good!
Thanks Julie! I also have a worm bin going strong in the yard. They usually get a diet of coffee grounds, egg shells and leavings from the juicer. Using worm poop as a topical cream is something I have yet to experience! However, I can tell by your diligence and embracing of the nutrient rich leavings that you are, without a doubt, my type of home gardener! Keep it up Julie! Do you also make worm tea? If you do, how much do you dilute it? I’ve been doing some experiments with mixed results.
Usually I don’t read post on blogs, but I would like
to say that this write-up very forced me to try and do so!
Your writing style has been amazed me. Thanks, very nice article.
I have a sneaking suspicion that this may be spam. If I am wrong, thank you very much. If I am right, shame on you for spamming. Especially with such grammar!
This is a super helpful article. Thanks for all the details. Now I know why my compost pile wasn’t turning into compost, and I’m going to turn it all over in the morning. Also been reading about you ur chicken coop adventures. Really inspiring. I think I’m about to buy some hens, but I need a good cheap coop- so reading about yours was great. Thanks for you ur candor, and all the info! Great reading, and I’m learning a lot!
Hi Rebecca! Thank you for your kind words and I’m so glad you’re getting something out of my articles!
I’ll wager that when you turn your pile, you may find that the core may already have some rich compost in it. Piles left unturned always look like they’re doing nothing at all on the outside. But even an untouched pile will have some activity going on. The turning is just a way to speed up the process. Speaking of which, I’ve been doing so much freelance museum work the last six months, my pile could use some attention! As well as Mind Your Dirt. I’ve not written for some time (since April!) and I long to get back to it. I’m almost finished with a project for the Timken museum here in SD. Building a mount for a 14th century triptych. No rest for the wicked it seems. But in the back of my mind, I’m always thinking about new projects and articles for MYD.
Also, yes to hens!! Once set up, it’s so much easier than it appears. Please let me know if you have any questions or need any help!