Almost a year ago to the day, I posted about my designs for a new and improved chicken run for my girls. One that would be the envy of all the world’s fowl. In case you missed it last April, here’s the link…
Well, a year later and I was still too swamped to make the time to finish this project. If I was being a responsible adult that is. I decided that a life focused on making ends meet isn’t enough and quickly developed a “fuck it” attitude and went and got myself some lumber and cement.
Something I should say before we even get started here is that this chicken run is by NO MEANS predator proof. Using chicken wire as a barrier is useless with raccoons, skunks and foxes as they can just tear through it like Kleenex if they’re hungry enough. Hardware cloth or steel fencing is what should be used in areas where there are predators about. Also, raccoons can open any latch that man has ever created. Little cute fluffy genius trash pandas.
I live about six miles from downtown San Diego, and even though there are skunks, possum, and raccoons in my area, they do not make it into my yard often due to all the dogs in the neighborhood. It’s a gauntlet of sharp teeth and butt-lickers before they can reach my hens so I’ve taken a much more lax approach to my chicken coop design. And over the last five years, I haven’t lost a single hen to predation *knocks on wood*.
So, that being said, here’s how to make a very overly-fancified chicken run that is a mix between the Colosseum and a circus tent.
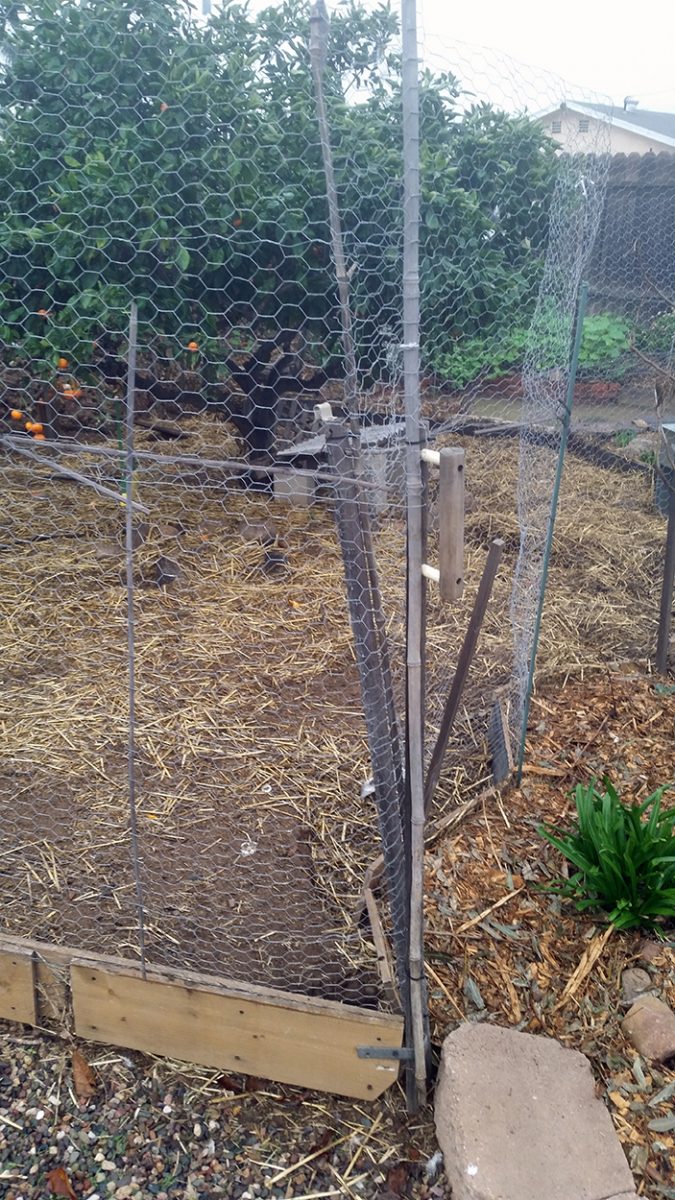
I’ve mentioned before that my initial chicken run was slapped together in a fury and with little thought towards longevity. I wasn’t exactly sure what my needs were at the time, or the needs of my hens. Was it too much room or not enough? Was I wasting precious real estate in the yard? So I decided a simple fence wouldn’t be too terrible in the short run while I observe the hens and see how it vibes with the yard as a whole.
Just to give you an idea of the set up I have, here’s a little video to illustrate the design using the finest of modern drone technologies. Note the difference between the newer front of the run and the floppy backside. Also, if you want to learn more about the coop design, go here. I’ll wait.
I’m loving this drone footage! A very very old friend of mine was visiting recently and he brought his drone with him. Spent hours zipping all over my neighborhood and took some amazing footage. I’ll be using that for posts coming up when appropriate. Cheers Mike!
Back to the chickens. After a short while, I was able to determine what worked in the run and what didn’t work. So I began to design a modified run in my head. Which was just in time as the old one was quite literally falling apart.
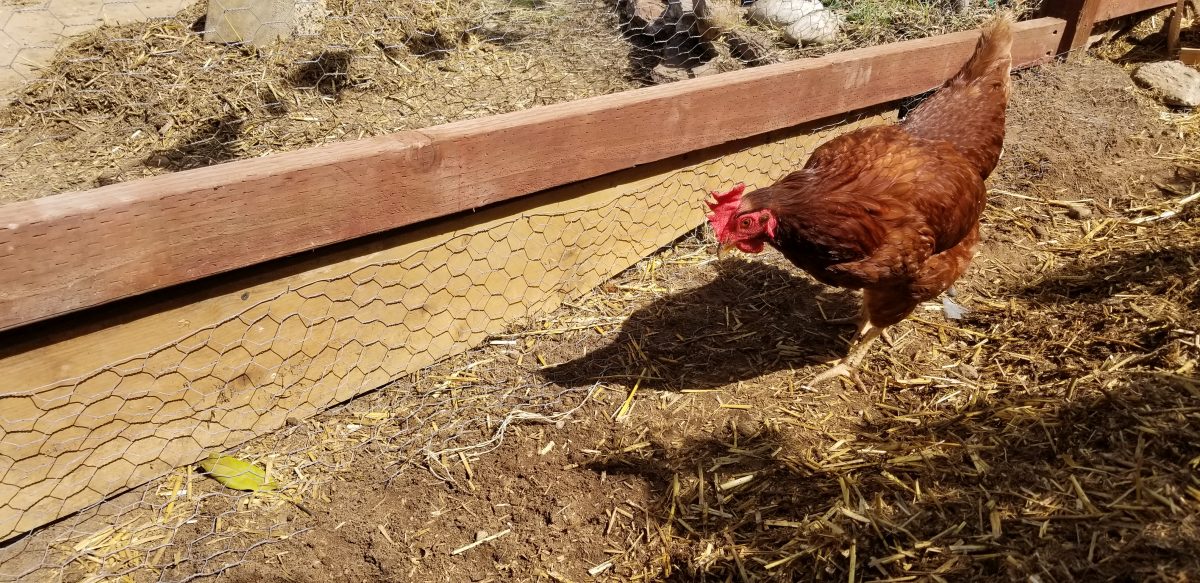
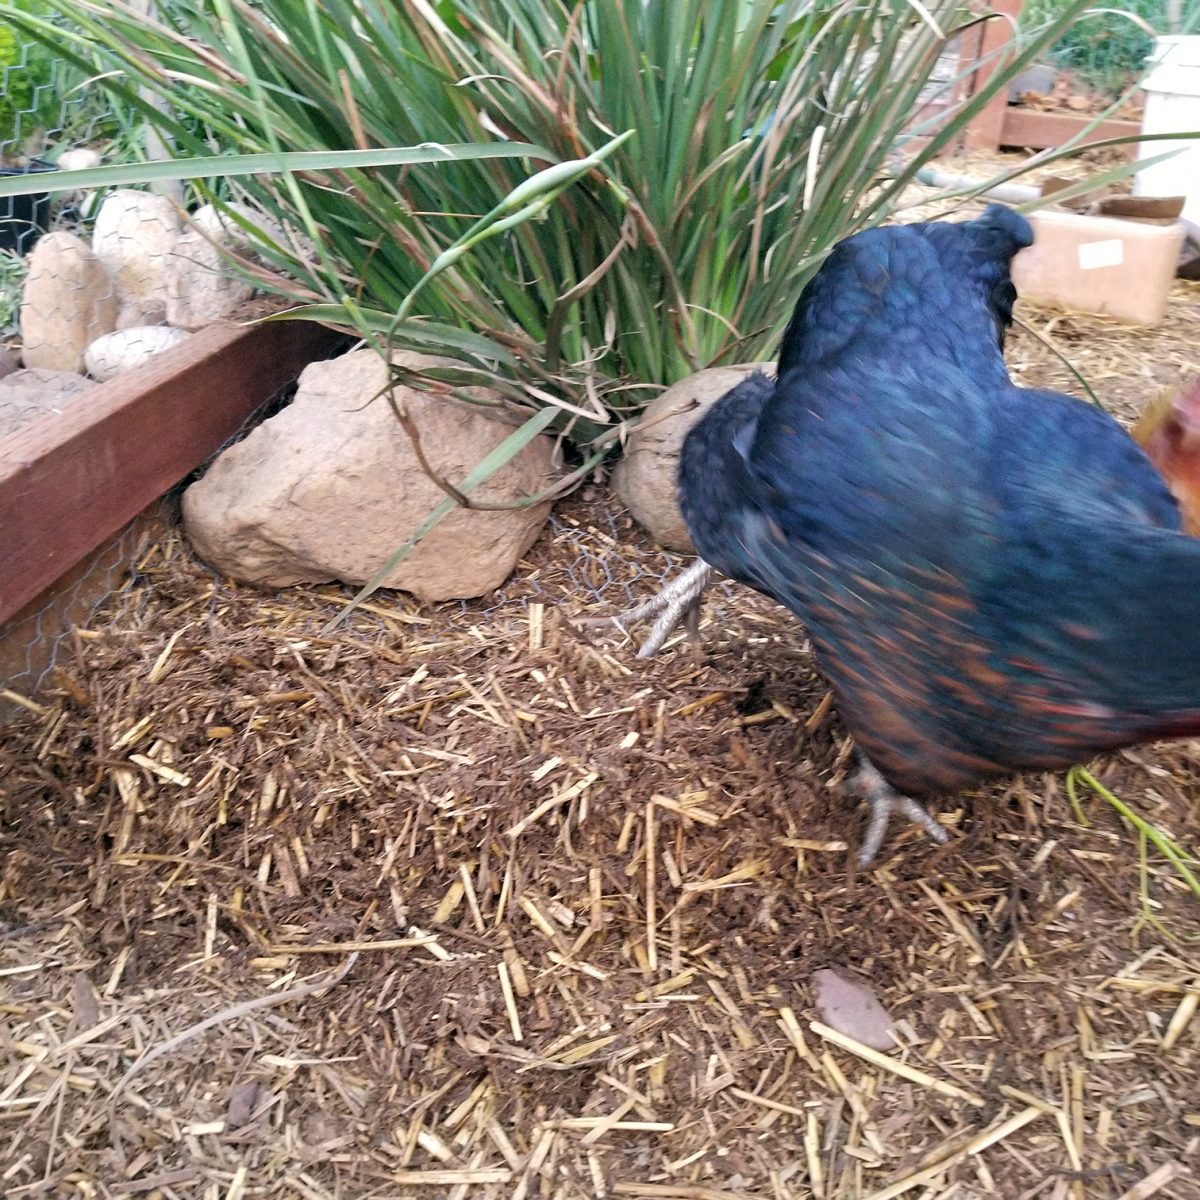
Having a pig in the run really helped quicken the destruction and test the overall resolve of the paltry fencing. Beyond that there were a few major issues I had with the initial design. Most importantly was the gentle slope’s effect on the placement of straw, my most used substrate for the ground cover.
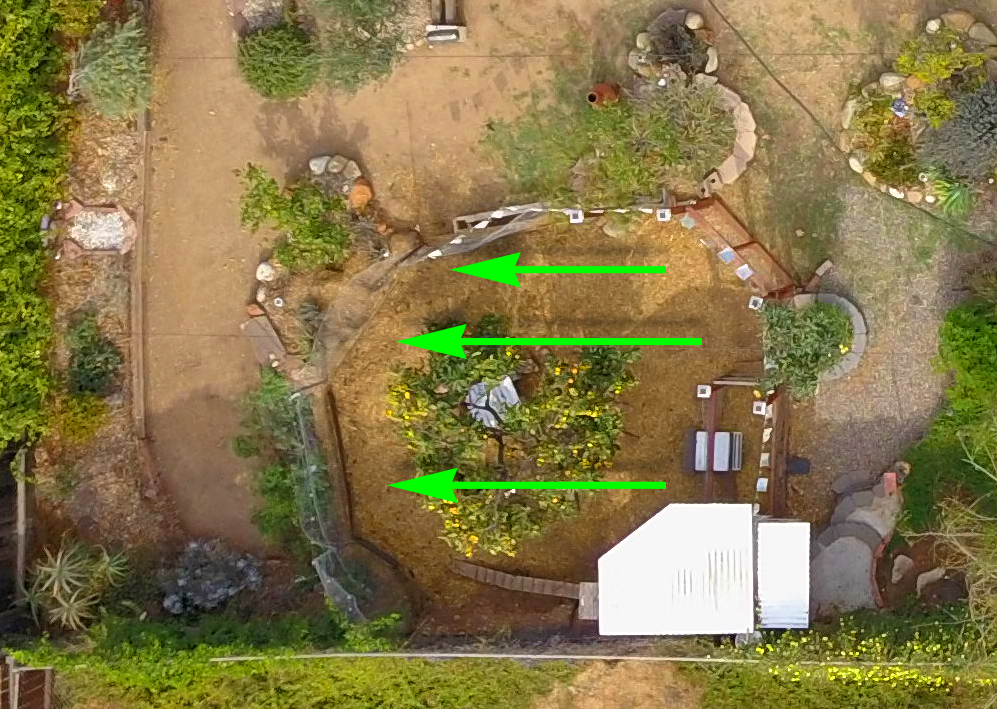
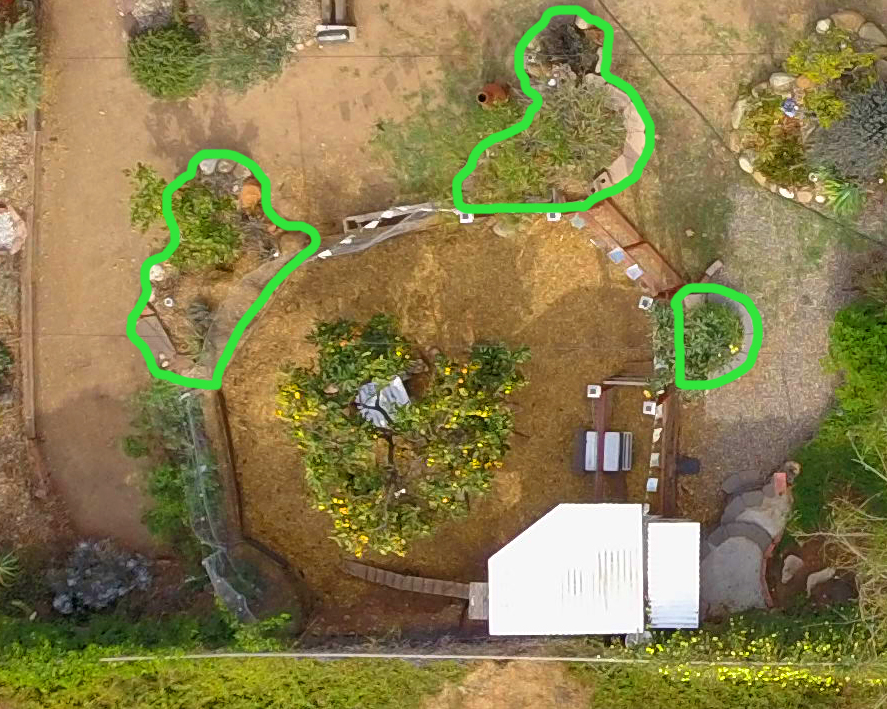
I would deposit the straw near the entrance and within a day or two, the hens would scratch and toss it about in search of tasty niblets or out of boredom. All of the straw would make its way downhill and get a good 12″-16″ thick towards the back and overflow into my beds and path. Let’s go to the magic and expensive satellite cam to see the toils of this weary warrior shall we? Note little Piper bouncing around the yard like a fluffy pinball in this overly dramatic and far too long four minute video.
Riveting stuff.
Shit Rolls Downhill:
Gravity and chicken feet forcing all the straw to the back of the run.
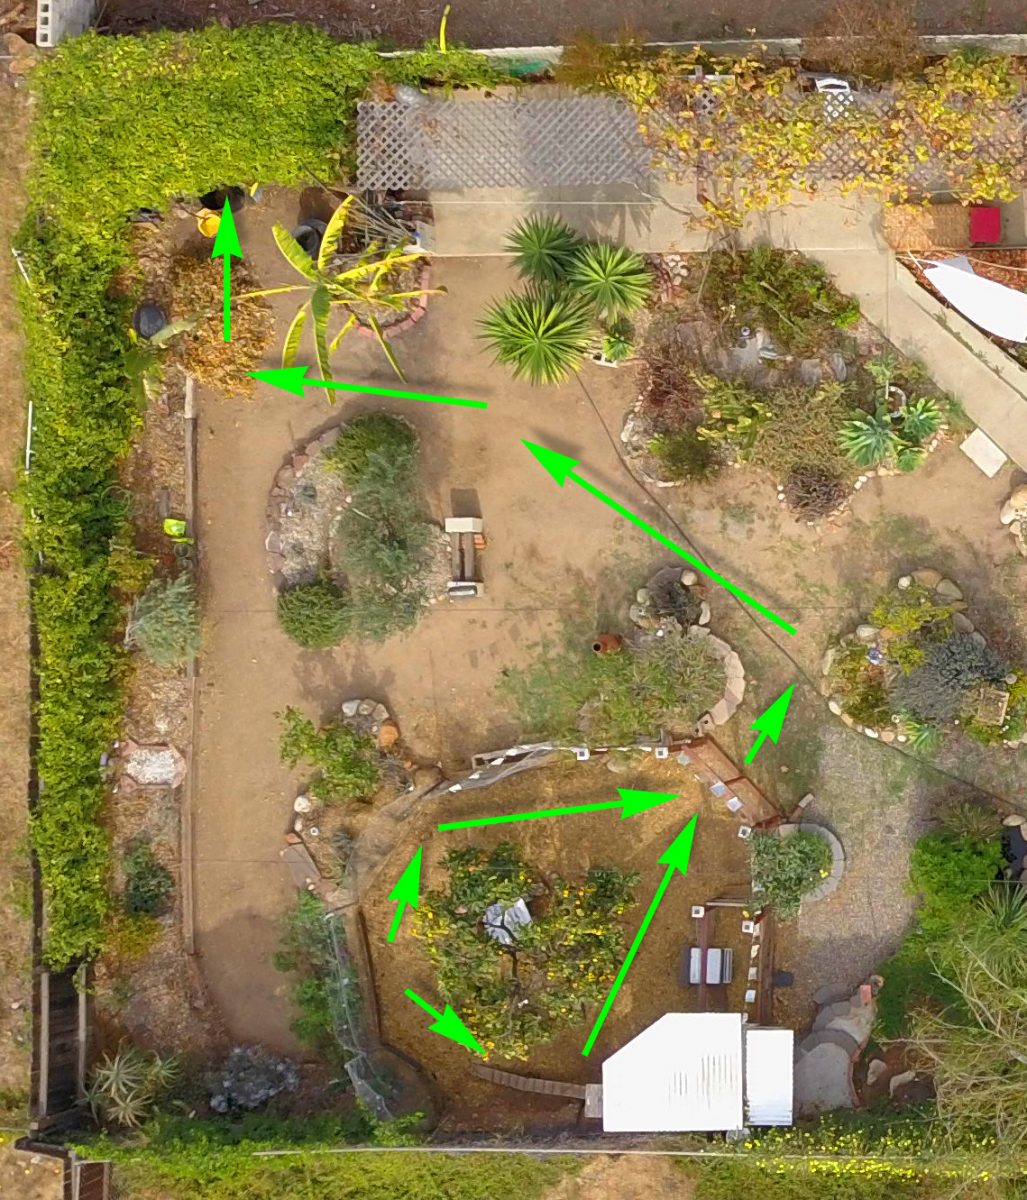
This particularly sucked because I like to use the spent straw as my primary source for carbon in my compost bins. In order to retrieve it, I would have to rake it all the way back uphill to the main gate and then lug it to my bins on the other side of the yard.
A long and tiring journey for composting.
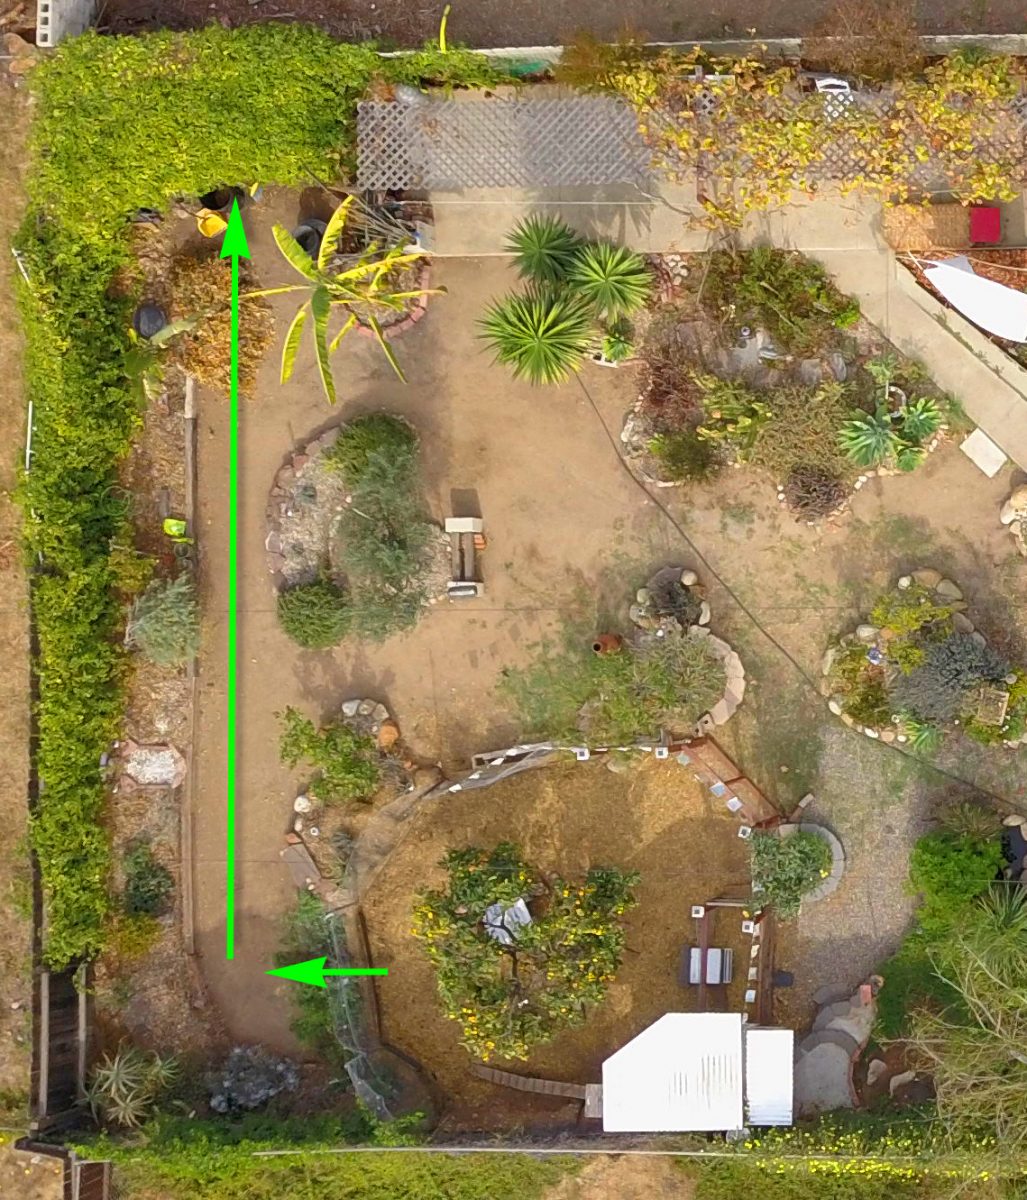
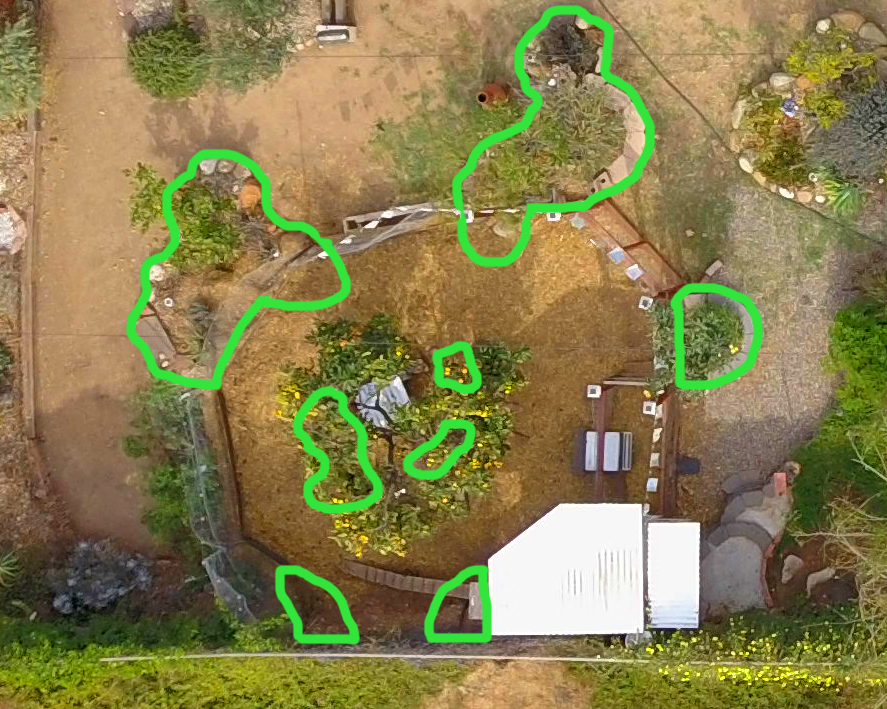
So my new design needed to fix this problem as my back and buckets of sweat needed a respite from foolish toil. The solution is crystal clear when you look at these overhead shots (taken from my personal satellite that follows my every move…at great expense). I needed to create another gateway at the back of the run to retrieve the spent straw. And one that lines up perfectly with the path to my compost bays.
It’s so simple.
The beauty of this is that all the work will be done by my hens. As Darwin discussed, the success of a species is all based on its ability to adapt to its environment. It’s not actually “survival of the fittest” by the way, more like “survival of those most adaptable”. Just a little nitpick of mine.
I also wanted this new exit bay to function as a place to compost the chicken poop for fertilizer. The levels of nitrogen in fresh chicken shit are so high that they will burn the roots of many plants in the garden so it needs to be composted before adding to the soil. In addition to this, I wanted to raise up the bottom barrier in the back of the run to try to mitigate all the straw that was being pushed out into my back beds and pathways. In the beds, it was choking out my smaller plants. In the pathways, it was always a chore to clean up the mess.
Messing with my Feng Shui:
The second major problem for me was one of aesthetics. The run itself was mostly devoid of any foliage. Except for the well established Satsuma tangerine tree, there was nothing but straw and poop and dirt in there. The separation between the beds in my garden and the run was too stark and easily defined.
The beds were in place before the run was built so I had to work around them for the layout. But how do you add plants into a chicken run without the hens tearing them to shreds? I began researching plants that are both safe for chickens as well as bad tasting so they’ll leave them alone. I’ll write about my findings in another post as I think it merits it.
For now, I’m experimenting with different species with mixed results. Important take away is don’t trust everything you see on the internet! Except here on Mind Your Dirt of course. I do my research y’all!
I’d like to incorporate the existing shapes of the surrounding beds into the run itself just to break up the contrast a little so it looks more harmonious. I also want the girls to have nice little exploration areas and have places where bugs and critters can make their way into the run so the hens have more food sources to hunt in between the foliage.
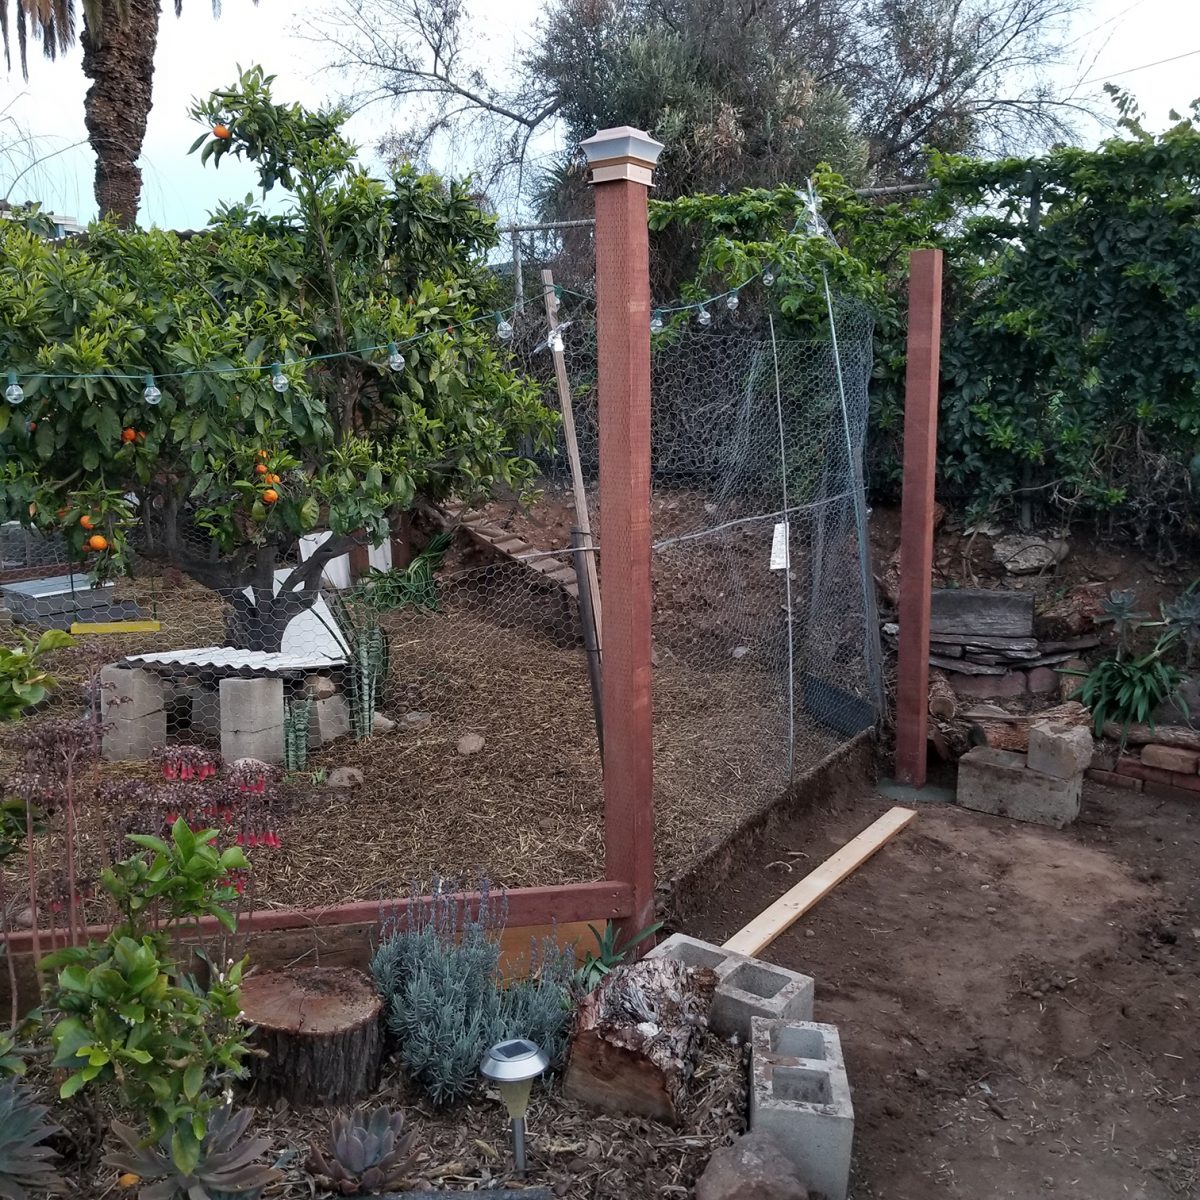
So those are the challenges that needed to be fixed for this new design that has been slowly forming over the past two years. Phase Alpha took care of the shitty gate as well as a separate pen for Piper, Phase Beta needed to address the above. The first order of business (apart from finding a good friend with a truck) was to start digging the posts.
The Dirty Deed:
Violet and Piper were on hand and generously volunteered their services for bug removal and digging. Clever girls.
Using ancient Egyptian techniques (not true at all) I mapped out all the post locations. My old run wasn’t square and true, so I wanted to fix that as well so the next bit of drone footage won’t be so mathematically embarrassing. I kept it at 45° and 90°. The upcoming canopy will be at a 22.5° angle for harmony.
Shout out to Paul B. for his seemingly endless loan of the post hole digger. So sorry Paul!!
I added a little chicken wire along the raised up base to keep the girls from scratching too deeply along the perimeter of the run as well. Bernie inspects to work.
“I hesitantly approve while retaining my skepticism.”
PoopGate 2018:
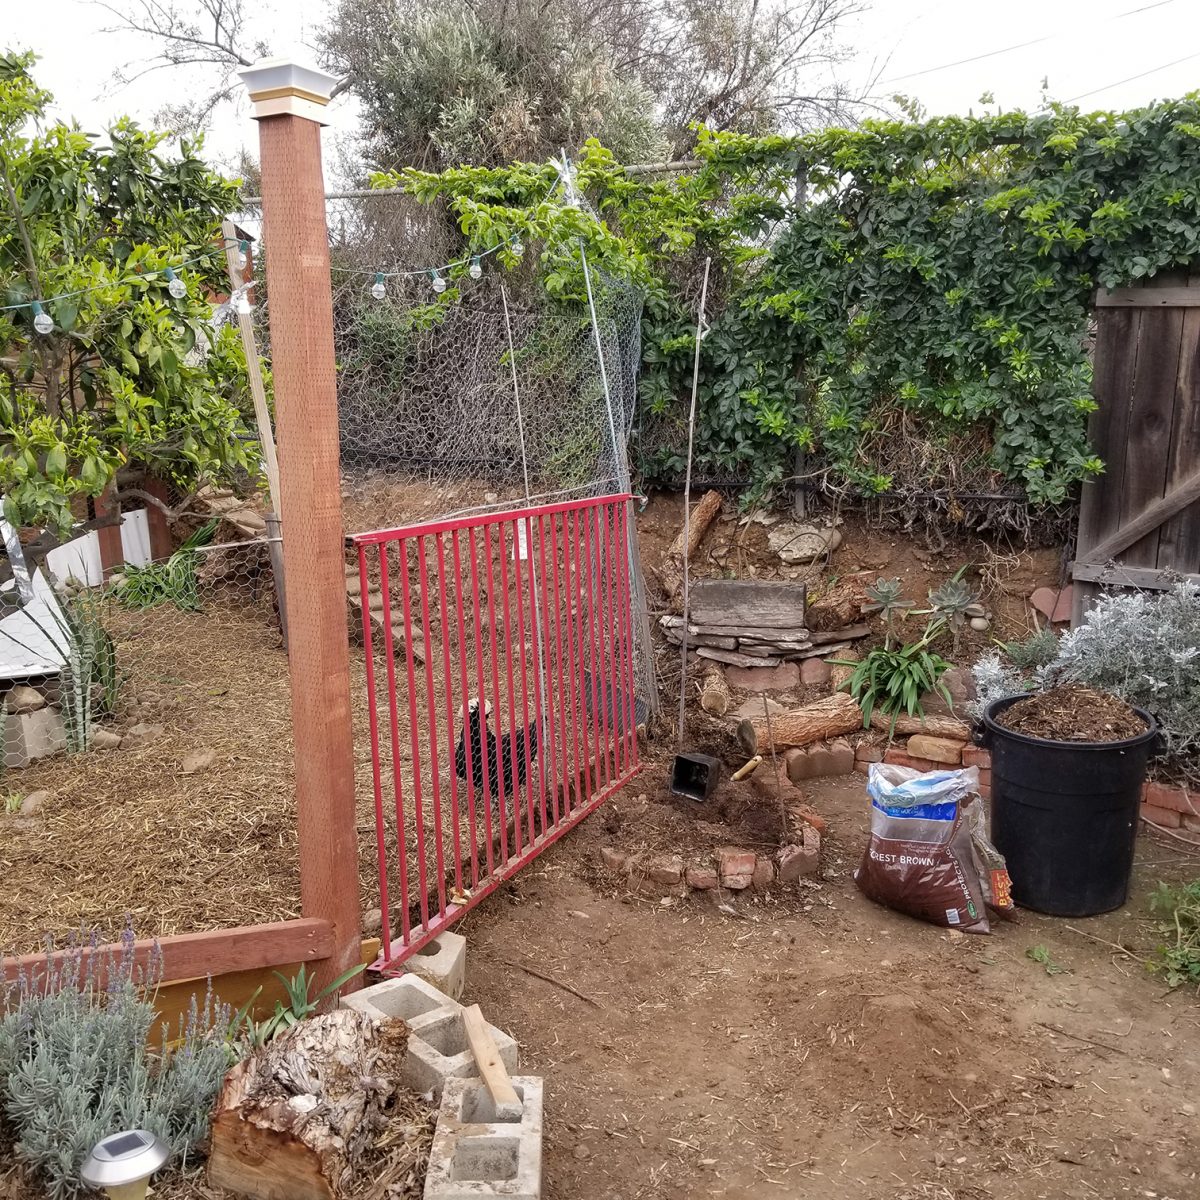
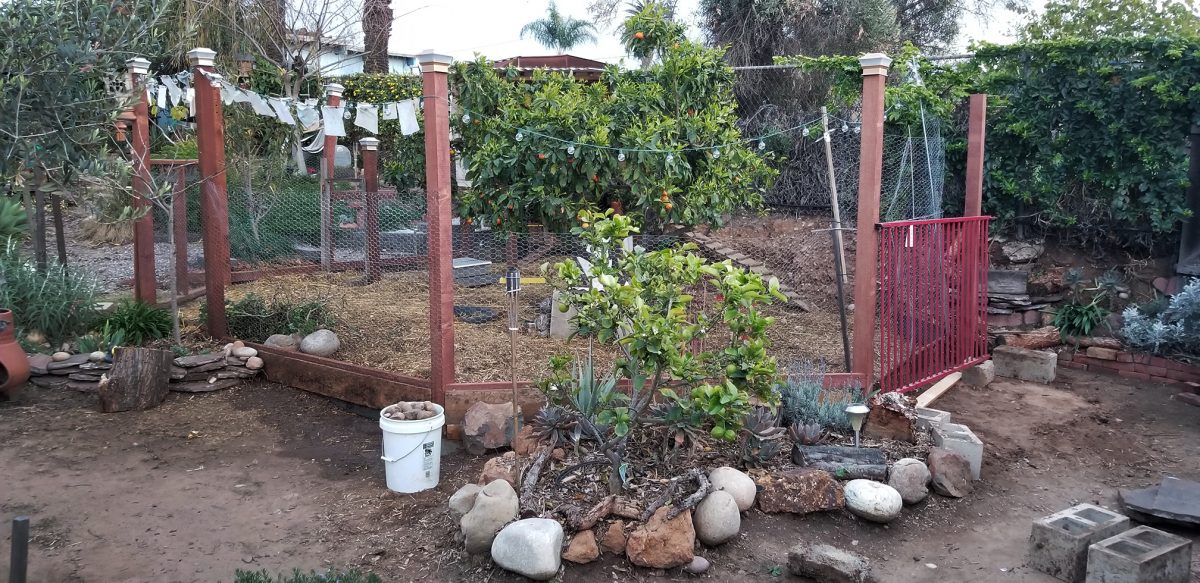
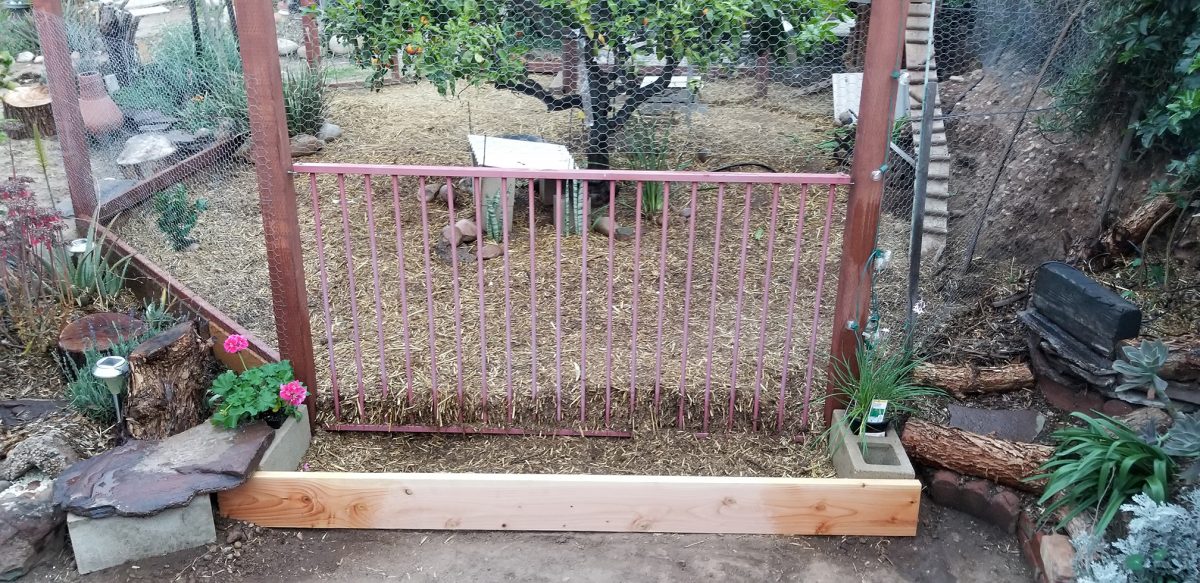
I then came to the back nine where I had to work out my exit gate issue. I didn’t really want to build a whole hinged affair as I wouldn’t be accessing it too often and didn’t want to buy more lumber and hardware to make another gate.
My solution came in the form of a sweet alley find. A seemingly brand new powder-coated steel bed frame that was just the perfect dimensions for the task. Height and width were spot on, but more importantly, all the hens could squeeze there little heads and necks out easily. Not their bodies though, which is simply perfect for my plans.
One mans trash…
A perfect solution and it didn’t cost a dime! I could simply hang it between two posts with four “L” screws for a quick and easy removal. All that was needed was the removal of that silly little bed that served as a sad lesson about how blueberry bushes prefer acidic soil. Spoiler Alert: San Diego has very alkaline soil. I was adding coffee grounds and peat constantly to keep those suckers alive. It was working for a while until a random tomato plant began growing and took over the whole area.
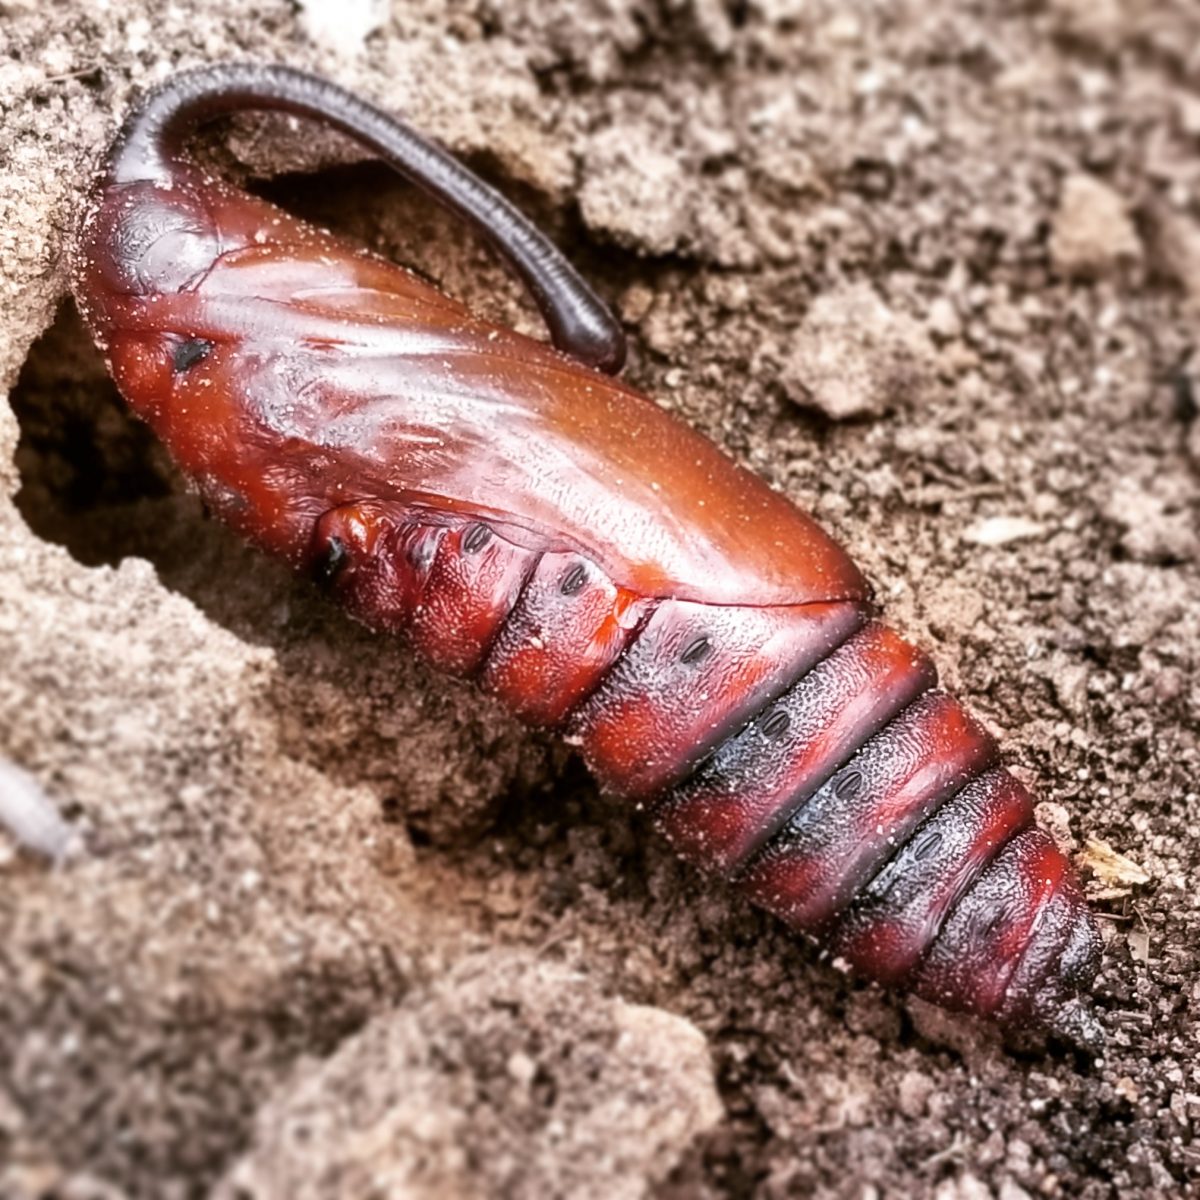
Speaking of which, I found a freakishly large chrysalis buried down a few inches.
Wiggly butt mystery in the dirt!
“Whattheshittingfuck!?!” was my battle cry when this thing began wiggling around menacingly. And when I pulled it out of the ground?
Gah! Freakish alien peanut!
As it turns out, its the chrysalis of a tomato horn worm (brought on by my invader tomato plant) as it turns into a five-spotted hawk moth. This thing was about two inches long, easily. Although I may regret this, I decided to bury her in a safer zone to finish her transformation. Who am I to judge?
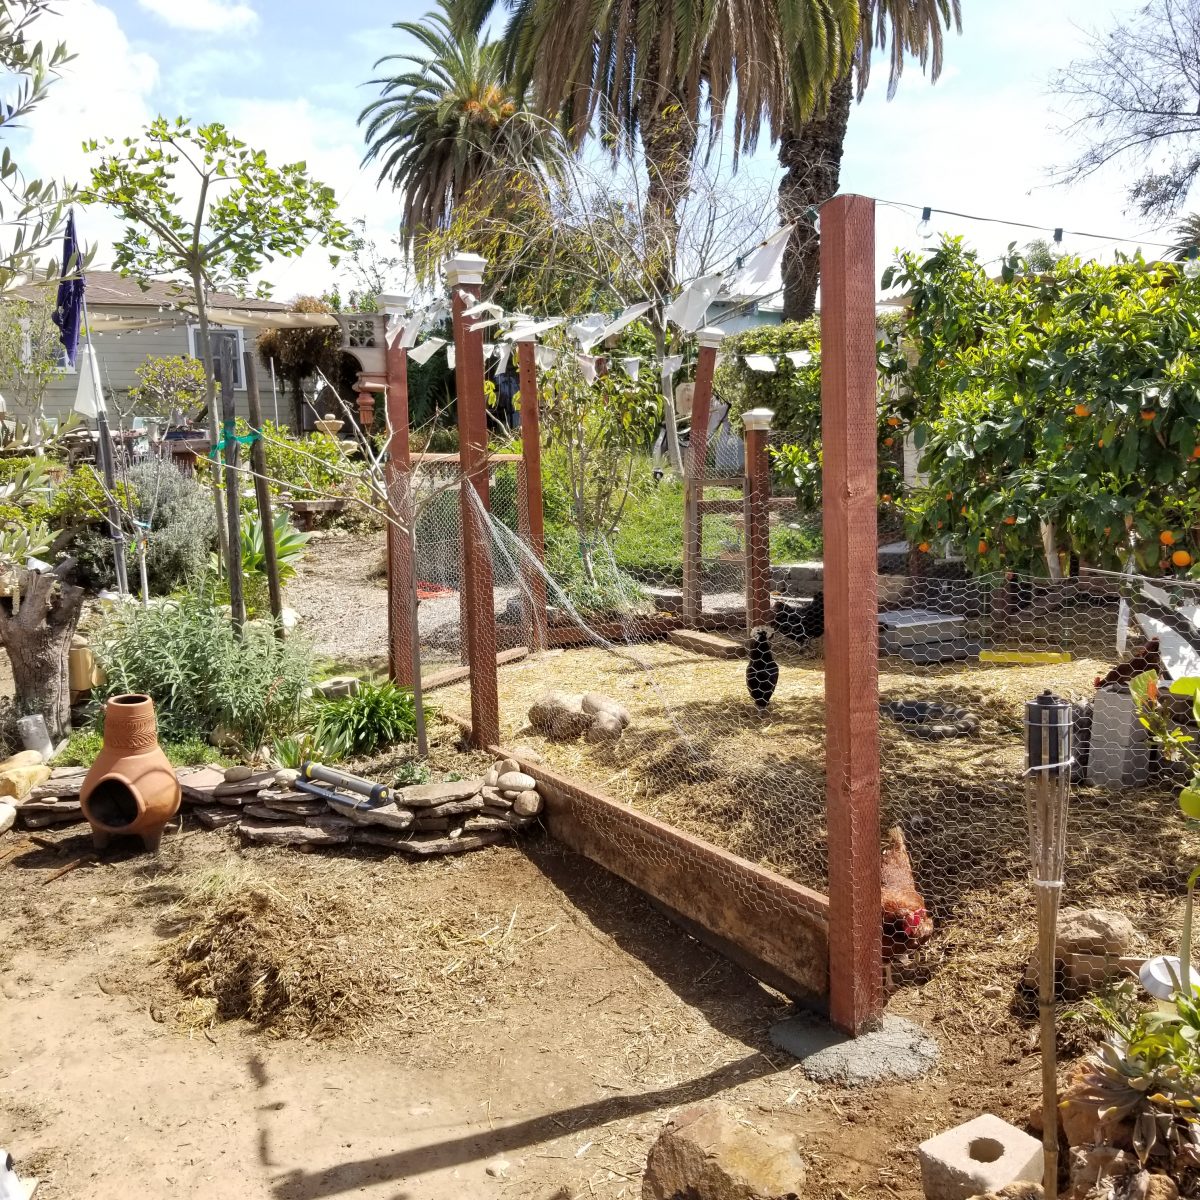
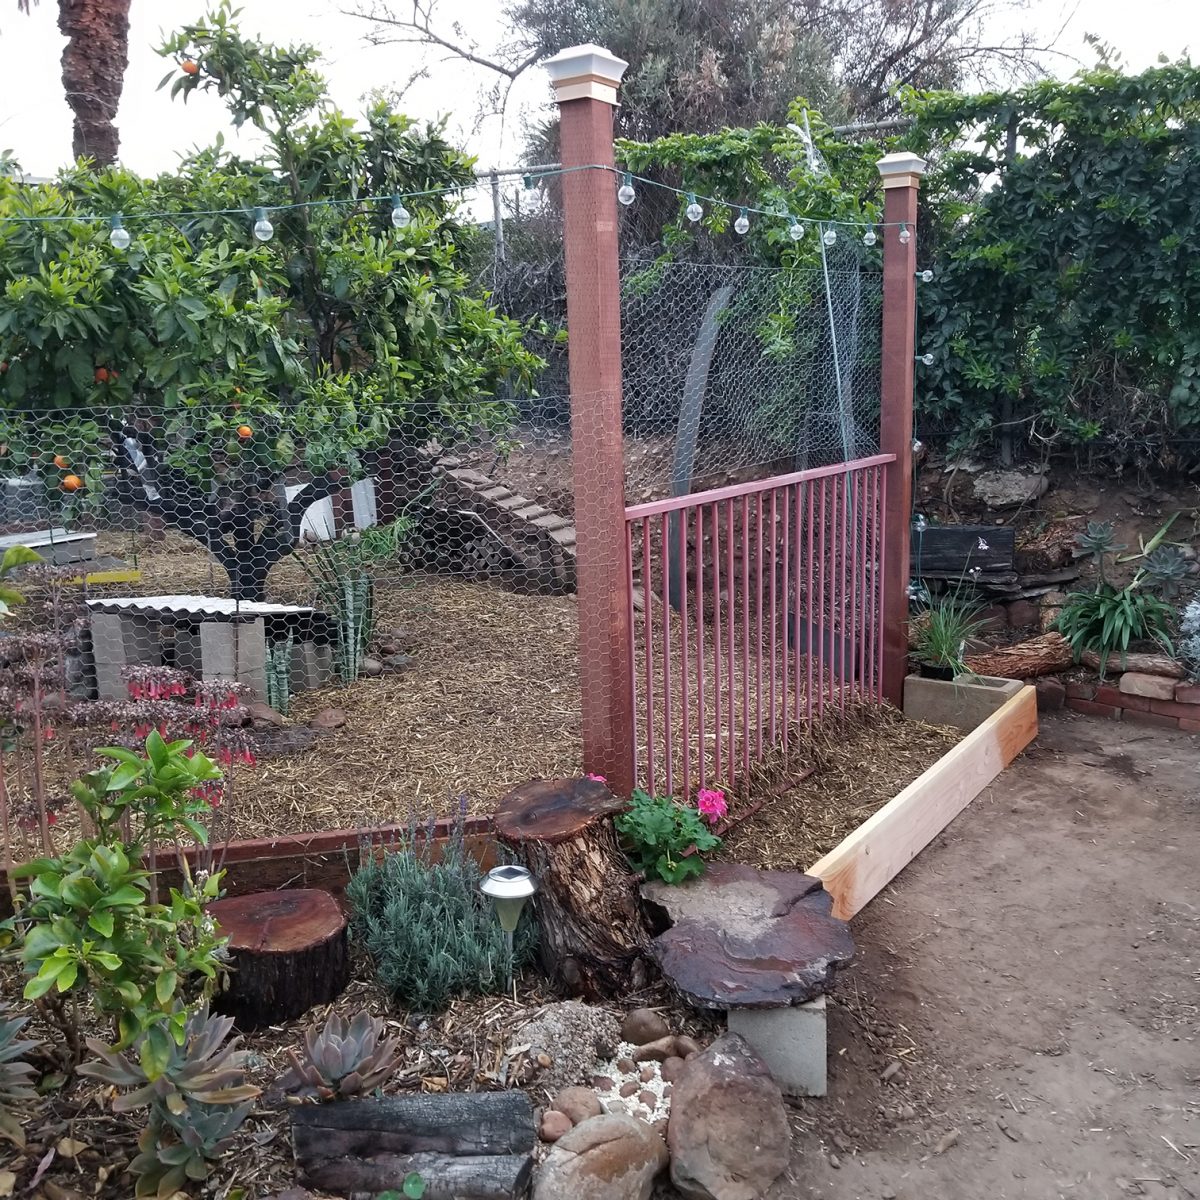
Buh-bye silly little bed. The last post!
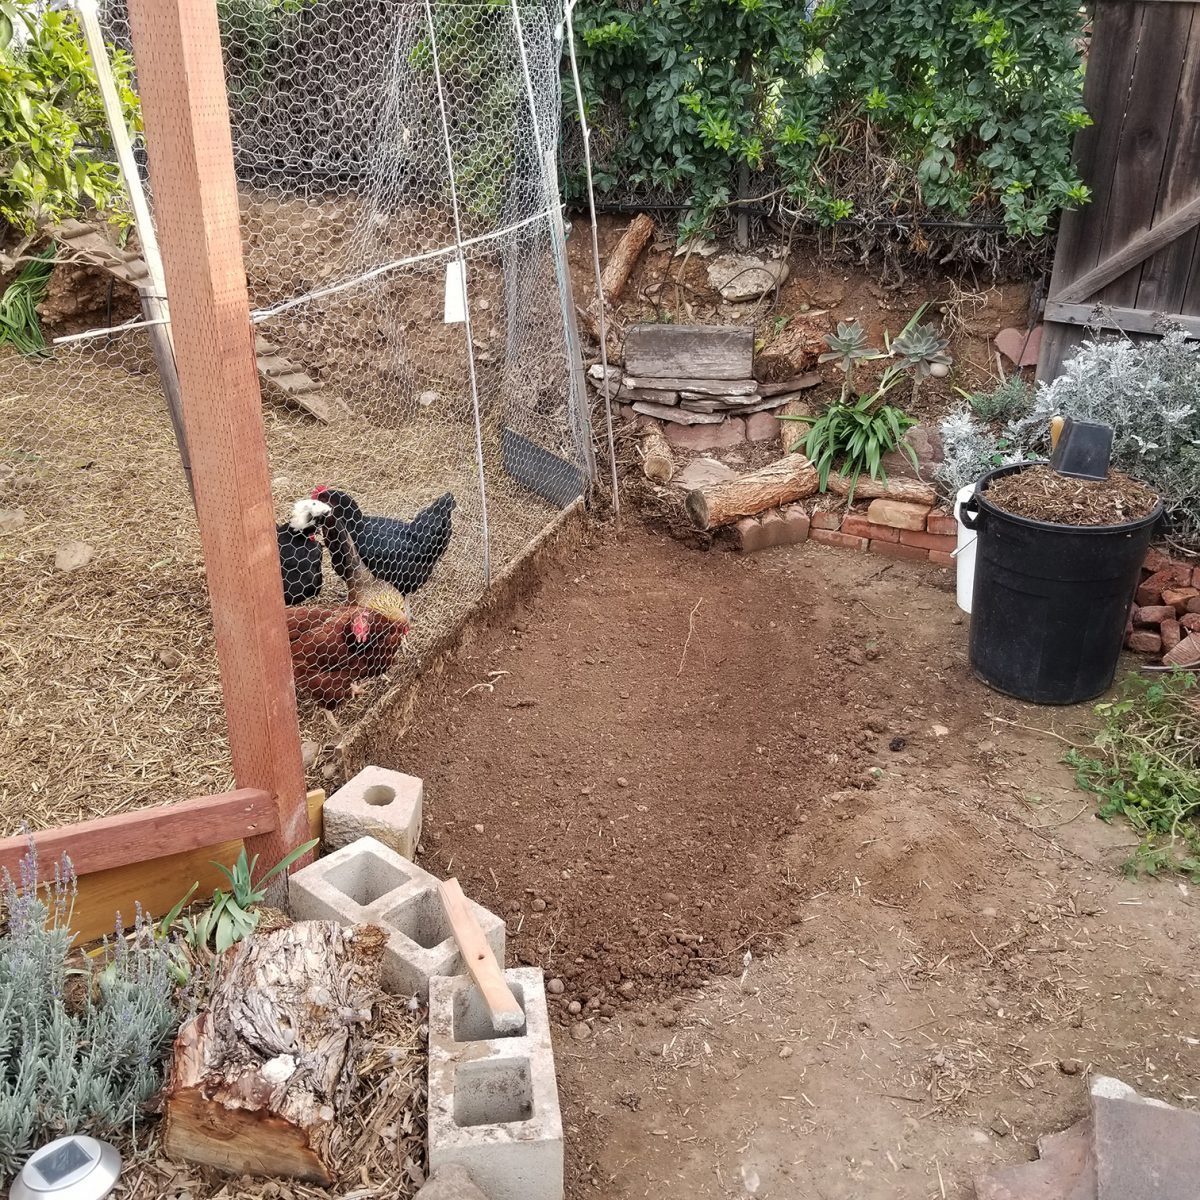
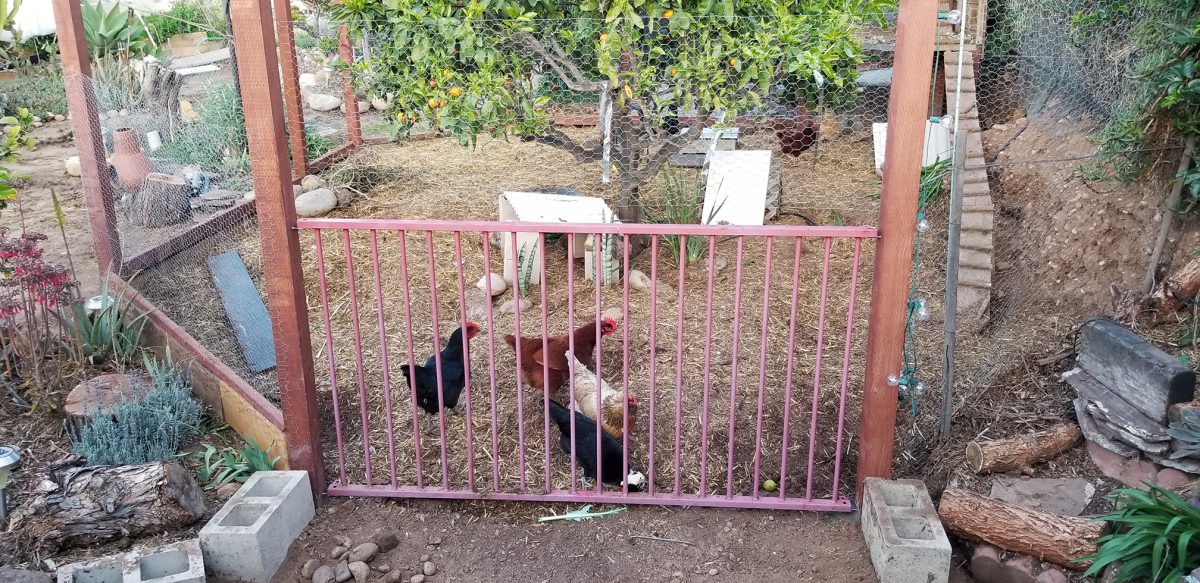
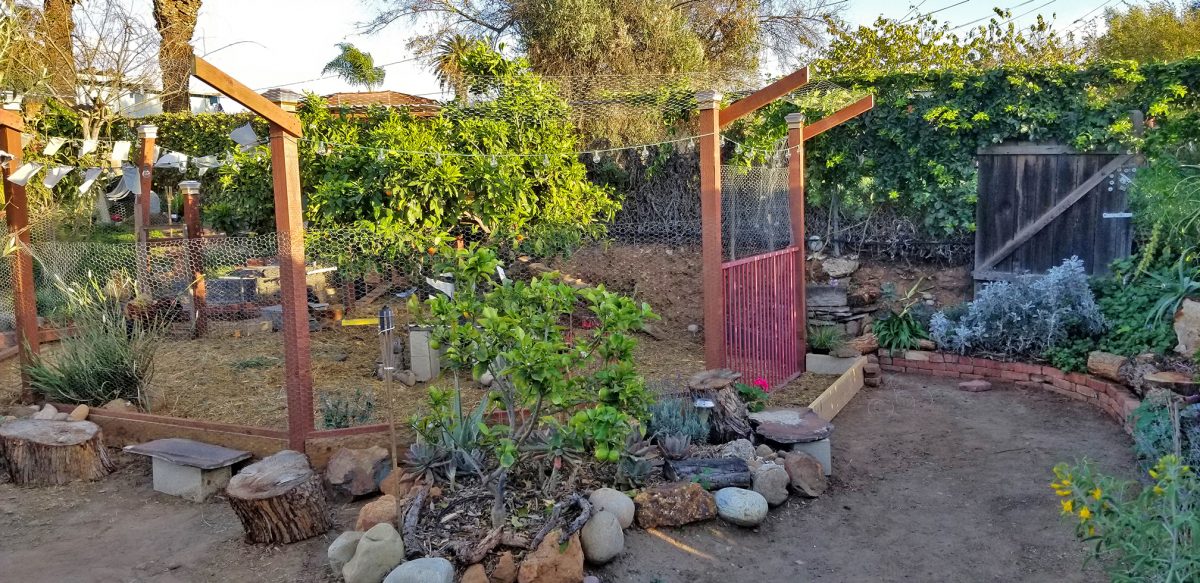
And with that, the framework of the run was completed. Now it was time to begin removing the old eyesore fencing and do some chicken behavioral testing. The first test is how he chickens behave with the back gate. I.E., can they escape or can they reach potential food scraps in the soon to arrive composting bay.
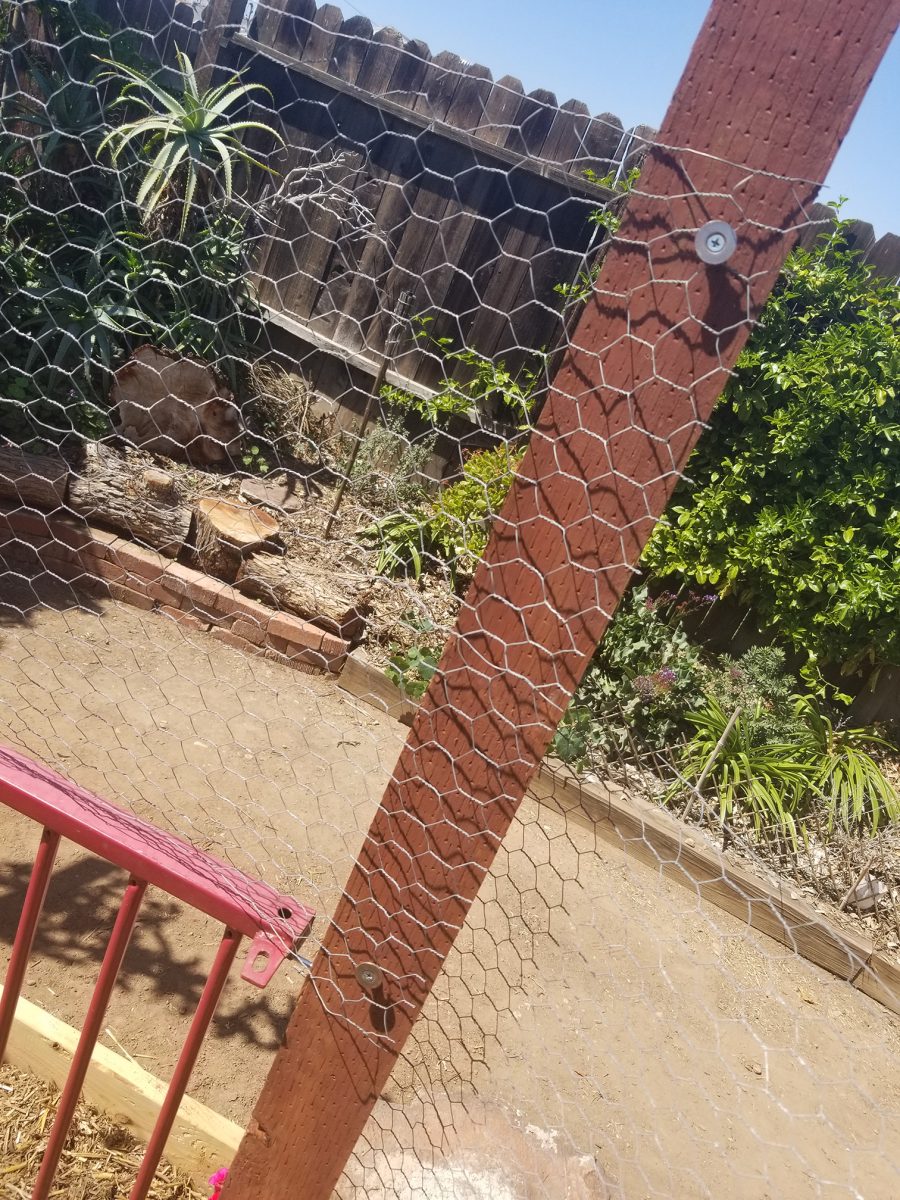
Test successful!! It was now time to install the gate and add an easy to remove section of chicken wire to keep the hens from perching on top of the gate and escaping to damage my garden.
Detail of the “quick-remove” chicken wire
The sweet thing about this composting bay is it can be extended if needed for larger volumes of compost just by adding a couple more cinder blocks and extending it outward. The board can easily be removed along with the chicken wire and gate for easy access with a wheel barrow. I’m so happy with this upgrade and yet kicking myself for not thinking about it from the start. Always learning in this animal husbandry and landscaping game.
Beds of Steel:
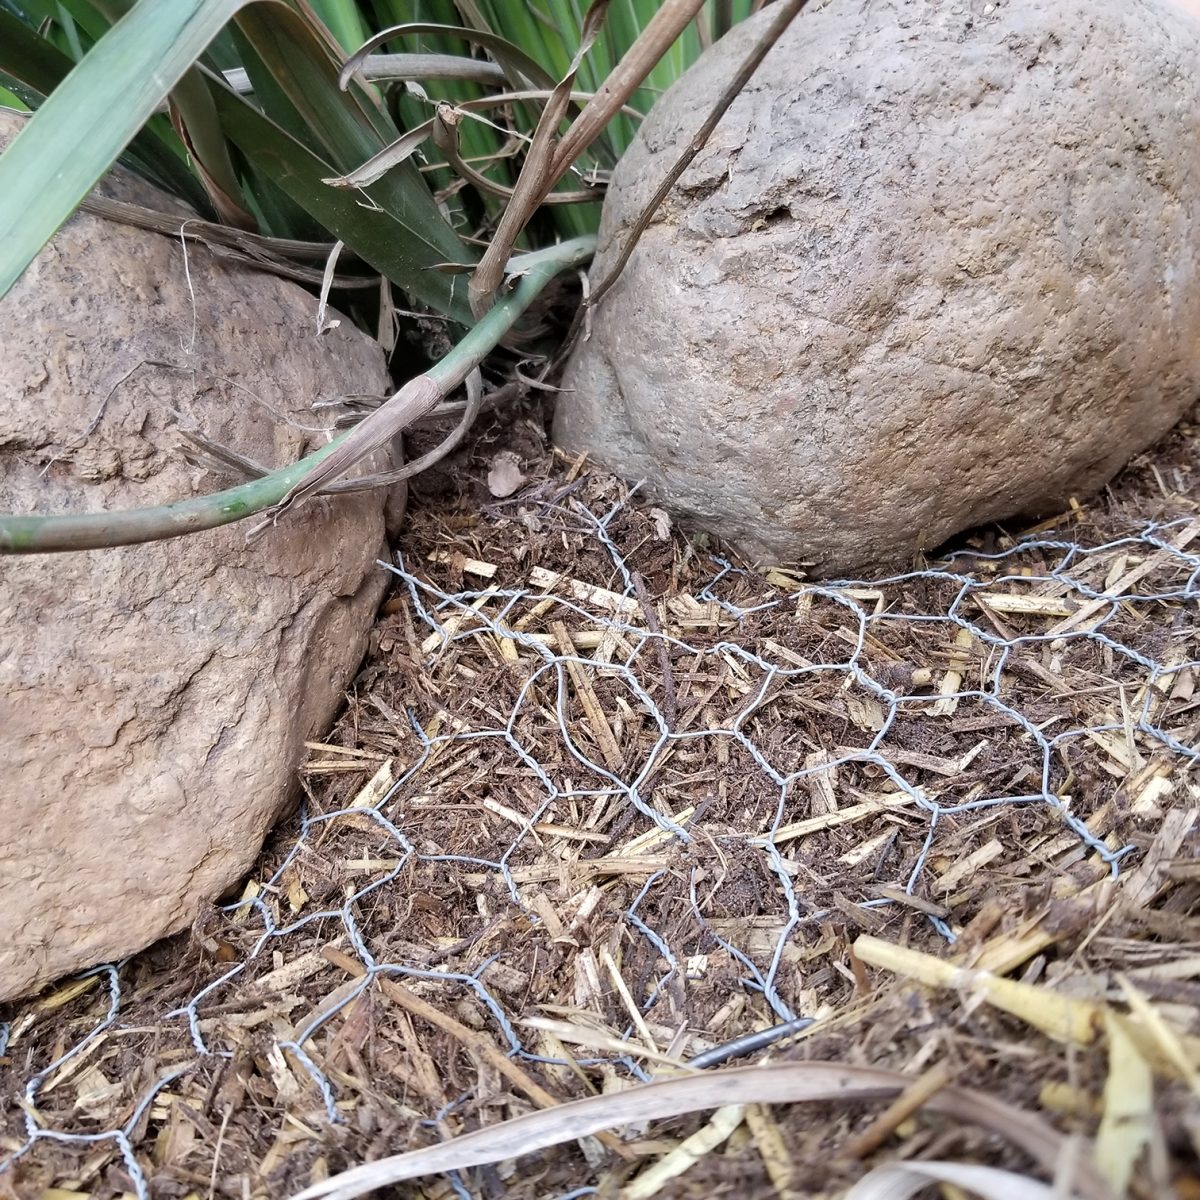
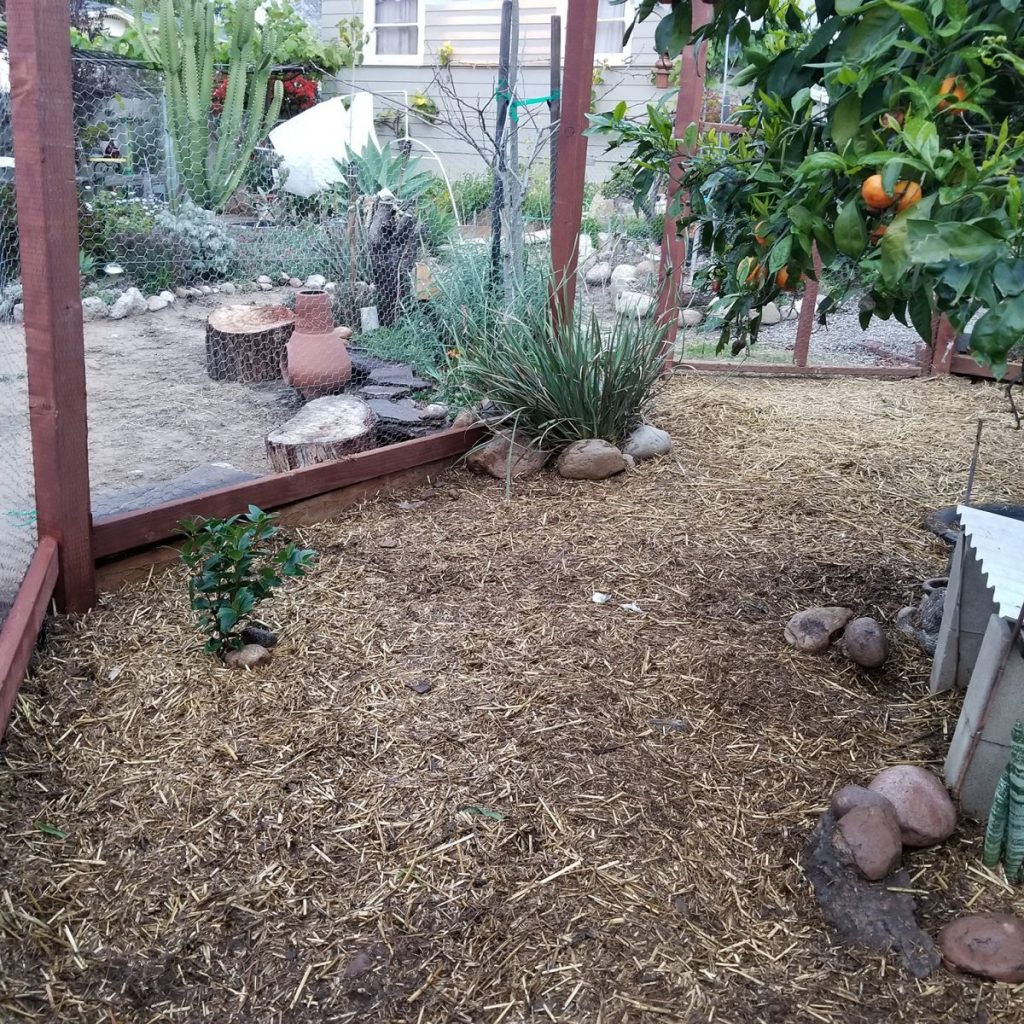
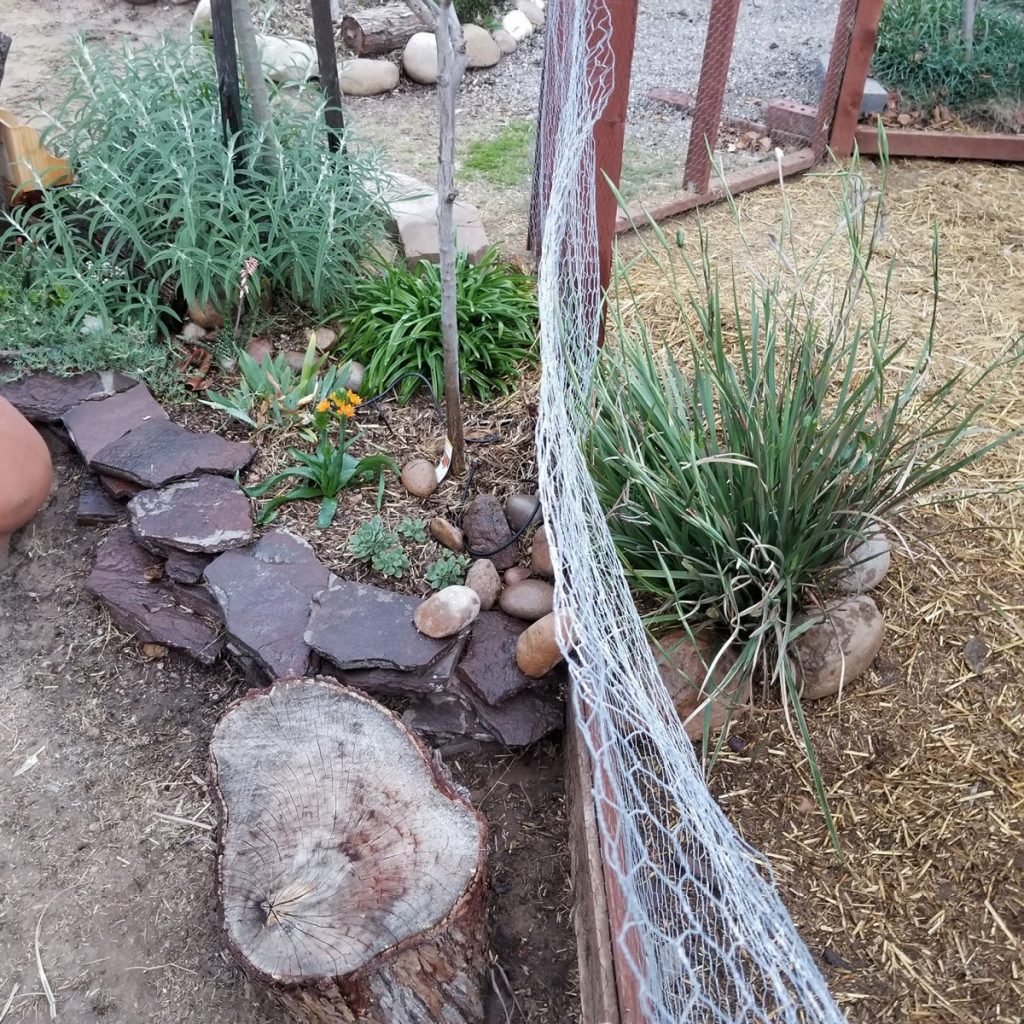
So that solved problem number one. Next was the aesthetics and chicken enrichment issue. I started by extending the beds into the run and planting items underneath the Satsuma tangerine tree. In order to keep the newly planted shrubs and flowers, I needed to add some more chicken wire underneath and stake it down well. This will serve to protect the plants until they are well-established.
This Iris is protected all around with staked chicken wire.
Hen Solo decides to inspect the strength of this protective barrier…
And soon discovers its raw power and flees in terror…
“Cheese it bitches!! He’s thought of everything!!” -Hen Solo
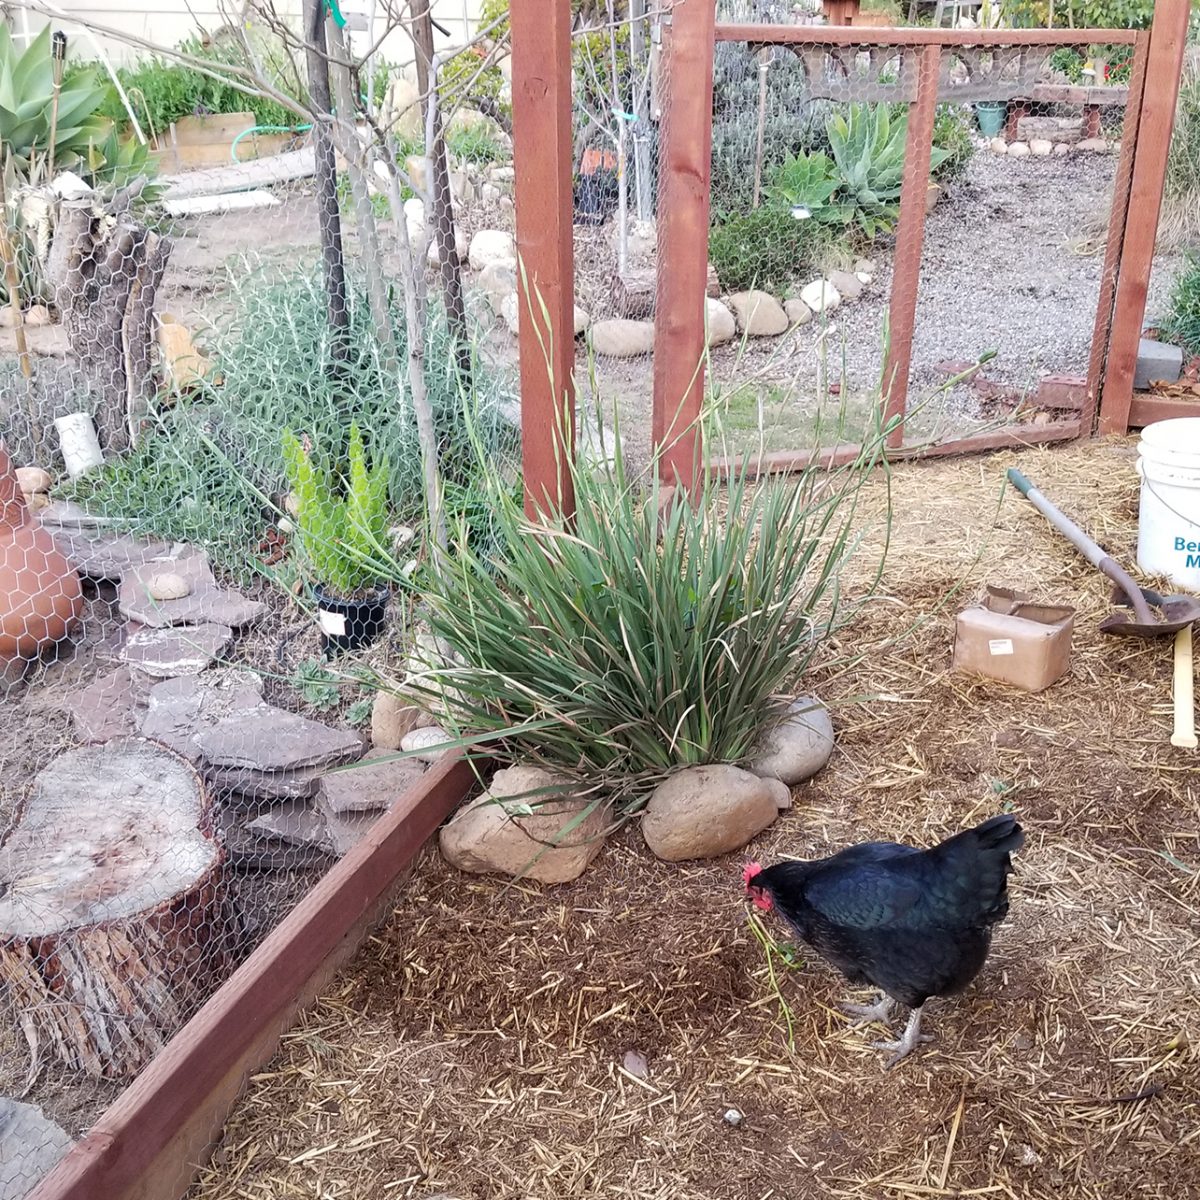
I learned pretty quickly what plants worked and what didn’t. Geranium was a definite no-go. As was society garlic. Camellia I’m still on the fence about. They attacked it at first but then left it alone. sort of. So far, the snake plant and the iris have been totally unmolested.
a failed geranium
snake plant and iris
A failed society garlic
Camellia bush and iris
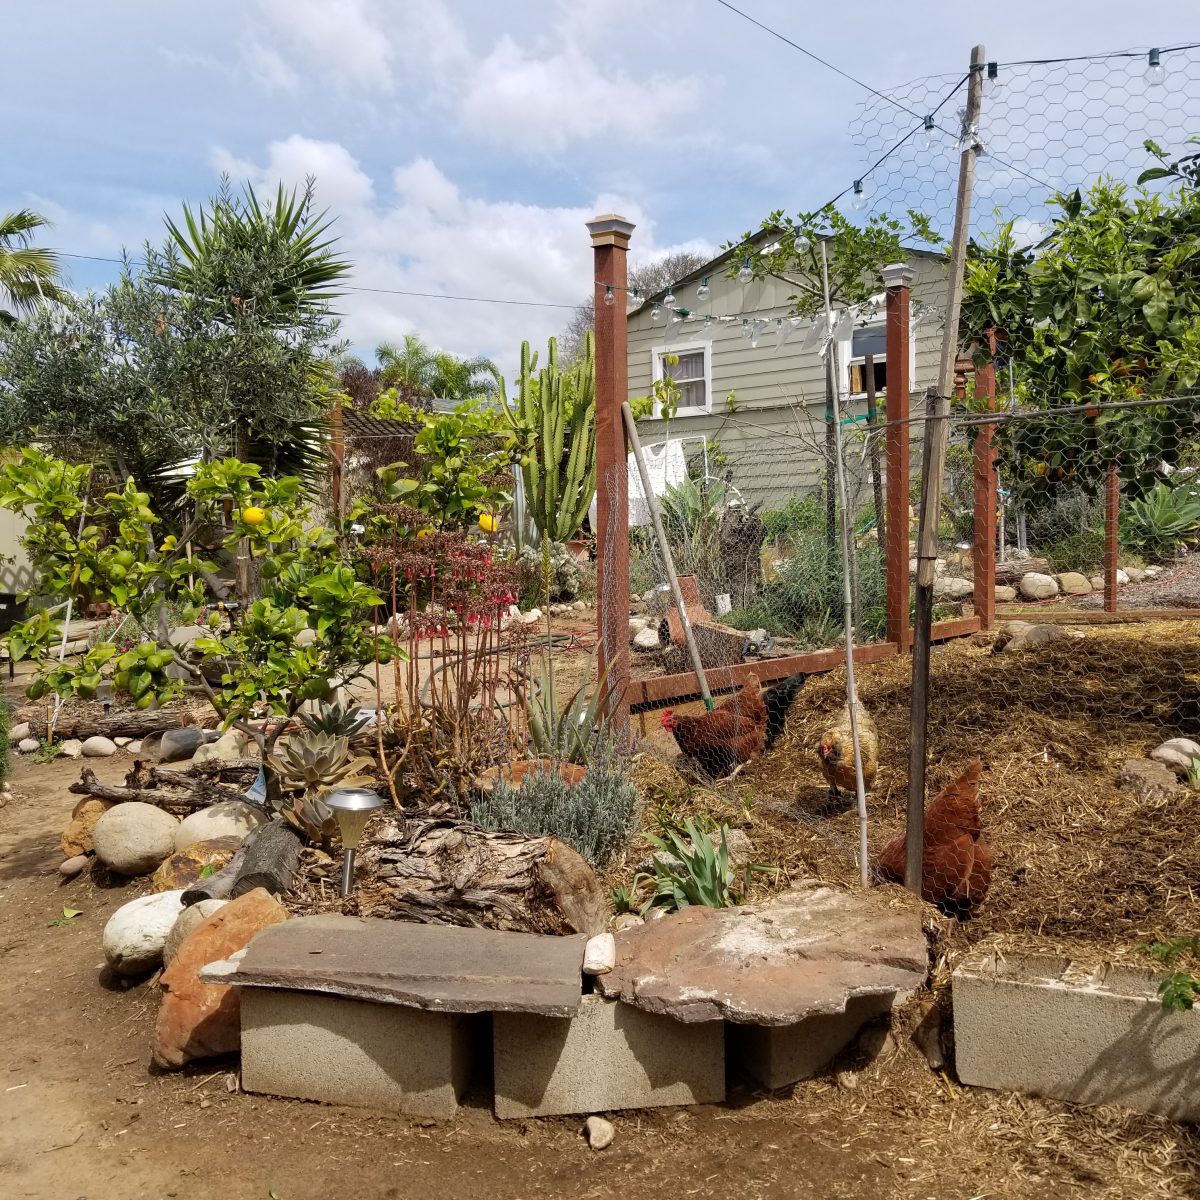
New seating area for chicken observations
Little critter den
Blending the beds into the run
Camellia bush under attack
As I said, I’ll post a more thorough account on plantings as I acquire more data. I will say that I can already see the difference in their behavior. They pull some snails out in the early mornings and play and hide around the iris’ a lot. I’ll be adding a lot more to help fill it out as my experiments continue.
Let the Games Begin:
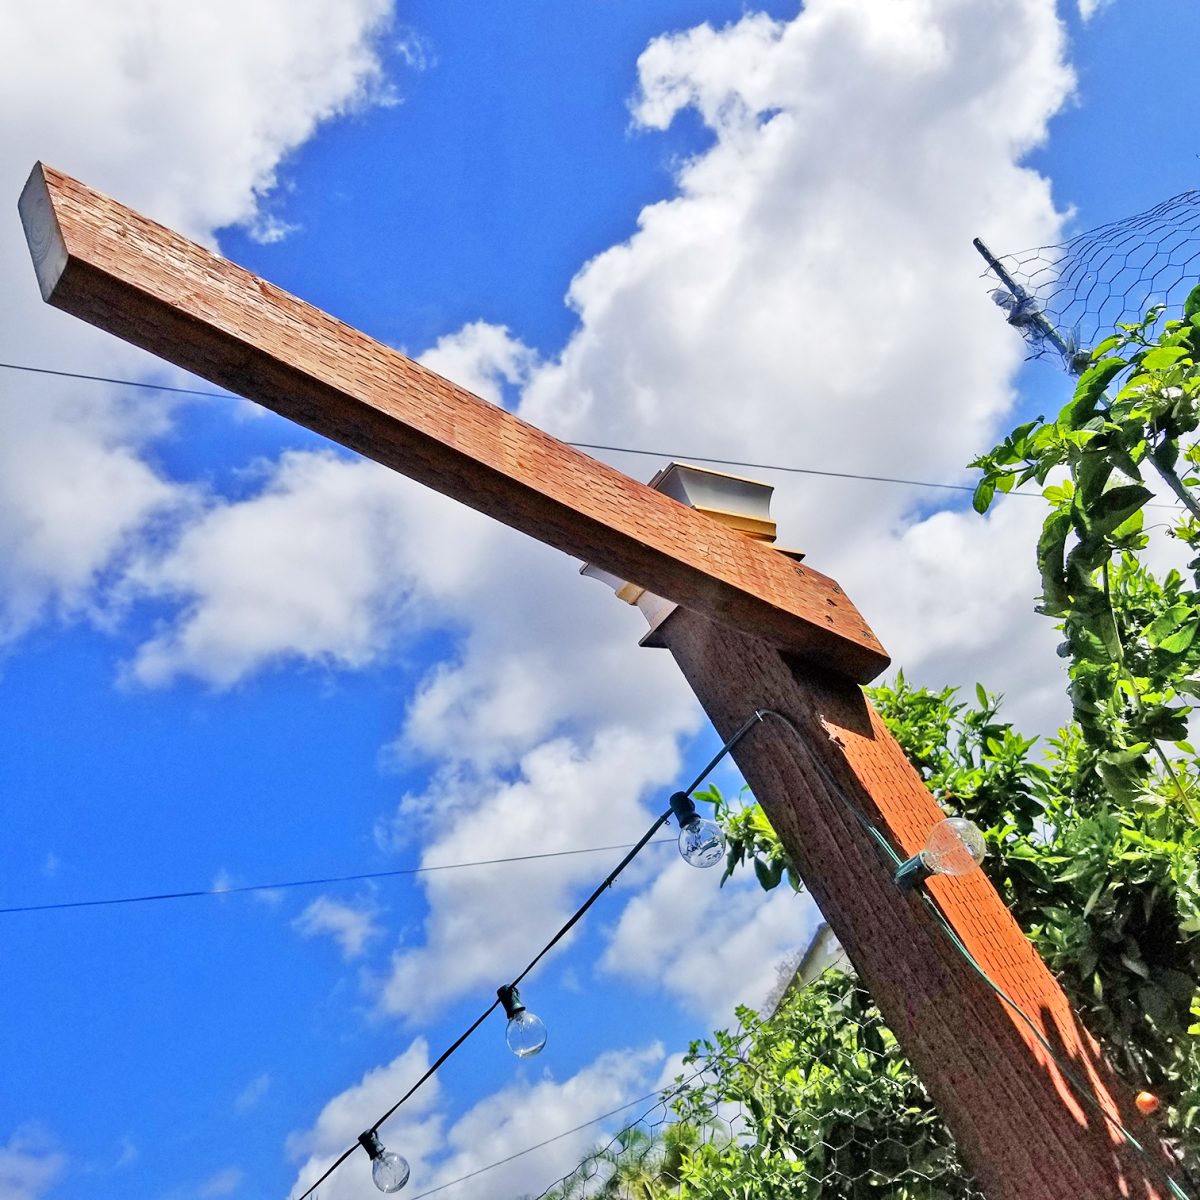
Now for the cherry on top of the new and improved run. A few years ago I planted a Black Knight passion fruit vine in the back corner of the yard. The goal was to eventually use it as a lovely canopy surrounding the whole coop which will be dropping tasty morsels into hungry beaks and hungry gardeners.
I’m hoping that the additional shade will create a little stretch of cooler air cutting through the center of the back of the yard. A little micro-climate of sorts. I also wanted a little of a Colosseum vibe to match all the times I’m dropping bugs and grubs into the pit ceremoniously. “For crimes against god, humanity, and gardening; you are found guilty and sentenced to death. Effective immediately.” *gnashing death beaks* I digress.
I started out by adding some angled support 2x4s near the top of the posts.
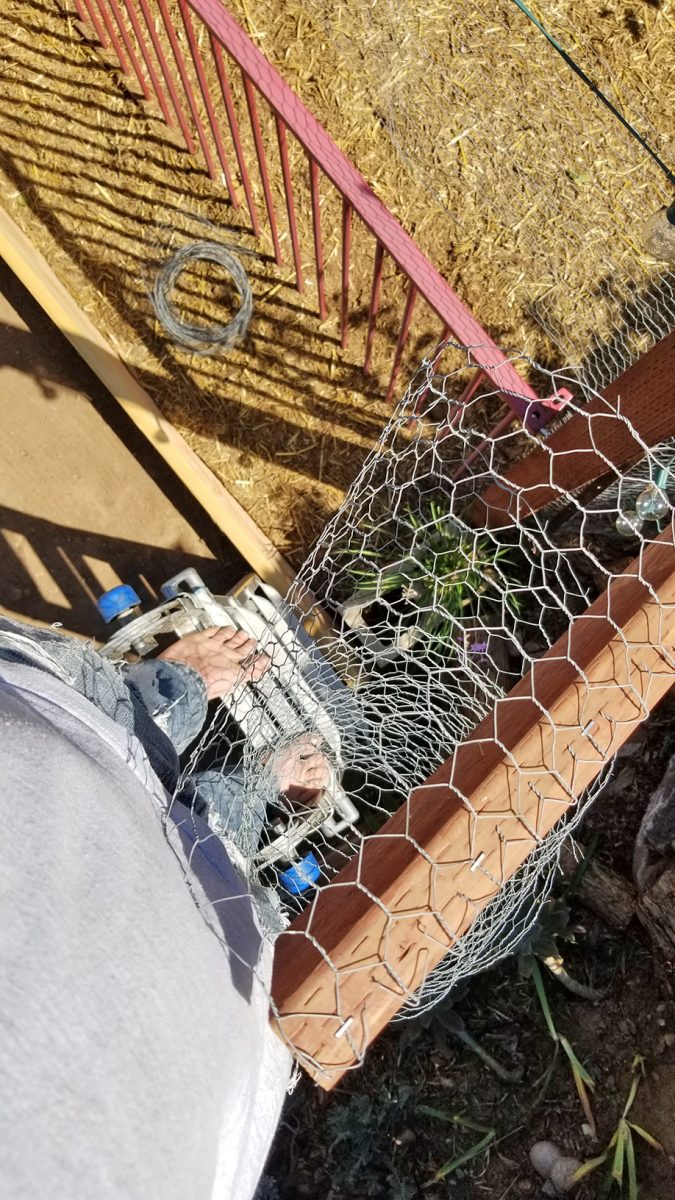
Then, following none of the safety protocols for ladders, I began adding strips of chicken wire about a foot wide.
Not a step!
So glad I ignored safety as on one of my climbs, two of the ladder legs found an old gopher hole and the whole setup came crashing down. Don’t worry though, my body broke the ladders fall.
Ouchies!
It all came out nicely and the passion fruit will fill this in in no time at all. That grows so well in my yard and it can span the entire run in one growing season easily. Passion fruit for days over here!
Outro:
Well, that’s all for now. Except for this! I had to share this with you guys as it makes my heart all mooshy and ginormous when I see it. My girls were so happy during this project. Probably because I was with them from sunrise to sunset for a couple days and all the digging and scratching was bringing a lot of scurrying bugs to their hungry hunter faces.
They began taking an orgy-like dust bath while cooing and purring the whole time. Just look at Violet the English game hen there! Eyes rolled back in giddy ecstasy as her little toes curl. It just the sweetest thing ever.
I’ll leave you with a photo of Sasha staring longingly into the fancy new set up. This is so one-sided though. Tell me about your dreams and designs that work for your space! Have any scary stories about predators and how you handled them? What’s the story morning glory? What’s the scoop Betty Boop?
45 Replies to “Fancy New Chicken Run: Phase Beta”
A lot of words here friend! Was this a caffeinated day?
I picture you telling Star Wars quotes out your back door to Hen Solo all the time with maybe the occasional Indiana Jones quote for good measure.
Every day is a caffeinated day! I figured a year long project merited a long ass post. As did my long absence from the blog. Just look at the pretty pictures if it helps 😉
I have been quoting Indiana Jones all week actually. Temple of Doom specifically. KALI MAAAAAA!
My sixteen accountants and twelve lawyers here at Mind Your Dirt Inc have all suggested I limit my expenses. I’ve fired them all and launched a satellite anyways. It’s 2018 and high time for advanced gardening blog technology.
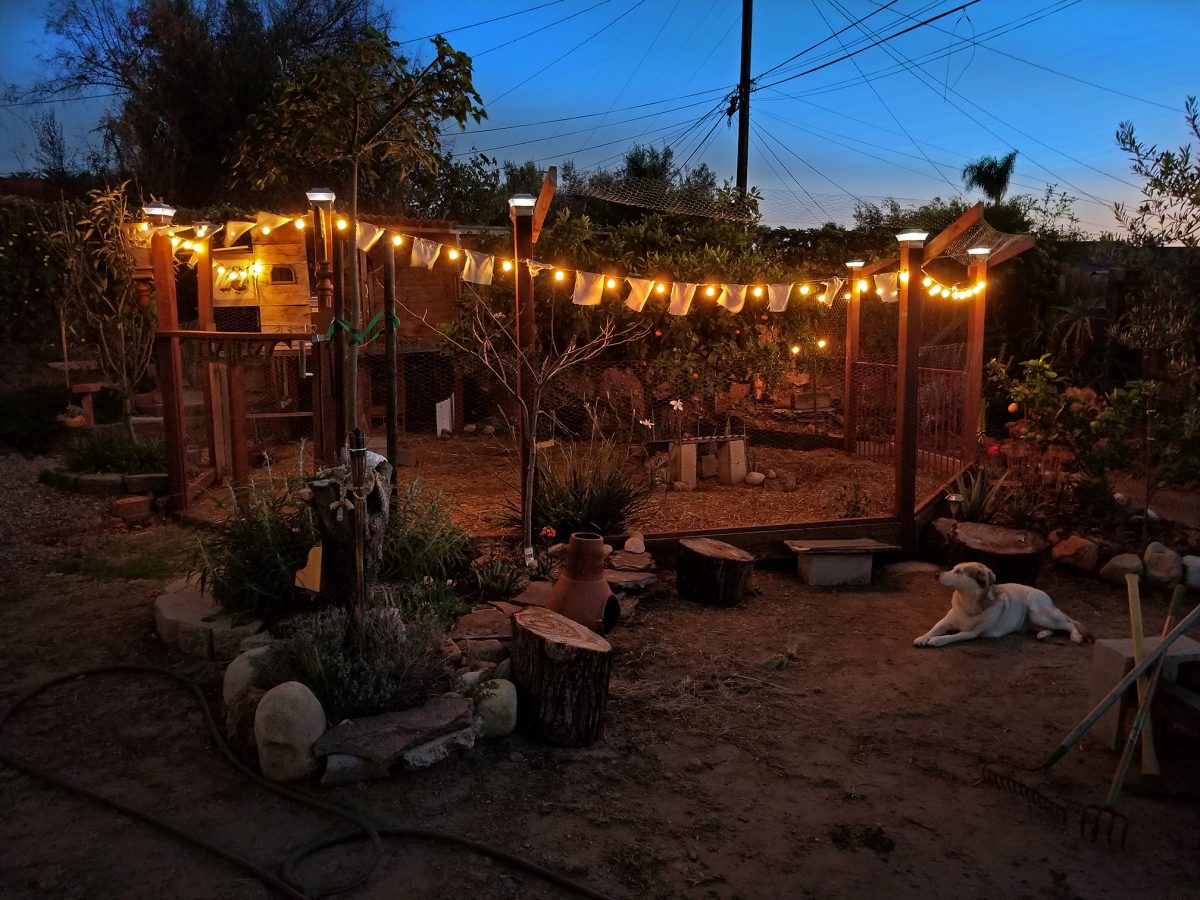
Love the drone footage! You have created quite the oasis amidst the barren yards of your neighbors. Also love the lights … I can imagine your flock sitting out in the evenings, drinking Margaritas under the stars. No wonder Sasha wants in.
It does look better than the nonexistent back porch I could’ve made instead. Think I’ll begin taking my evening meals in the coop. Recoup (wink) my leisure spaces.
Looks fantastic! A thousand thank yous for sharing! I’m working on my permaculture chicken run-food forest design and found that tubes of chicken wire make good plant protectors around my new trees. I’m thinking something similar to put in the coop and grow some herbs and greens (tree collards maybe) for the hens to eat when they get bigger….
Nice drone footage by the way and love that you put lights around the coop it’s really lovely!
Thanks Emma! I did slap some chicken wire cylinders around the more sensitive plants. This weekend I loaded up the manure composting bay. Not sure I can say I’ve ever been as enthusiastic about poop as I am now.
Depends on how much rain we get. Or how much carbon I need for the regular compost. The set up now will be an ongoing rotation. The work done by the hens of course. Fresh straw uphill and poop straw downhill. I have the bay divided up in stages right now.
I’ve had a test bay going for about a year now and it breaks down really fast. So I transferred some aged fertilizer over to the new bay to help kick-start the process.
Hi James. After reading the adventures of Piper, I would like to add a silkie to my flock. Can you recommend a good source some place between San Bernardino and San Diego?
Yes! Piper is the best chicken I’ve seen. Her personality and affection for me (and tolerance of my dog) are beyond endearing. She also still lays eggs like crazy. Although I’m not sure how that’s possible at her age. Tiny little things, but Sasha loves them.
Locally, I source people with healthy hatchling. My last three hens were from the East County Zoo near San Diego. Great guy and his flock is well tended…
Just make sure your new silkie isn’t bullied by the other hens. Bantam breeds get their fluffy asses handed to them on the regular. Can you keep her separated at all from the flock?
Come to think of it, perhaps you should get two so they have company and solidarity against the dreaded pecking order. But so worth it. They’re like lap chickens. And they purr a lot when happy. I’m gonna go hug Piper right now…
I would love to get two. We are limited to 5 birds since I am on a 1/2 acre parcel. My room mate wants the others to be layers. We have 3. One is an older Americana who is past chicken menopause. Suppose code enforcement could be convinced that two silkies = 1 layer?
Yes, your logic is sound. Two bantam equals one fat layer. It just broke my heart when Piper was in her own run with no one to snuggle with. Now she has a one-eyed sex link (that sounds wrong) to keep her company.
But maybe one of your hens will be kind and able to hang out with your silkie? I just always like introducing new hens in pairs so they have a teammate to roll with. They get so clicky. “oh snap! Who’s that bitch all up in our peckin and scratchin?”


A lot of words here friend! Was this a caffeinated day?
I picture you telling Star Wars quotes out your back door to Hen Solo all the time with maybe the occasional Indiana Jones quote for good measure.
Every day is a caffeinated day! I figured a year long project merited a long ass post. As did my long absence from the blog. Just look at the pretty pictures if it helps 😉
I have been quoting Indiana Jones all week actually. Temple of Doom specifically. KALI MAAAAAA!
Nice. I read every word.
“Sallah, I said no camels. That’s five camels. …Can’t you count?!”
“asps, very dangerous. You go first”
Never gets old…
Why doesn’t anyone ever quote Crystal Skull? Lol.
I didn’t hate that movie actually. Not sure why it got so many haters. It had all the elements of the earlier films.
April fools.
Haters gonna hate..
Now we are friends again. Who can be mad at you when you quote Taylor?
Coming over with Crystal Skull DVD. Perhaps if I act it out, you’ll better appreciate it.
Excellent point. See you in ten hours.
I’ll take my Tesla hovercraft. Be there in five minutes.
There is a Tesla dealer nearby. You can plug in while you are here. Is that darn speed train finished yet?
It’s actually bullshit powered, so no need to plug in. I can go to Mars and back.
I picture you looking like a cross between the Red Baron and Doc from Back to the Future.
It’s one of the worst movies ever made of all time ever. Ever.
I can’t even talk to you anymore
Hahaha. Silly girl. We named the dog Indiana.
In ther news I love the music you set your drone footage to. You really spare no expense. Well done friend. Well done.
My sixteen accountants and twelve lawyers here at Mind Your Dirt Inc have all suggested I limit my expenses. I’ve fired them all and launched a satellite anyways. It’s 2018 and high time for advanced gardening blog technology.
I’m sure Elon Musk would invest. It’s only logical.
Actually, for full disclosure, I kinda sorta stuck my satellite under his space car when he wasn’t looking. #sorrynotsorry
#fanboy
Oh I’ve missed our witty repartee
😗
great job! You should meet my friend https://circumstance227.wordpress.com/2018/03/29/we-interrupt-this-broadcast/ over at her trek blog, who unexpectedly turned into a chick mom, somehow, now breeding assorted hens. She could do with a parkland thingy like yours…
Clicking away over here…
Barefoot on a ladder? !!!
“Gardening with danger” is part of my subheader. When I’m in the yard, I’m almost always barefoot. Gets me grounded.
Love the drone footage! You have created quite the oasis amidst the barren yards of your neighbors. Also love the lights … I can imagine your flock sitting out in the evenings, drinking Margaritas under the stars. No wonder Sasha wants in.
It does look better than the nonexistent back porch I could’ve made instead. Think I’ll begin taking my evening meals in the coop. Recoup (wink) my leisure spaces.
Also insanely envious of your Satsuma tree!
That thing is a champ! And it is loving the chickens pooping underneath it.
Looks fantastic! A thousand thank yous for sharing! I’m working on my permaculture chicken run-food forest design and found that tubes of chicken wire make good plant protectors around my new trees. I’m thinking something similar to put in the coop and grow some herbs and greens (tree collards maybe) for the hens to eat when they get bigger….
Nice drone footage by the way and love that you put lights around the coop it’s really lovely!
Thanks Emma! I did slap some chicken wire cylinders around the more sensitive plants. This weekend I loaded up the manure composting bay. Not sure I can say I’ve ever been as enthusiastic about poop as I am now.
Your plants are going to love all that crap when it’s well rotted down though! How often do you clean out the straw from the run?
Depends on how much rain we get. Or how much carbon I need for the regular compost. The set up now will be an ongoing rotation. The work done by the hens of course. Fresh straw uphill and poop straw downhill. I have the bay divided up in stages right now.
I’ve had a test bay going for about a year now and it breaks down really fast. So I transferred some aged fertilizer over to the new bay to help kick-start the process.
Awesome! Thanks for letting me know!
Happy chickens come from the Gielow Estates. Very swanky! And what a masterful poop engineer you are.
No shit? Yes shit! I got a whole shit system over here. A shitstem.
Hi James. After reading the adventures of Piper, I would like to add a silkie to my flock. Can you recommend a good source some place between San Bernardino and San Diego?
Yes! Piper is the best chicken I’ve seen. Her personality and affection for me (and tolerance of my dog) are beyond endearing. She also still lays eggs like crazy. Although I’m not sure how that’s possible at her age. Tiny little things, but Sasha loves them.
Locally, I source people with healthy hatchling. My last three hens were from the East County Zoo near San Diego. Great guy and his flock is well tended…
https://www.eastcountyzoo.com/
Before that I did try shipping from near L.A. with good results. Here’s the link…
http://www.californiahatchery.com/Chickens-_c_11.html
Just make sure your new silkie isn’t bullied by the other hens. Bantam breeds get their fluffy asses handed to them on the regular. Can you keep her separated at all from the flock?
Come to think of it, perhaps you should get two so they have company and solidarity against the dreaded pecking order. But so worth it. They’re like lap chickens. And they purr a lot when happy. I’m gonna go hug Piper right now…
I would love to get two. We are limited to 5 birds since I am on a 1/2 acre parcel. My room mate wants the others to be layers. We have 3. One is an older Americana who is past chicken menopause. Suppose code enforcement could be convinced that two silkies = 1 layer?
Yes, your logic is sound. Two bantam equals one fat layer. It just broke my heart when Piper was in her own run with no one to snuggle with. Now she has a one-eyed sex link (that sounds wrong) to keep her company.
But maybe one of your hens will be kind and able to hang out with your silkie? I just always like introducing new hens in pairs so they have a teammate to roll with. They get so clicky. “oh snap! Who’s that bitch all up in our peckin and scratchin?”