I’ve been noticing over the last year that Mind Your Dirt receives a great many inquiries about the Coastal Coral tree. Two of my articles on the species gets read daily, and often several times per day. This article covers the species as a whole, and this article discusses when and how to prune erythrina caffra.
I’ve often wondered what it is about erythrina caffra that causes so many people to make their way to my humble doorstep in search of answers. The species itself is indeed a beautiful specimen tree with an amazing sweeping short and stout umbrella like canopy, both alien and breathtaking bright red flowers and powerful and very organic flowing trunk and branches. Just see for yourself, I went out hunting for photogenic specimens just for you. You’re welcome.


So I can see the interest, but why is so much Interwebish (I know, relax) traffic drawn to this subject? Mind your Dirt offers a plethora of stories of equally amazing species all over it’s back pages. What drives this keen interest to the coastal coral tree?
Then it struck me. Several years ago when I was researching ways to propagate the species online, I had a hell of a time finding solid propagation information. A bit here, a smattering over there; but nothing solid and concise. To quote my past self…
Only in this day and age would one consider “scouring for hours” to be any form of extensive research, but if you know how to search effectively it shouldn’t take this long to find info on a relatively well known species. So that’s what I’m here to do; share that seemingly lost information so that it can have a new forever-home on The Interwebs and all you amazing people can begin to grow and love this amazing tree as well! How nice of me huh?
I have tried many different methods for propagation of this species (to grow as bonsai stock). Seeds are perfect, but they take a wee bit longer to achieve a beautiful and stately tree in the yard. I tried taking smaller six inch segments of the new green growth thinking that they would root successfully. I believe I tried about twenty or so of those. All of them rotted into nothingness in short order.
The key is to take larger woody branch sections and allow them to dry out before potting them. Without further adieu, here is how to grow a coastal coral tree…
What You’ll Need:
- Pruning Saw
- Pruning Shears
- Razor Blade (fresh one!)
- Rubbing Alcohol
- A Cool and Dark Place to Store the Cutting (garage or cellar etc.)
- 3-5 Gallon Pot
- Well-Draining Potting Soil (50% organic/50% inorganic)
- rapier-like wit and ninja cunning
1) Selecting a Good Host Tree:
When you find your free-range coastal coral tree, there are a few things to look for. The clone you’ll be making will most likely take on all of the traits as the host plant so if the tree is sickly or disease prone, chances are your clone will be as well. Don’t be dismayed if there aren’t many leaves on the host tree, however, during the spring the coastal coral will drop most of it’s leaves in order to show off it’s amazing flower display. This allows full visibility to all it’s pollinator friends.

Via
You may also want to look for certain traits that best suit your needs like branch and trunk development, although much of this is dependent on how you prune the tree during it’s training. Mostly, look for a tree that speaks to you and draws you in. Once found, make sure to get permission to prune off a decent branch.
There are many state and federal laws in place to dissuade field harvesting in this aggressive manner (and rightly so), so try to find a private property owner that can give you permission or is planning on pruning their tree anyways. That said, ninja cunning is one of the items on the list above, so take that however you wish 😉
You’ll want a branch that will have ample ramification (a subdivision of a complex structure or, in this case, bunches of little branches) as well as a strong trunk. Picture the branch as a tree because that’s what it’s about to become. The more subdivided branching it has now, the less time it will take to grow into a decent full tree. Here’s a good example of what you want regarding ramification (albeit this branch is crazy big for this purpose).

Once you’ve selected your branch, it’s time for surgery!
2) Making the Cut:
Out of respect for the host tree, be sure to make a good clean cut in the proper location so that the wound will heal completely. This is where the rubbing alcohol comes into play! Clean your saw, pruning shears and especially the razor blade before and after using!! This will help avoid any bacterial infections that can cause serious problems to the host as well as the clone.
I chose the following branch because I’m in the process of training and pruning my clone that is now three years old. Initially, this was a five foot long branch.

Not only does it interfere with the overall design of my tree and may cause trouble once the branches get bigger due to over crowding at the fork; but it also stands in the way of another possible future project. This tree will be perfect for a tree house in a few years! Now, I don’t have any children (that I’m aware of) at the moment, but when I was a wee lad (one million years ago) I always wanted to have a tree house. So this is for the future little ones with similar hopes and dreams. The difference being that, unlike my dear poppa bear, I know how to build one.
This branch would interfere with the basic structure of the flooring supports so I wanted to keep a nice open inner structure that has a fairly level branching like this…

I also wanted to get a really nice lateral canopy shape and this branch was blocking that view. There is a lower branch that I’m allowing to thicken up so the tree will be easier to climb on. Once it’s thick enough, I’ll cut it back as well for a lovely little foot-hold. Here’s the tree as of today so you can see it beginning to take shape.

This young lady has been in the ground for a little over two years now. The original branch was in a pot for about two years before I found a nice cozy home for it to live. Last year, the thing went crazy and grew more than double its size in about three months! Read about that madness here. The branches just shot straight up to the heavens. Take a look.


It’s so amazing to see this tree take shape as I’ve always wondered how it grew so wide and stout. Every season brings dramatic changes and a great deal of trunk thickening. It’s rare to see trees develop so quickly. Typically when you plant a tree, you’re planting it for your children to sit under, not you.
But enough about my tree, let’s get back to yours.
You’ll want to make the cut just slightly above the surface of the larger source branch so that the bark can grow around the wound in time and seal the area completely. Too far up and the wound will never seal, too far down and you can damage the vascular structure main branch. Both can leave the tree susceptible to rot and infection. Here’s a detail of the trunk of one of the Balboa Park specimens.

Notice that the lower branch cut was done slightly too far away from the main trunk? That’s no good. The bark will never heal over it in time for it to avoid rotting and harboring harmful pests. It’s already showing signs of this and can eventually become a serious weak spot for that large and heavy trunk. A ticking time bomb if this tree were planted close to a house or over a parked car! Oh, the humanity!
The one above it is slightly better and already on the road to being sealed up completely, however it is also showing signs of decomposition. This is why it’s always best to do the major pruning while the tree is still young or the newer branches are just developing. You can better avoid later cuts that can really impact the health of the tree. Bonsai training really helps one to hone these “fortune telling” types of early pruning. But that’s a whole other post Daniel-san so wax on y’all.
As for our cut, take note in the image below of the rather distinct separation of the branch to be removed and the larger branch that it’s attached to. This line is important for a good clean cut that will heal rather quickly.

Everything below the red line should remain intact for the wound to heal properly. So the cut should be made in a straight line across the branch at the highest point above this imaginary red line.
But before we can do that, make certain that you clean all of your cutting tools and then wipe the blades down with rubbing alcohol! If you don’t, the host, the cutting, as well as your tools, will suffer. Disease and bacteria can carry on to other plants via these tools.

Once everything is sterilized and clean, begin cutting as cleanly as you can muster. The smoother the cut, the faster the healing process can begin.

Below is the result of this minor tree surgery. Were this a larger project with multiple cuts I would’ve waited for a winter pruning, when the tree is dormant and the sugars are stored safely down in it’s roots. However, I should note that winter dormancy is a relative term in sunny and warm San Diego.


Not too shabby! New evidence (relatively new) shows that pruning sealer is wholly unnecessary and can actually cause more harm than good by trapping in harmful material. Just leave it alone and the tree will take care of the rest. If you must intervene (because that’s the type of person you are) then you can provide it with some makeshift shade to protect it from the sun while it heals. As the branch thickens the bark will grow over this wound and seal it up altogether. With a healthy and vigorous tree such as this one, it shouldn’t take more than a year to be completely healed. After a few years, all traces will be gone completely.
3) Attacking the Clones:

Above is the branch we just removed. These next few steps are critical for getting the branch to form roots before succumbing to rot (and possibly depression). We have no more need for any of those lovely green leaves as they will drop off long before you pot this baby anyways. The newer green growth at the tips of the branches will also wither away before a single root forms, so now is the time to remove all of it so that the sugars remain in the core of the branch and are not wasted on material that will die off anyways. Plus, in the dark, there isn’t much photosynthesis going on anyways. We’ll start off by removing the green new growth.

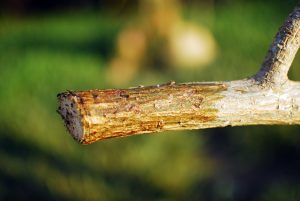
You can see in the above photo that on the left is the fresh newly formed green branch and to the right there are flecks of brown. That shows that the older growth is becoming woody (having woody parts : rich in xylem and associated structures). The latter is what is going to survive the next few steps because it has enough xylem to survive this rather dramatic and brutal attack (poor lil’ fella). The former lacks the structure to survive. It is weak and lacks the moral fiber. To bad, so sad.

Once this is complete, the next weak link in the chain are the leaves. Not a single one will survive the next stage of propagation, so those too must go! This can easily be accomplished with this species by applying a gentle downward pull at the base of the stem so that they will snap cleanly off.

While you may feel that this is waste of green loveliness, rest easy; all of those leaves will make an excellent nutritional addition to you composting pile!! Huzzah to nitrogen! So save those leaves y’all.
And here’s the final product! A completely naked coastal coral branch. I did leave the smallest branch with a few tiny leaf buds just to give it a glimmer of hope for the future. Emotional pandering is key in successful gardening.
This next step will seem very counter-intuitive, but bear with me. This is the key to success here that was prominent in the long lost PDF I mentioned earlier. This is the secret. Shhh.
4) Teetotalism; Time to dry out:
This was why I was having such poor luck propagating the smaller clippings. I cut them off of the tree, slapped them in rooting hormone and then stuck them in my little green fuzzy cubes of failure. The rotted because I failed to allow time for the cuts to dry up.
The process takes about two to three weeks and involves that cool dark place that I listed in the beginning of this article. We don’t have basements here in San Diego, so I have to settle for the garage but any dark, dry and cool spot will work fine. Here’s a photo of the optimal space for storage…

You want all those cut ends to dry up and you want the sugars to stop flowing. It’s those sugars that will form the new roots once you get this fella into the pot. You also want to store it upright so that the thicker portion of the branch is on the ground. The same orientation that you will be planting it in a few weeks. Here’s mine patiently waiting.

That’s all you can do for now. The big waiting game. I’ll see you in three weeks!
5) The Final Surgery:
This is that last step before planting your clone and requires a wee bit of surgery so get your hands steady. In this step we’ll be using the razor blade and, of course, we want to clean it with our rubbing alcohol before proceeding!!

We need to make some slight incisions along the length of the base of the branch to provide room for the new root nodes to form. This part is also critical as we do not want to cut into the vascular cambium, but just the bark. Here’s a diagram to help you know the difference:
 Cutting into the cambium can cause issues with the vascular properties of the trunk and root nodes will not form at all because the tree will read this as a wound it needs to heal and seal it up with those stored sugars we were talking about earlier. Just a slight score into the bark will do the trick. All the way around the branch and long enough to score the entire section that you wish to bury in the soil. For this branch, I’ll just do a few inches.

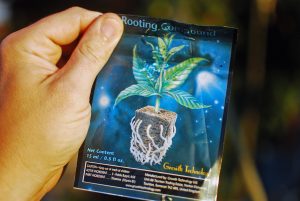
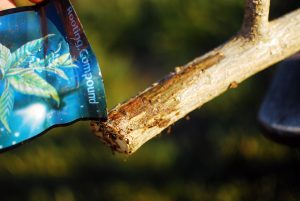
If you have rooting hormones, now is a good time to add it to the scores you’ve just made along the branch. It’s not essential for success, but does increase your root structure and cut back on the time it’ll take for roots to form. If you don’t have any rooting hormone, don’t sweat it! You can always make your own willow water which will work like a dream and costs you nothing but time. I’ve also heard that cinnamon can be used as a rooting hormone substitute although I have no experience with this. Does anyone out there have good rooting hormone recipes they’d like to share? I’d love to hear them!!
Again, not essential to the task, but it will speed up the process.
6) It’s all in the Soil:
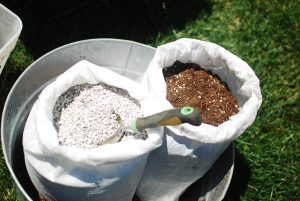
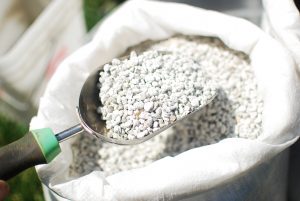
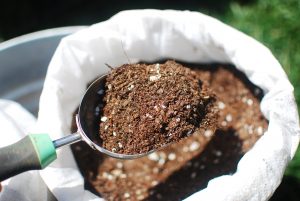
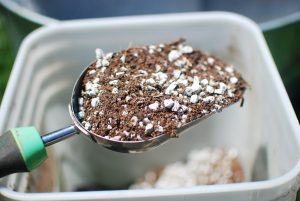
Now that your clone is fully prepared, it’s time to plant it into a 3-5 gallon pot so that it can begin to take root. I use a 50/50 ratio of pumice to rich organic sandy soil. This provides ample nutrients, water retention as well as excellent drainage. Premix your soil ahead of time in the pot you’ll be using so that you have the perfect amount all ready to go. If you only have access to bagged potting soil, that will work as well because the coastal coral is rather forgiving.
You’ll want to bury the branch enough into the pot so it will remain stable and not flop about. I’ve added some support sticks in the past so that I only had to bury the few inches that I scored with the razor blade. If the branch is too far in and you plan on making this into a bonsai, you’ll always have that thick central column to deal with as well as trouble forming a good root flare at the base. If you plan on putting it into the ground, it doesn’t really matter that much.
Now you simply place your branch into the soil and loosely pack it around the “trunk”. Give it a good slow soaking to allow the soil to settle a bit and place the pot in a warm sunny spot in your yard. Easy peezy.

It’s important to let the soil dry out completely in between watering during this waiting stage. Too much water will cause the branch to rot and it doesn’t have any roots to take up water yet anyways. In about three to five weeks, you should begin to see little green buds forming and then you can water it more regularly.

Once this occurs, the leaves will come in super fast and the tree will begin taking off. Here what the growth looks like during a two week period…

Crazy fast right?
If you leave it in the pot, it will get thirsty often and will need at least weekly watering, depending on the weather. If you plan on putting it in the ground* it should require less care after it’s been well established. Fertilize it in the early spring and it will grow faster than you’d expect!!
*NOTE: If you plant this species in the ground, please be aware of its location! Too close to a structure or above sewage pipes can be a costly mistake to make. The roots of this (and many other trees) can be fast growing and invasive to say the least. Take the time to find a proper safe place for this baby to live. The coastal coral is a sun loving, medium sized tree, so it won’t get too large and should be easy to find a home for. Also of note is that in most climates, it will act as a deciduous tree and drop it’s leaves seasonally. In San Diego, it’s hit or miss regarding this behavior and my leaves seldom drop. Again, the host plant will best determine the traits of the clone so be aware during field collection.
Well folks, there you have it! An extremely long-winded and detailed account on how to best propagate the lovely coastal coral tree, or erythrina caffra. Again, I wanted to provide a full account on this process seeing as no other one seems to exist out there. I’ve done this about four times and each and every time it has worked like a dream. Zero failure rate is a rare trait when it comes to plant propagation so take heed ye heathens!
I hope this helps to encourage more people to experiment with this fascinating species and please share your stories with me!! I want to hear you successes as well as your your near misses. Until then, Mind Your Dirt!


Great post, Jim. Once again you’ve inspired me to try something new.
Since you say you had a hard time finding information on propagation I thought I’d take this opportunity to promote the SDSU Library, and libraries in general. I am slightly unsurprised that you’re having a hard time finding plant propagation information online. Agriculture doesn’t seem to be a very popular topic anymore amongst the youngsters.
If you start perusing the SDSU Library’s website ( library.sdsu.edu ), the library’s online catalog (lib pac.sdsu.edu ), or especially the botany research guide ( http://library.sdsu.edu/guides/sub.php?id=100 ) and you find a book in print or an article behind the proxy server that you’d like to read just let me know and I’ll get that to you.
Cheers my friend,
Tyler
Thanks Tyler, on both counts! I’ll definitely use that resource when I get stuck again!! Although I will always prefer the classic Dewey Decimal System 😉
I do feel, however, that this interest is beginning to shift towards my favor as more and more people begin to realize the importance of sustainable living and agriculture on smaller plots. There is a change in the air my friend and people are beginning to wake up about our current agriculture practices and how devastating and unsustainable it is. Have hope!
Plus, the problem regarding the coastal coral Interwebs presence is now officially solved!
Cheers to you my good man.
Never even heard of that tree before but I am in love! Lots of detail thanks.
Perhaps you’ll see it in your travels now that you know what to look for. If there are none in your area, I have seeds that I can share 😉
Also, many of these techniques will work on other tree species that may be more local and or native.
Good to know! Sheesh I would love one of those trees but I suspect it is just too darn hot here. Nothing wants to grow right now. The drought is helping any either…my plants are on life support. 🙂
Well, the coastal coral is an African tree. Super drought resistant and it does amazingly well in the heat. I never water mine now that it’s established and it is doing better than most of my plants. San Diego has the current climate of the surface of the sun too.
What!? Now I am intrigued! Don’t be surprised if you find me in your yard tonight dressed in black stealing a clipping of your tree! 😉
We planted our tree (24″box) on the central coast of CA a year ago. We’ve watered it 3x and it’s growing super fast. They definitely dont need much water.
I’m never surprised by nightly ninjas. Ever vigilant am I.
If you’re really interested, and can’t find a good host in your area, PM me with your address and I’ll mail you a few seeds. Although the branch cutting method will save you a few years worth of growth.
May I have some seeds as well ?. 🙂
I should have some fresh ones ready to send. Just have to climb the tree… Email me an address and I’ll send some your way. Sharing is caring!
Wonderfully well written, clear, and helpful.
Hey thanks thistle hammer it means a lot
Reblogged this on Wolf's Birding and Bonsai Blog.
A tour de force. I now understand why this post took so long to complete. Fascinating stuff, even for us temperate creatures!
Why thank you good sir! I just had to put it all out there for those odd ducks that keep slapping “coastal coral” into the Google. Now they’ll have a safe landing zone. Thanks again my friend over the pond.
Thanks for liking a post on my website. I am excited to connect with other gardeners. You have a lot of gardening tips on your site as well. I have a lot to learn as I am studying to be a master gardener.
But of course! I don’t think we ever stop learning about gardening. A lifetime only covers so much. It’s the journey that makes it so rewarding though isn’t it.
Excellent, superb, fantastic, the best, thank you from Long Beach CA where these beauties are abundant on City properties and some newly planted ones at the base of Cherry Ave and Junipero where the sand meets the strand on the newly redone bicycle path, what a life eh. I failed on my first try but now that I have this info it will not happen on #2.
Thanks a bunch, D…
Dana, you are the person I wrote this article for! My key demographic in coastal coral propagation! Just remember, right when you think you’ve failed again, those buds will pop! Every time I’ve done this I’ve convinced myself that I blew it. And then POW! godspeed my gentle warrior and call upon me when needed.
Great article James, the information shared would have been most helpful when I did this myself almost 40 years ago. However, even without your great information, of the 10 clippings potted 2 did survive and are now very large majestic centerpieces in my front yard.
Thank you Randy! They do make a very stately tree for the front lawn don’t they? I can’t get over how fast mine is growing. It must be very happy being out of it’s pot.
Congratulations on your success! I know from experience that it’s not easy to propagate that way. Well played sir.
Not the best for tree houses or climbing, they have thorns
The thorns are only on the newer growth. As the branches thicken the bark becomes extremely smooth. Like a babies bottom.
I have been admiring these trees all over town and daydreamed about being a tree climbing/cutting ninja. In my daydreams, many police cars ascend on me with spotlights and catch me in the act (like they don’t have more important things to do!) and haul me off to jail. But daydream no more! I spotted a tree at a local nursery and got it for a steal! It was in a 5 gallon container but very large and probably about to get transplanted to a larger pot (for almost 4x the cost). I am now working up the courage to perform surgery since it has a low branch I need to trim. Thank you for this post and all the info.
Haha! Of course we at Mind Your Dirt Inc. would never condone such acts of ninja thievery! Not officially of course.
You were wise to get the smaller cheaper tree, these babies grow so fast that there’s no point in breaking the bank. I’d say the same for passion flower vines.
As I mentioned in this post, I was amazed how little information there was online for this tree and its propagation! I had to remedy that post haste!
I have some other articles on the species on Mind Your Dirt which may have some more tips (you can search coastal coral at the top).
Enjoy this beauty! When it flowers, it’ll blow you away with its vibrancy. Let me know if you need any help or tips! I’m here for you.
Wow, this is such an amazing post. Thank you for this… I’ve been a huge fan of these trees and I just bought a house… So front yard… Ready the soil coral tree s a coming up… I’m so excited… There are plenty of these in the Palisades and areas of el segundo… Ninja mask soon out of retirement. 👹
That’s how it’s done Ernie! Stealth ninja style. Er, I mean, I do not condone such actions good sir! But if I did, I’d totally high-five you right now.
I just pruned a massive 10′ branch from this main tree and planted it in the back yard for an (relatively) instant shade tree. This morning I noticed the first signs of new leaf growth! I did this during the winter pruning. Of which there is an article on Mind Your Dirt…
I followed the advice of one of my commenters here and used aloe as a rooting hormone. I was skeptical at first, but it seems to be taking off at the same rate as my fancy rooting hormone tree up front. Which is ridiculously ginormous right now! Also, another recent post will attest to that.
Also, congratulations on the new house Ernie!! A wonderful adventure is ahead! And please do call upon me if I can offer any help along the way. That is my sole mission with Mind Your Dirt. And I always answer the call.
This was such a helpful article! I just moved to SoCal from the East Coast and saw one of these trees in The Arboretum in Pasadena and fell in love. Lo and behold, there were two of these trees growing in front of my mother’s house. Apparently the landscapers pruned them too late in the season and they were full of leaves and didn’t have any of their distinctive red flowers, so I had no idea they were the same thing until someone mentioned it the other day. And then, this morning, they were pruning them again…so I snagged a bunch of the cuttings–no ninja-ing required! They are drying out as we speak. Fingers crossed that I’m successful. If not, I will blame you completely! Just kidding! Thank you for taking the time to make such a detailed post!
By the way, I came across this:
https://www.doc-developpement-durable.org/file/Arbres-Bois-de-Rapport-Reforestation/FICHES_ARBRES/Arbres-non-classes/Erythrina-coraltree.pdf
Could it be the elusive PDF to which you were referring?
By God, I think this is the PDF! Well done! You’ve found what none of my fastest and bravest knights could do. The grail of coastal coral propagation.
I’ve also made a new discovery. You can use aloe as the rooting compound for this process. I’ve been letting a large branch grow on the main tree for a few years now with the plans to push the limits on the size of the clipping I can propagate for the backyard. As of last month, it began pushing leaf more aggressively than I could’ve imagined. I now have a 10′ instant tree in the backyard. I’m not sure but I think putting it directly into the ground and skipping the pot allowed for a much faster root development. It happened in half the time as it would in the pot and there won’t be any transplant shock as it’s already in its home.
Either way, I’m pretty excited about it. Keep me posted on your clippings! I love it when I hear about other people propagating this tree. And I will take the blame if it fails 😉
I guess sometimes you need a damsel to do a knight’s job! 😉
The aloe thing is pretty interesting. I assume it’s aloe vera? Is there nothing that stuff can’t do? Alas, my poor aloe didn’t fare well in the move and I’m still nursing it back to health so I think, for now, I’ll be sticking with the rooting powder. It’s definitely something I’d like to try in the future, though.
I’m new to this whole propagation thing–actually, gardening in general–that aloe was one of three plants I had back East. It’s amazing how much more interesting and fun gardening becomes when you have a playground like a backyard in San Juan Capistrano instead of an apartment in Washington, DC!
But I digress…My newbie questions are this: Do you think the semi-hardwood parts of the cuttings are, in any way, viable candidates for propagation? Would I snap off most of the leaves and let it callus over before putting it in the soil? Would they need to undergo the same surgery as the hardwood cutting? I’d like to try rooting them for the sake of experimentation, but I want to make sure I’m going about it properly.
Also, my living situation is soon to be changing again (just a short move to L.A. this time), so 85% of my gardening is of the container variety. The other 15% will be staying in my mother’s yard and unfortunately she’s not in the market for a new tree, so all of this has to happen in a pot–can I put more than one branch in the same container?
Any insight you could impart would be greatly appreciated!
In my experience with the semi hardwood or green stems they ended up rotting before taking root. So if you do try it, I’d let them dry out and go easy on the watering once they’re potted. And yes, remove all the leaves. Save all the sugars for root growth. I’d try doing the same gentle scoring and rooting compound as you would with the hardwood. And as for putting a bunch in the same pot, it should be fine until they really start taking off. Then they’ll be competing too much to get strong and happy.
ok–I’m gonna try it (and won’t get too disappointed if it doesn’t work)…wish me luck!
and I forgot to add: thank you for your advice!
I’ve had an Erythrina X Bidwelli in my yard for about 15 years now, and in all those years of cleaning it up, pruning, taking cuttings (mostly hard to semi hardwood, about 7 or 8 have taken root. Yesterday I found some very hefty pieces in a green bin that were cut out of a yard where i’d sold a plant to the previous owner. I’ll use your method to try to start these. The X bidwelli is a bit different in that it shoots out many new shoots from swollen node points on the branches (hard to describe it) The pieces I picked up have some huge swollen ‘joints’ like this, so my plan is to try to get roots out of these points. If anyone has experience with X bidwelli, please share!
Hi Adrian. I saw your PM, but have a house guest so haven’t responded yet. But… I imagine that based on your similar issues with cuttings and the species that this method would work.
I’m not sure if it’s essential to make use of the swollen joints to get rooting, but also worth a try to compare results.
As an update to this article, I’ve tried using willow water and then just aloe as a rooting hormone. The aloe was amazingly fast and responsive to stimulating root growth on the trunk/branch. Again, no nodes needed for rooting provided you’ve scored the bark correctly.
Please please please share your results!! I’d adore seeing/hearing about it.
Thanks , I’m excited about trying your method, and also trying to root those massive , swollen node pieces. I also have a caffra..which I really need to do something with. It’s in a 15g container sitting under a compact blue gum tree. the roots have totally busted out the bottom since it’s been sitting there for about 15 years..I got this thing from Village nurseries back when they were still willing to truck plants up here (Sacramento) from socal. It’s about 18 feet tall, never bloomed , probably because of the eucalyptus leaves and darkness. I’ve started cuttings from that one…much easier than the X Bidwelli. I’ll keep you posted. I’m convinced that the drying you mentioned is key, and I may not plant anything out til spring, since temps are dropping, and I’m not bringing them in the house!
Please do keep me posted! Yes, the drying is the key. All my previous attempts resulted in rotting and had I not found that old farmers article I most likely would’ve abandoned the effort. Now I have three clones in the ground around my property and just recently visited the original host tree to say hello. I’m a bit sentimental like that.
Best of luck and let me know how it goes!
almost forgot…Your method for rooting shows multi branched pieces that look like they are 2-3′ tall…what would you say the minimum length is to be successful?
I wouldn’t go any short than a 16″ length and a 3/4″ to 1″ diameter. You want as much sap to be stored as needed for the lengthy rooting process. It helps with rot as well with the larger sizes.
In some cases, it is useful to make incisions in the bark (to the cambium layer) near the base of the cutting in the area that will be just below the soil surface when the cutting is planted. This serves to enlarge the area of callus formation and stimulate the production of superficial roots. Because the base of the stake will be planted as much as 50 cm below the soil surface, young roots may suffer high mortality due to lack of aeration or water logging. By stimulating callus and root formation near the soil surface, it is often possible to improve cutting survival considerably.
Wonderful tip! Thank you Teri!
Hi 🙂
I followed your advises and I think it will strike for soon ( roots are nearly coming.. now it’s time for calus, meristematic masses cells )
One month ago or so, I stole a big branch of an Erythrina growing in a park, near my home.. armed with a tiny teeth saw.. scissors,.. and a solid travel bag to put the heavy spiny sections in..
This coral tree is plantes outside.. and each winter it freeze back from the ground or so.. so it can’t flower. To sum up, the branch I took will freeze, will be destroyed by frost this year.. so better to make cuttings with 🙂
Thanks a lot for sharing this tip (!)
Next time I will give a try with Aloe as natural rooting hormone instead of synthetic stuffs ( quite expensive and maybe even more toxics ).
Do you have ever tried with comfrey ? This plant have strong ability to form new roots on small section of root.. ( one centimeter root can regenerate a new plant )
Hello Vincent! So glad this article was helpful for you! And yes, this species doesn’t enjoy very cold weather. What part of the world are you in?
I haven’t tried comfrey, but have always meant to. I’ve read that my chickens would love it as well. I have tried using willow water before…
https://mindyourdirt.com/2015/09/05/diy-natural-rooting-hormone-willow-water/
But found aloe to be both simpler as well as more effective. Thanks so much for writing!
Yours,
James
Hi James, excellent article with a dash of humour too!
We live in Port Elizabeth in the Eastern Cape province of South Africa. The Coral tree is endemic to our area and an indigenous tree for South Africa.
Where we currently live, there’s a lovely specimen of a about 10 metres ( 30 ft ) high.
When it drops those ‘reddish-orange’ seeds…you could bankrupt yourself if you offered children money ( $1 ) to pick them up 😬 – there must be thousands of them!
Anyway, I would really like to try to transform a little one into a Bonsai tree 😁
Hi Pierre! Thanks my friend, I try to entertain. A bonsai would be impressive for this species for sure! I’ve thought about it as well. Due to the size of the leaves, you’d be wise to go for a larger bonsai. Something about two feet tall at least. And I’d not start from a seed, I’d propagate a branch that has the general shape you’re looking for and go from there. Save yourself many years of waiting that way. Follow that rule of thumb regarding first and second branch placement in relation to the trunk thickness and eventual final height. Forced and intentional mathematic harmony to fool the eye that a little tree behaves as a giant tree would.
I’ve been collecting seeds and mailing them to readers that don’t have access to this beautiful species. It’s still one of my favorites!
Thanks for dropping me a line! And let me know how it goes!
Thanks to your method I have a ten foot tall coral tree from a three foot branch. It flowered the first year and grew exponentially this year. I’ve gotten greedy and cut three more branches between 3 and 4 inches thick, trimmed them and deleafed them. They have been in my basement for three days. My question is whether the time of year affects the outcome. I live in San Diego and it is the first week of October. I can’t wait. This is one of my favorite trees. Thank you so very much for sharing your methodology. I hope others have luck with their attempts. I try to share this page as much as I can.
Thank you kindly for your warm words! Made my morning. I’m also in San Diego by the way.
I actually think this is a perfect time of the year. Once you get it potted you’re just waiting for the roots to form. The cooler months should really help with that. Many of the local corals have lost their leaves by now anyways. My daily raking is testimony to that. So photosynthesis is in hibernation anyways.
The only short fall that I can predict is the possibility of the host tree’s sugars being moved down to the roots so your cuttings may not pack the same punch as they would in the spring time. You can always add a small amount of 3-20-20 fertilizer to help promote stronger root growth with your soil mix.
Apart from that, you should be fine. And thanks again! I’m so glad this is working for you! My coral now has about 10 clones out in the world. I can’t wait for her flower show this year.
Thank you so much for this amazing tutorial! I wonder if it works for other Erythrina species? I will try to make clones os E. crista galli, here in Brazil! With seeds it works very well, but I want to propagate by cuttings as well. 🙂
Hi Lucas! My absolute pleasure! You have to, and I mean have to, let me know how your galli turns out using the same method!
The beauty of this is you can start with a large branch and fast forward the process as opposed to starting from seeds. Keep us all posted please!
They root very fast in clean water
Never in my experience.
I’ve rooted them in water but most rot. I have two large specimens in pots using your method and as spring seems to be coming early downunder am hoping they will thrive, despite already hitting severe drought. We have about 10 coral trees on our farm. They are great shade trees in summer, provide fodder for cows and allow the light to get to pasture in winter. And many survived the fires. So we love them and have taught our local
Landcare that used planted they are a great asset rather than a weed.