
I’m not exactly certain as to how old my Chinese Elm bonsai is. I know it’s the oldest bonsai I have in my collection, but I am not the first owner so I can’t be sure its exact age. Lets just say it’s old and leave it at that. Old enough for me to have been afraid to repot it for the last few years. Today is the day where I must get over that fear and dive in head first.
It’s growth has been stunted the last year and a half, so I just know that the pot it getting root bound and the soil is spent. It’s time to sh*t or get off the pot, if you will. So, with that said, let’s dive in!
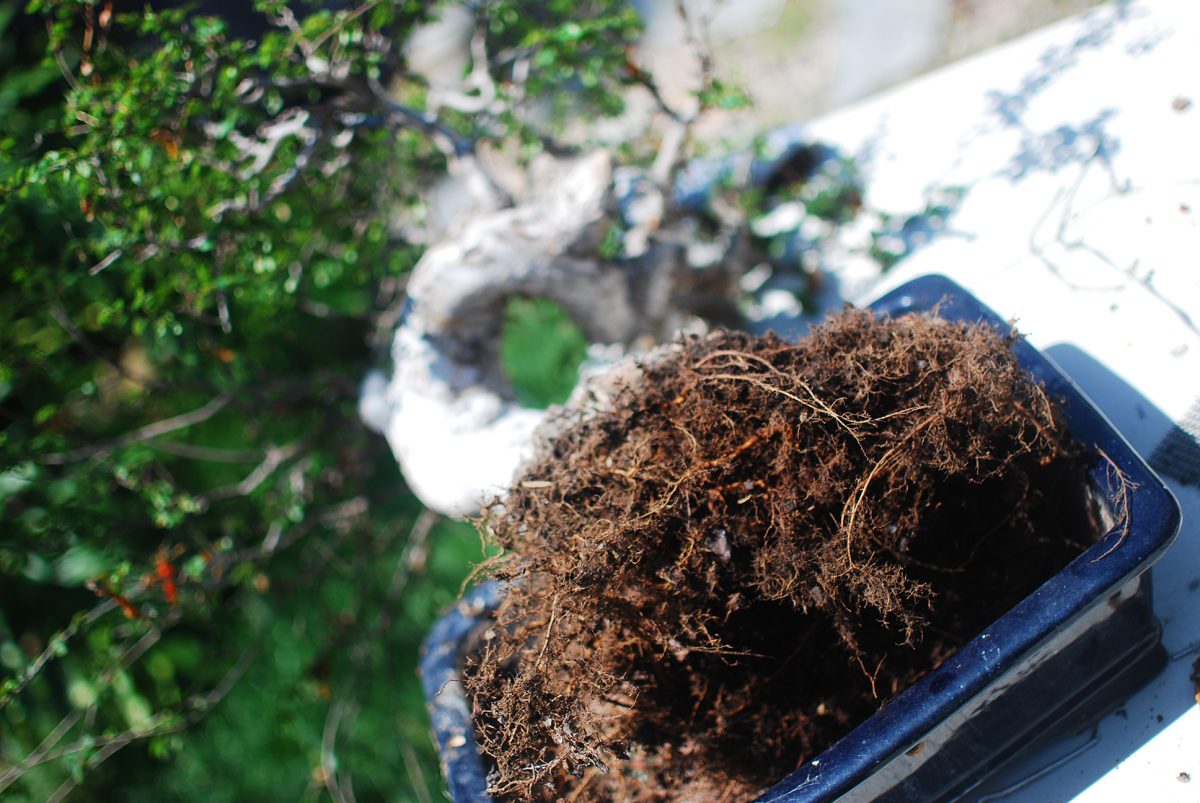
Here it is in its shabby state.
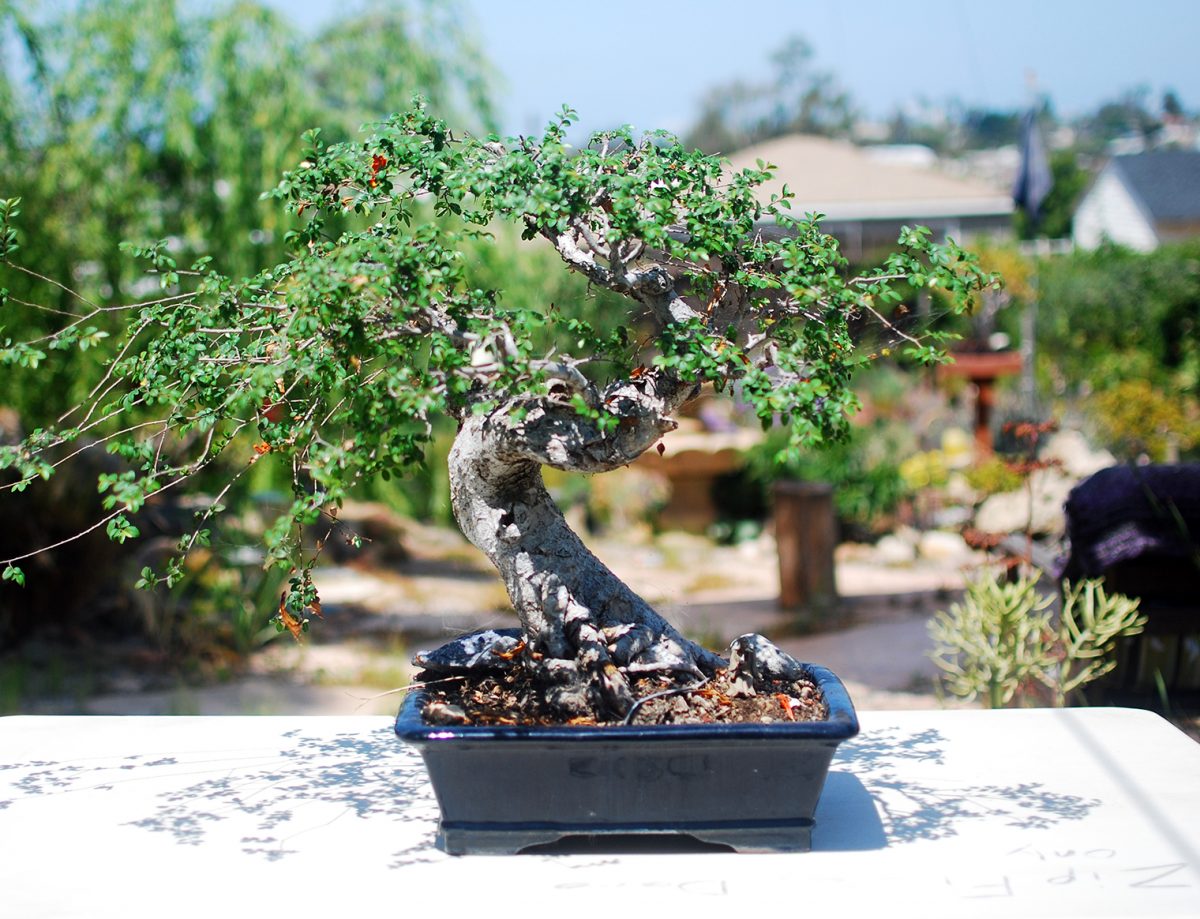
Try to ignore the wild growth on the left side, I’m trying to create some new branching so it’s gonna look unsightly for a while. Notice instead the general lack of foliage and the shabbiness of the soil. Gross!
Trees this old need to be repotted every three to four years. It’s been five (gulp). Younger trees need to be repotted more frequently, around one or two years.
The first thing you want to do is create a nice work space because you’ll be making a mess. I use a fold up plastic table because you can set it up anywhere that’s convenient and it’s easy to clean. Here’s a wider shot showing my work space.
Plenty of room to let the dirt fly and all my tools get in the way! Speaking of tools, it’s a good idea to invest in a few if you plan on creating bonsai. You should start off with a wire cutter, some shears and a few branch cutters to begin with. A straight branch cutter and a concave one would be a good start. Or you can do it the way I did several years ago when I was starting out. I went a bit nuts with this hobby at first and bought the master set. The Mr. Miyagi Set.
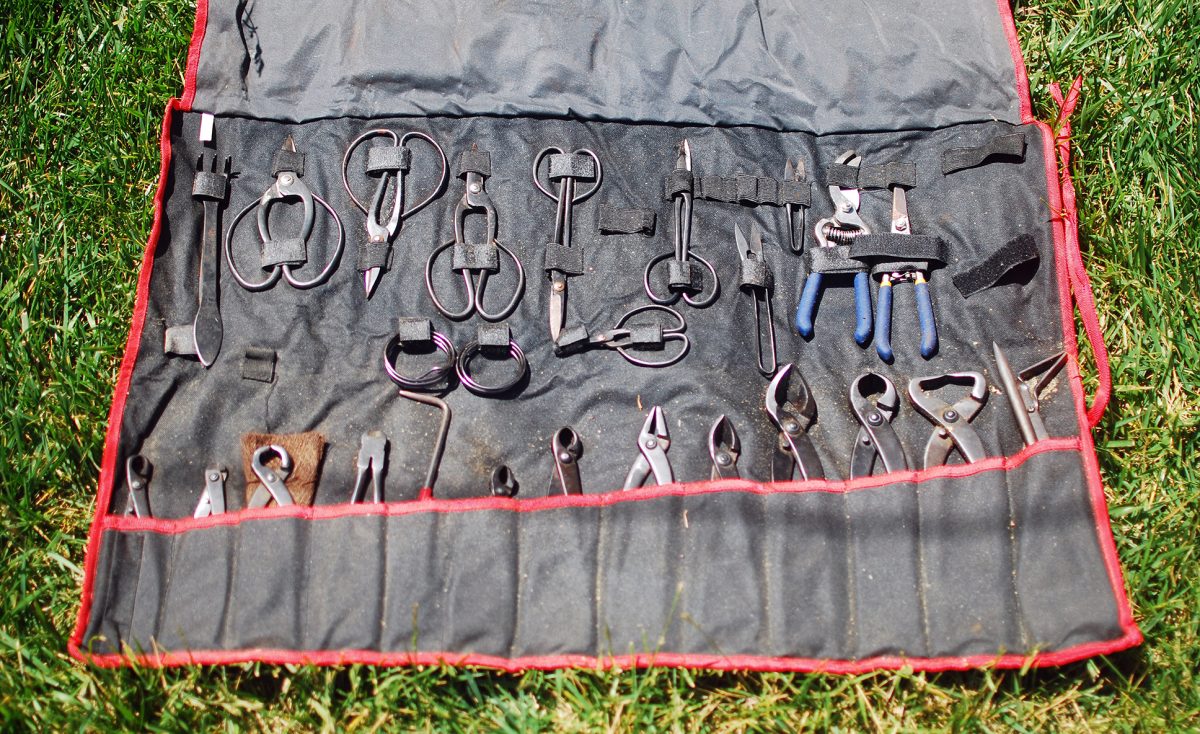
This is a great way to spend a butt load of money for tools that you may never use! However, I do so enjoy rolling out the mat when I begin to get to work styling! But back to our struggling Chinese Elm!
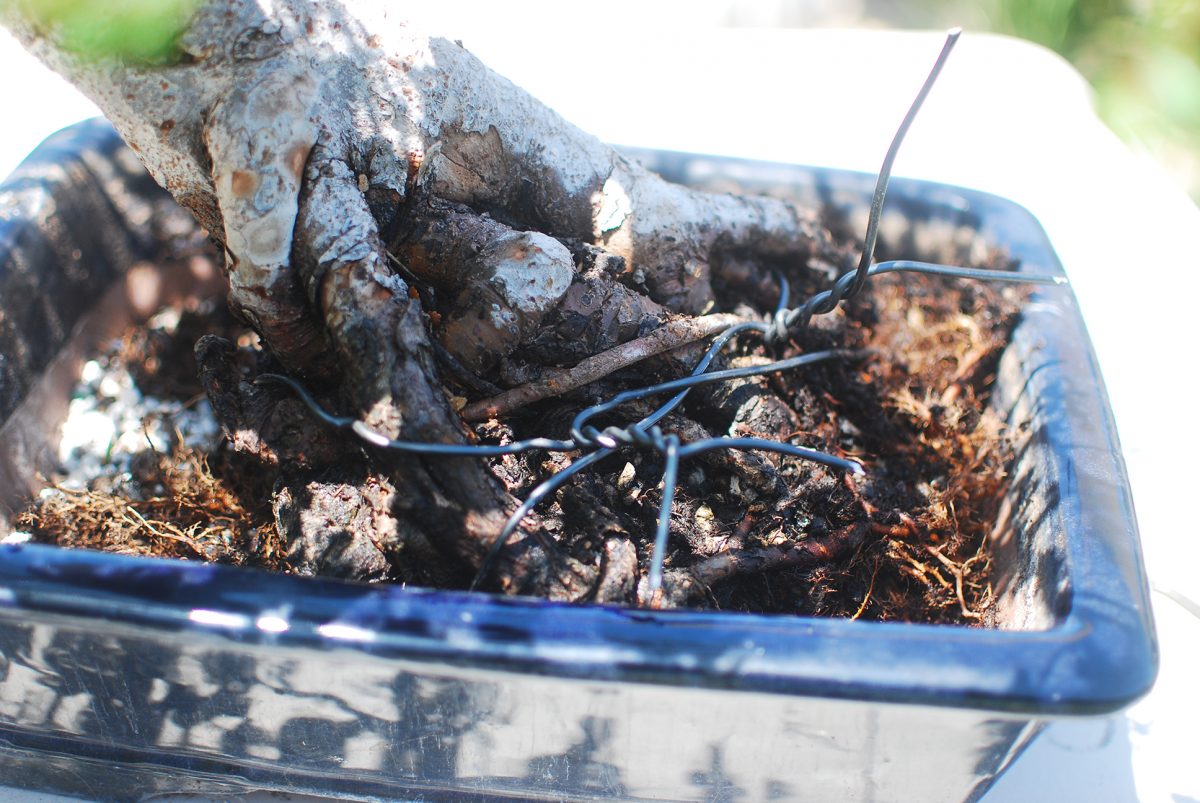
Due to the general smallishness and shallowness of your typical bonsai pot, you almost always have to use bonsai wire to hold it down into the pot. It’s made of aluminum usually so it doesn’t rust and is easy to work with.
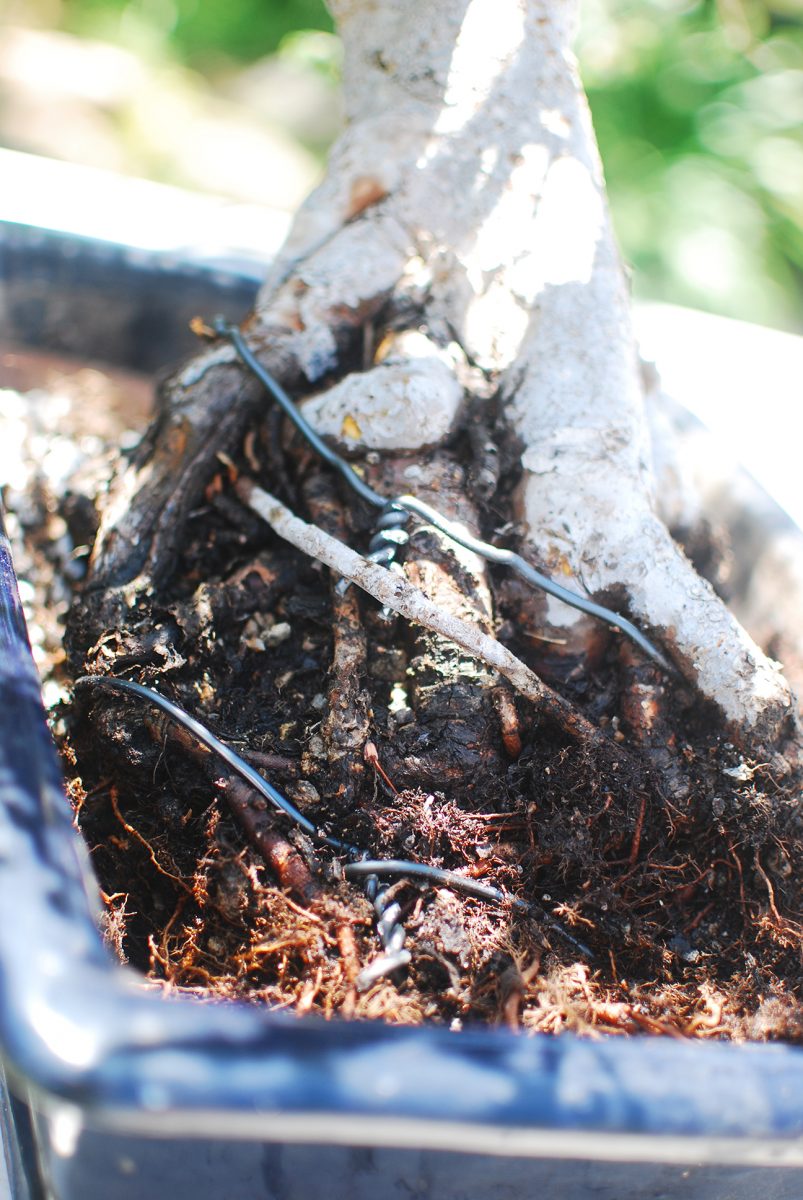
The next step in repotting is to remove the wire to free the tree from the pot. Do this from the underside with your wire cutters.
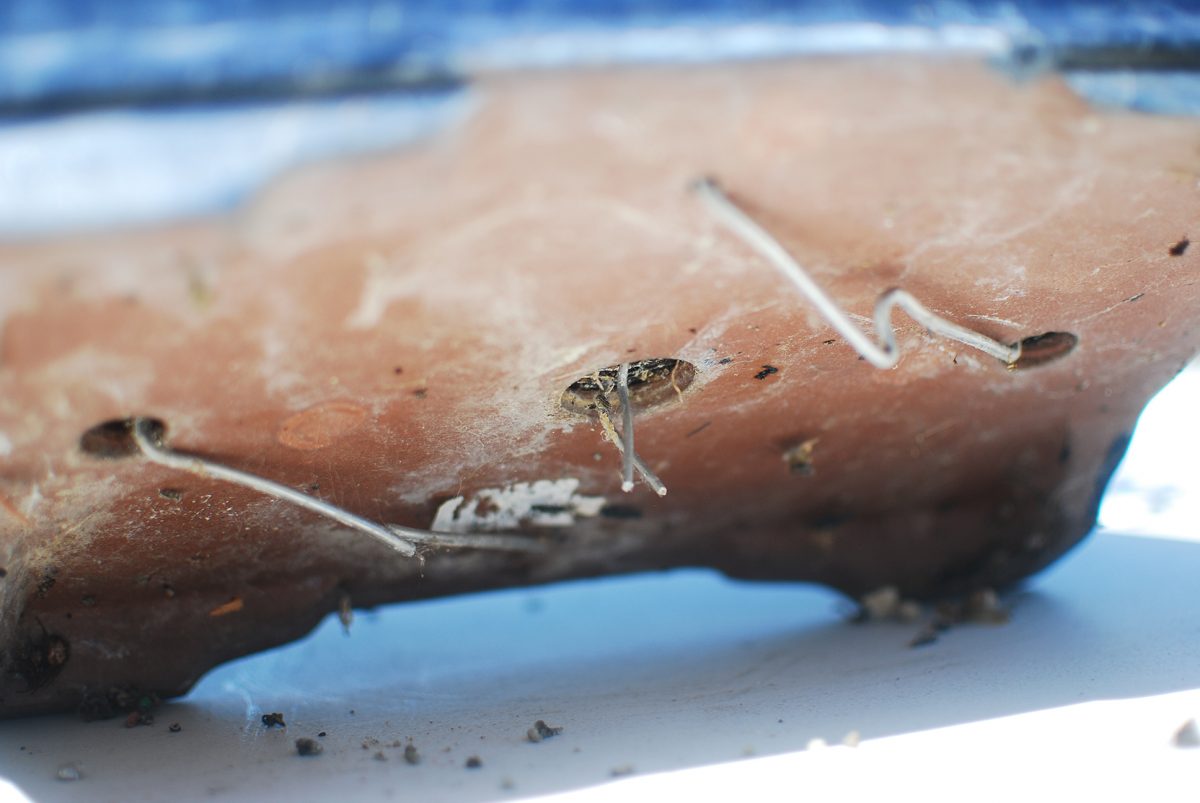
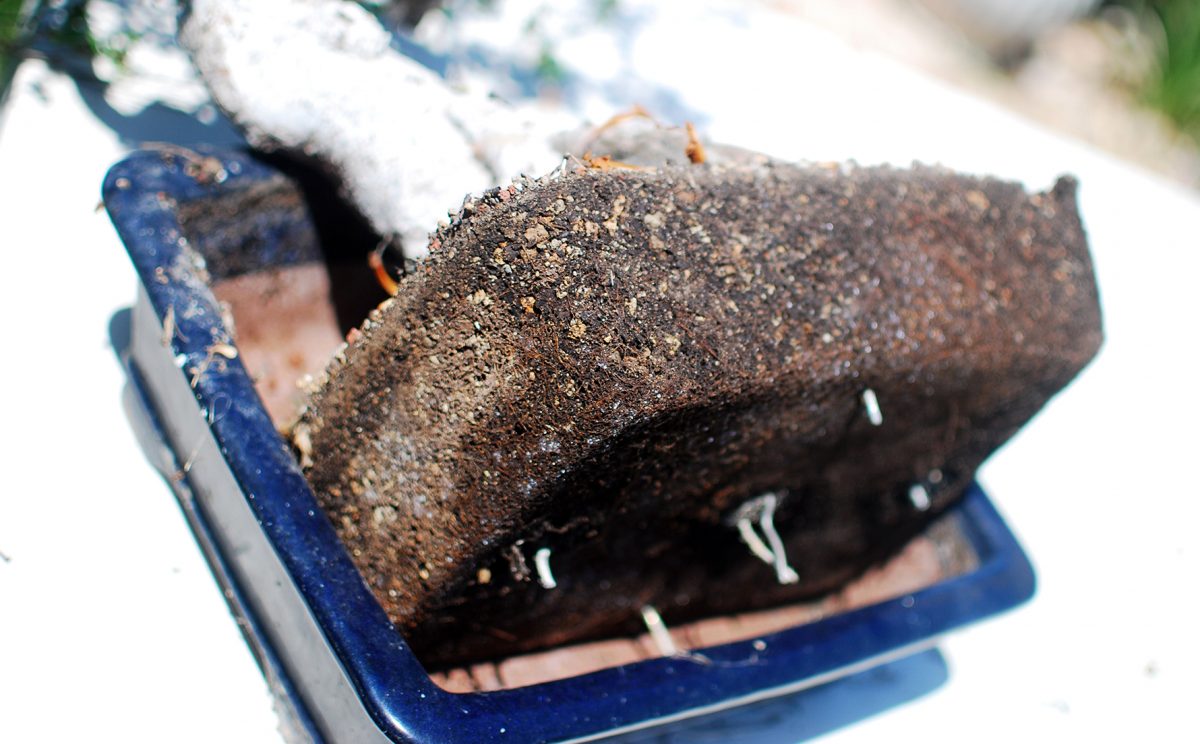
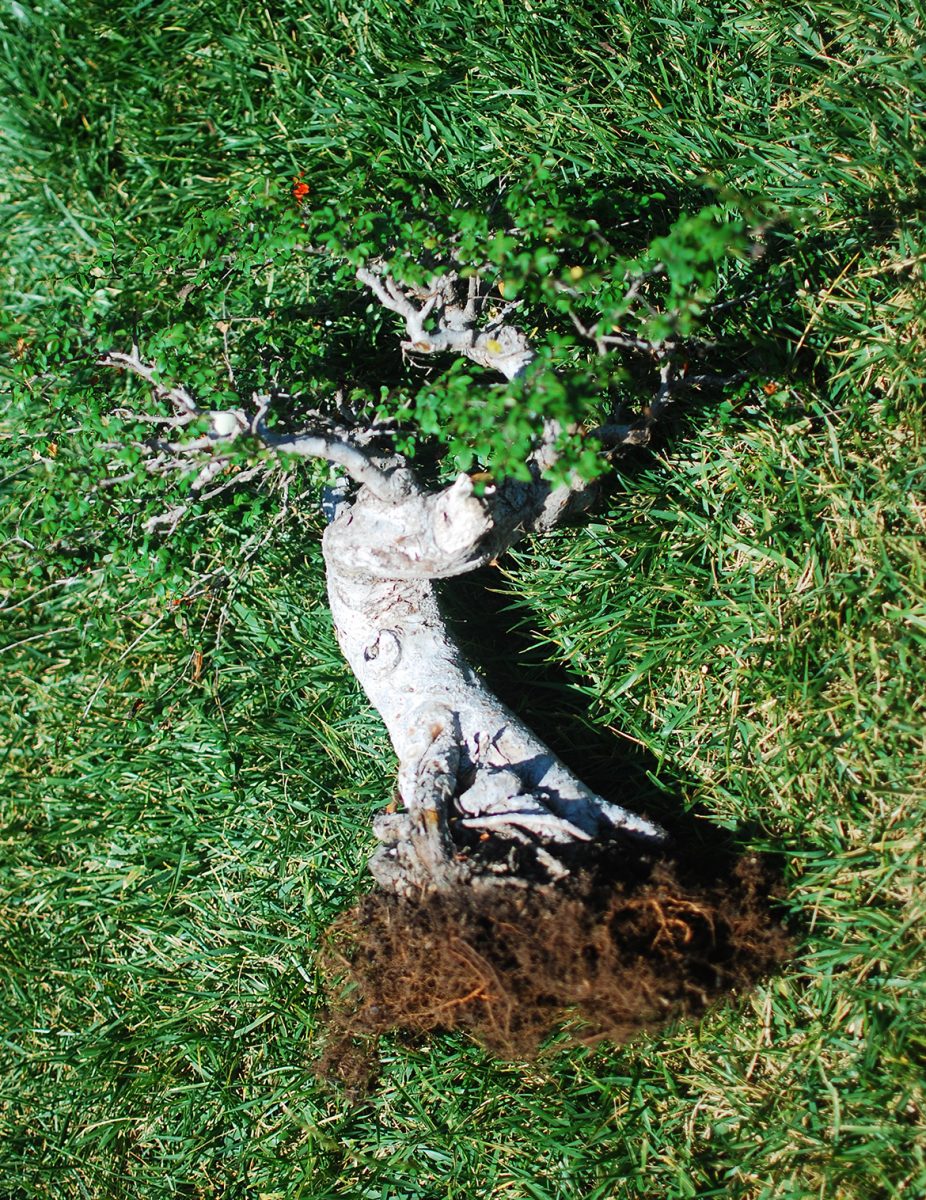
Free at last! Once they’re clipped, bend them straight so they have an easy exit through the holes in the bottom of the pot. If it’s been some time since you’ve repotted, the whole plant should come up roots, dirt and all. A sure sign that you’re doing the right thing because this bad boy is root bound!
Yep, I definitely should’ve done this a long time ago! Oh well, ever forward. The next step is we want to remove all of the old spent soil without damaging too many of the tender roots. This can be tricky and I recommend that you never use your hands to do so. If you haven’t purchased the master tool set and don’t have a fancy schmancy root hook, you can use a chopstick just as easily.
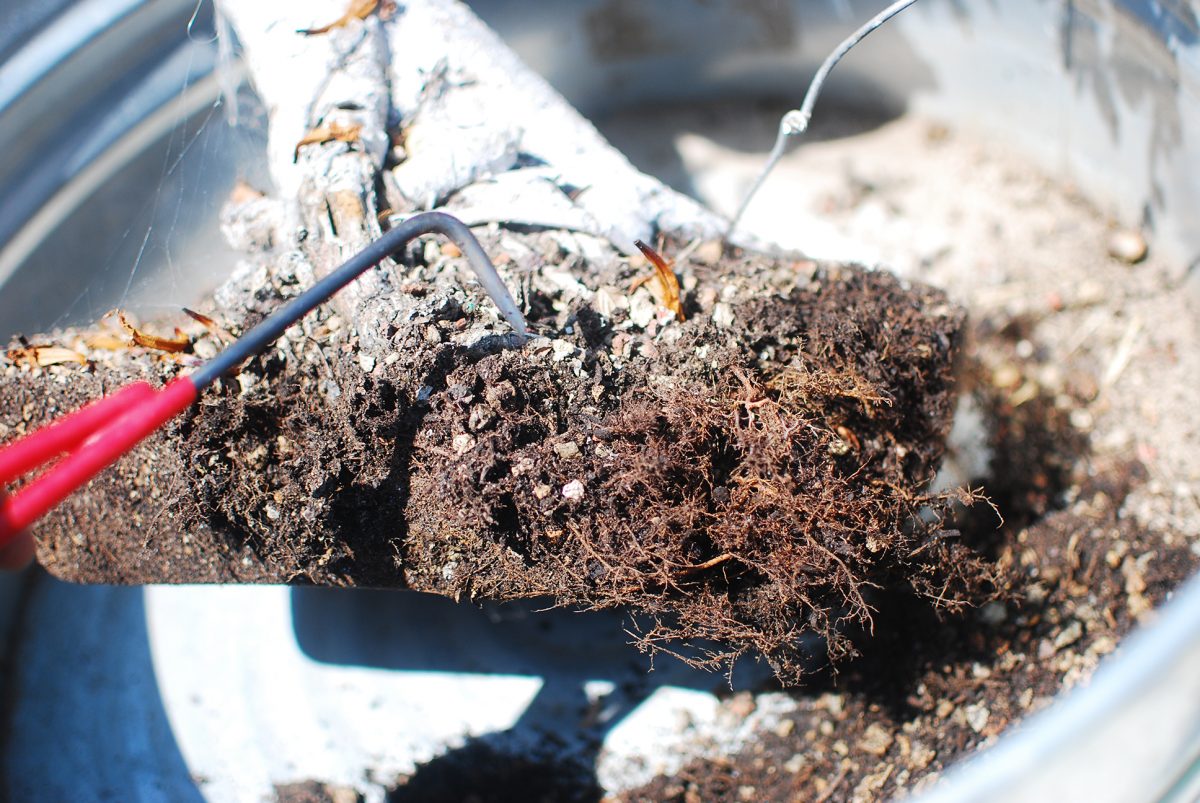
Begin in one spot and carefully poke the dirt to loosen it. Take your time and be gentle in doing so. Slowly work your way around the roots and it should get easier as you go.

It’s okay if a few roots come off during the process. It happens. Sometimes the roots are already detached especially in root bound pots. We’re going to trim off some of the roots anyways so it’s not a huge loss. You just don’t want to remove more than a third of the roots during the whole process.
Getting closer…
And all done! I trimmed off only a small amount because this root ball lost a lot during the soil removal. I gave it a gentle rinse with the hose to remove the remaining soil as well as to keep those sensitive roots moist! Now is not the time to take a break and go watch Game of Thrones! We must work quickly prepping the pot so we can re-plant as soon as possible.
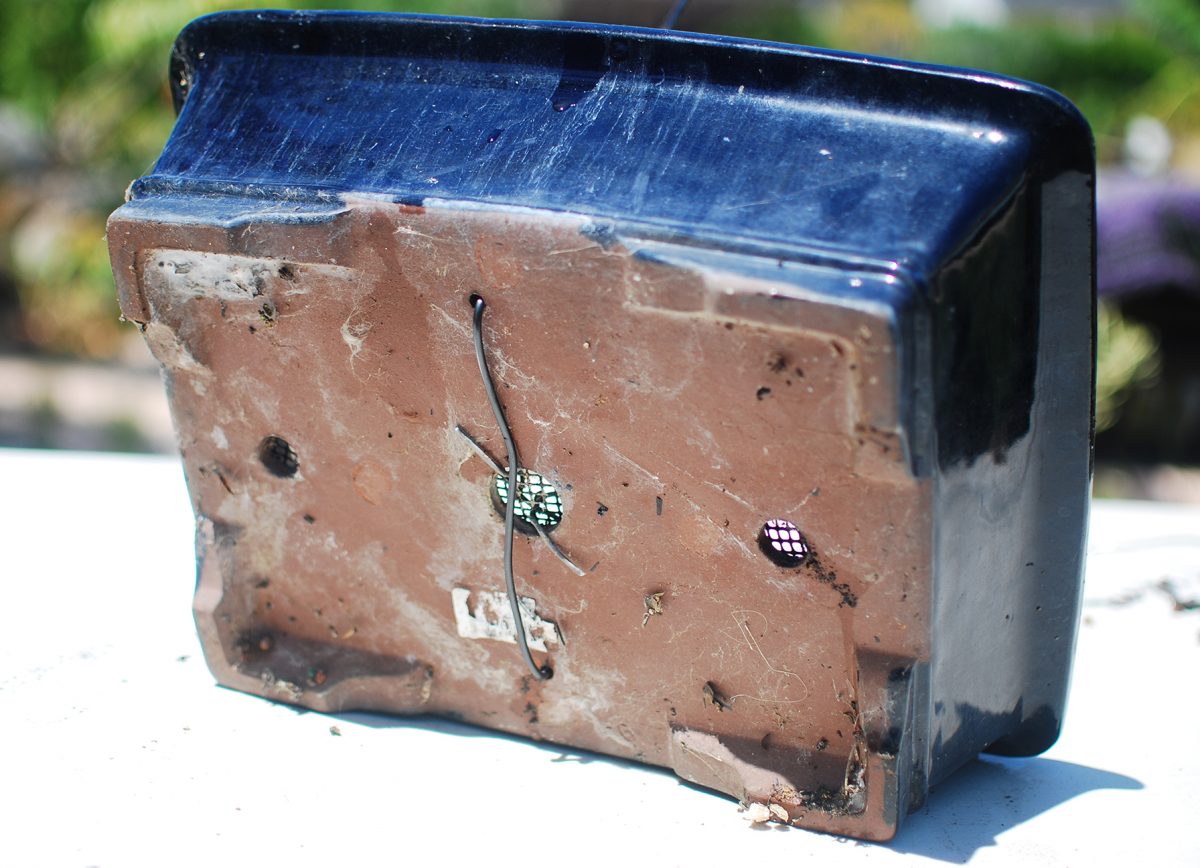
Next we wire in the screens and place the new wire to secure our tree. The screens keep the soil from seeping out during watering, but allow the drainage to still be fast.
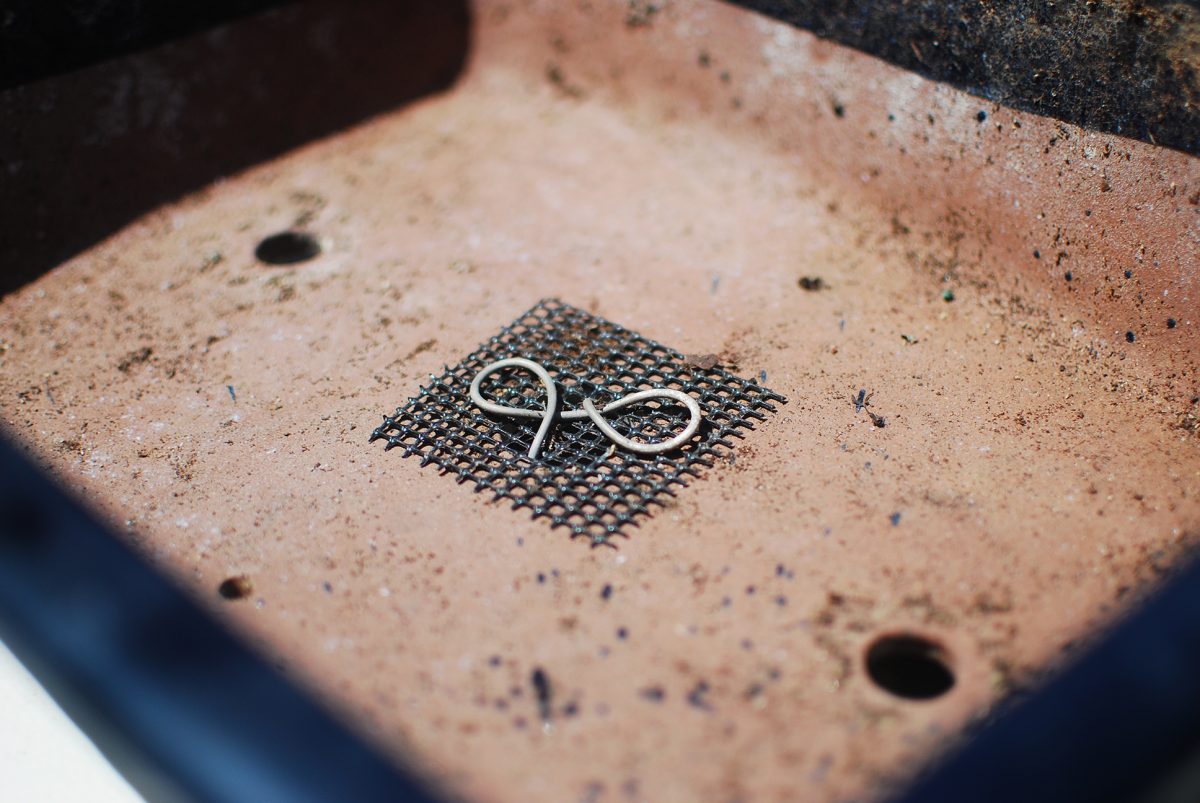

Next you place the support wire through the holes to accept your tree. I drilled two extra ones in this pot because this tree is heavy and has a definite lean to it.

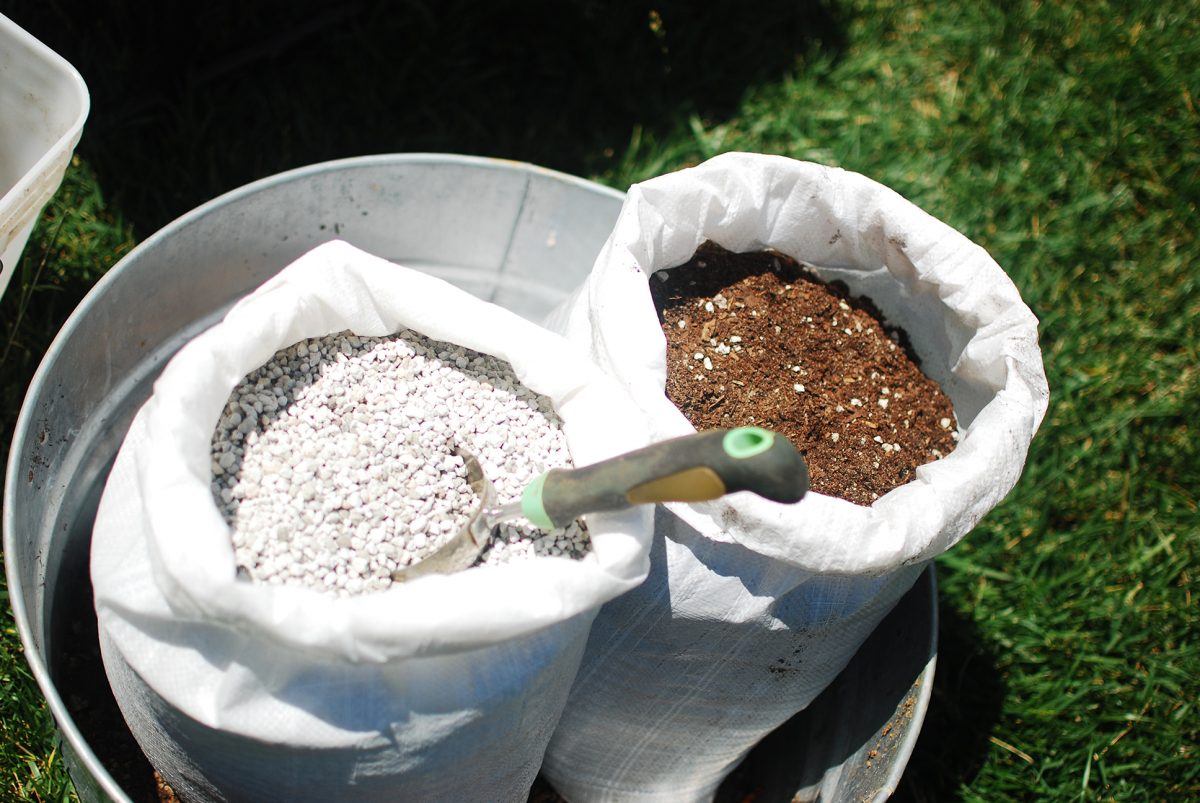
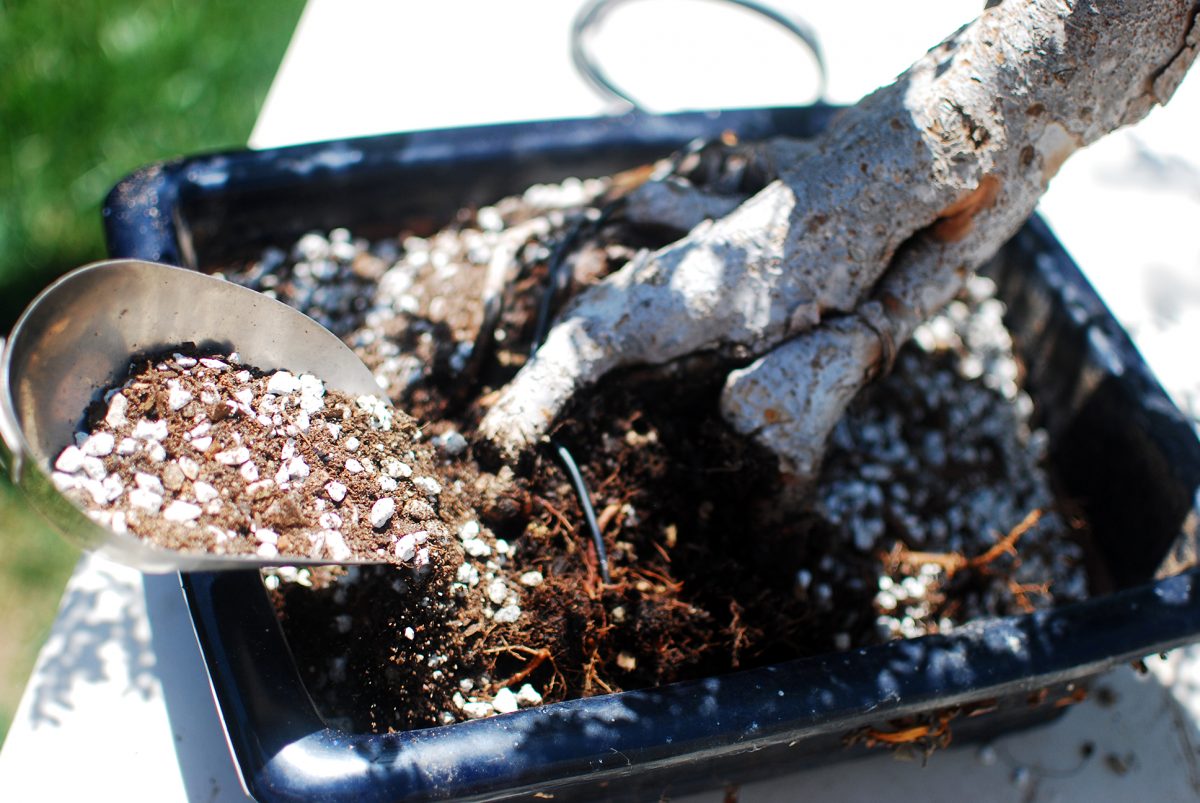
Now we are ready to add some soil to the bottom of the pot. Bonsai soil is not the typical potting soil you buy at the nursery. It needs some extra loving to stay well drained and keep the tree healthy.
Typically, bonsai soil will have about 60% inorganic material and 40% organic. Depending on the species of course. Look up online the best soil mix for your species as there are too many to list here.
Inorganic material:
Bonsai need excellent air flow and superb drainage in order to be happy. Regular potting soil would retain too much water and the roots would rot. That’s why we use so much inorganic material, to provide good oxygen and drainage. You can go out and buy some really expensive akadama soil to mix in with your organic, but it’s a huge waste of money. Especially for larger trees. Akadama is simply tiny clay balls. If you want to save some money, you can replace it with cat litter! Not the perfumed kind or the clumping kind. The cheap stuff. You can even use floor sweep from an auto supply store and save even more money. That’s made from diatomaceous earth and has the same properties as akadama and kitty litter. Here’s a good place to look for brands in your area that are safe.
The only thing with all three of these options that I don’t like is that they begin to break down after a few years and can cause serious drainage trouble. Especially the clay from the kitty litter and the akadama. For younger bonsai that you intend on repotting every other year, this is a moot point so go for it! For older trees, you may want something that will hold up a bit longer and wont degrade.
Decomposed granite and pumice are great inorganic materials for this purpose! Whatever you use, be sure to sift out any dust or smaller particles to keep that drainage! I use a screen with 1/8″ openings to handle that task. You don’t want any silt to gum up the works!
For my Chinese Elm, I decided on using pumice.
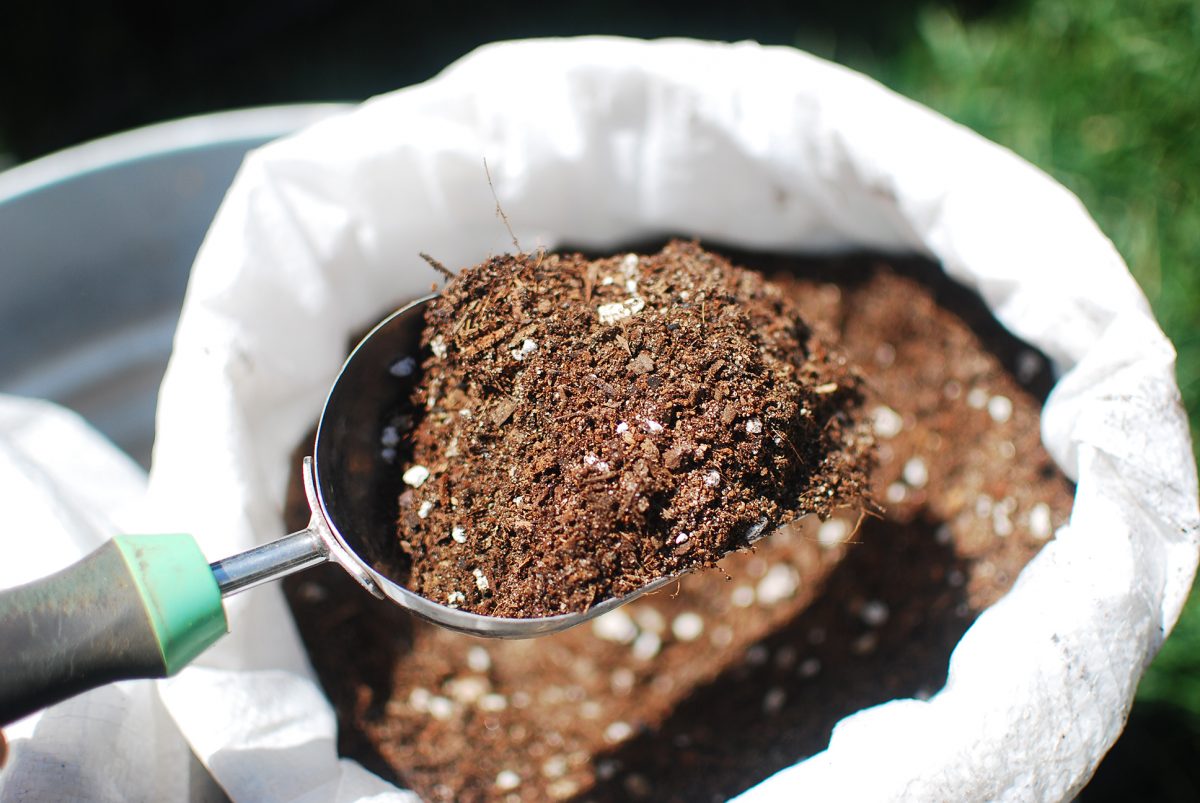
Organic material:
Nothing beats fresh home made compost for the organic material! For my mix, I added a small amount of peat, a bit of sand and some fresh worm castings to give it a bit of a boost. You can also buy a soil mix from a local nursery because to make this batch of goodies at home may cost more than if it’s premixed. Plus, you may not have all of those supplies readily available. The organic material is going to help retain some moisture but mostly provide nutrients to those hungry roots. If all you have is potting soil, make sure at least that it doesn’t have any time-released fertilizer or Pearlite in it. You don’t want too many nutrients that will burn those sensitive roots nor do you want too much moisture retention. It’s always better to fertilize bonsai with a weaker liquid solution. With bonsai, you always have to water and fertilize more frequently, albeit with weaker solutions, due to the micro-environment you’re creating in such a relatively small pot. Standard potted plants have a bit more wiggle room because their pots are much larger in relation to the plant.
For Chinese Elms, the ratio should be around 70% inorganic to 30% organic. That’s just how they roll yo. So I took my standard 60/40 mix and added more pumice to it.


That should prove to be a perfect mix for this bonsai! Now that my wires are ready to accept, I sprinkle a small layer of this soil on the bottom of my pot and then carefully place the tree into position for the wiring. To reduce stress on the tree, make sure you have your soil all mixed and ready to go before you begin the whole process.
This is where things can get tricky. Getting the tree to be in a pleasing position without damaging the roots takes a little bit of practice. Getting the tree to stay in that position when you’re done takes even more. Just take your time and be gentle and you’ll get it! You can gently stuff some soil underneath as you go to help support the tree as well. Once you feel it’s secure, carefully tighten the wires and trim off any untidy parts.
I try to keep most of the wire buried under the soil. Sometimes that’s simply not an option. Do your best, but remember that a secure tree is much better than hidden wires. With bonsai, you’re in it for the long game so patience with unsightly aspects is par for course. Once your tree is properly secured, begin adding the soil.
Use a small scoop or a large spoon to get into hard to reach areas. It’s very important that there are no gaps between the soil and the roots. As you add the soil, you want to gently probe it in to these spaces with a chopstick.
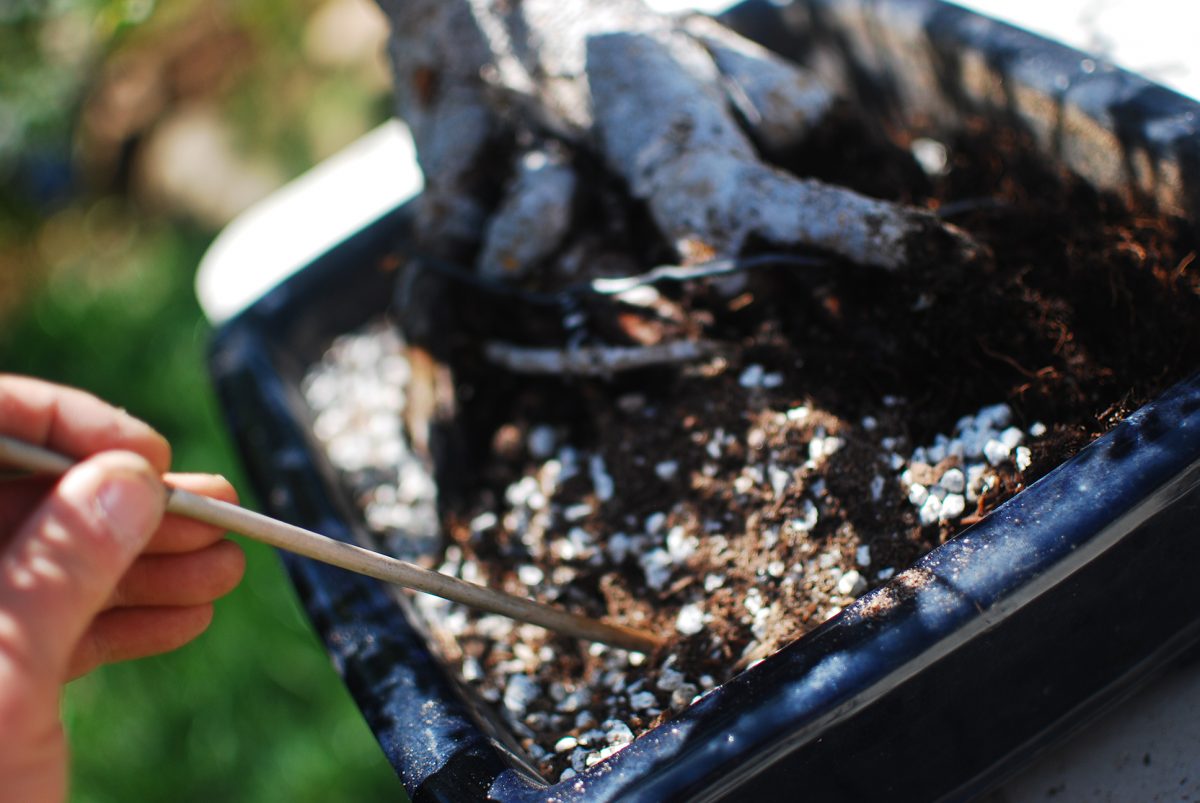
Slow and steady wins the race! You don’t want it so tightly packed that it effects oxygen flow or drainage, you just want the soil to gently hug every nook and cranny around the roots. Keep doing this as you slowly build up the soil around the base of the tree.
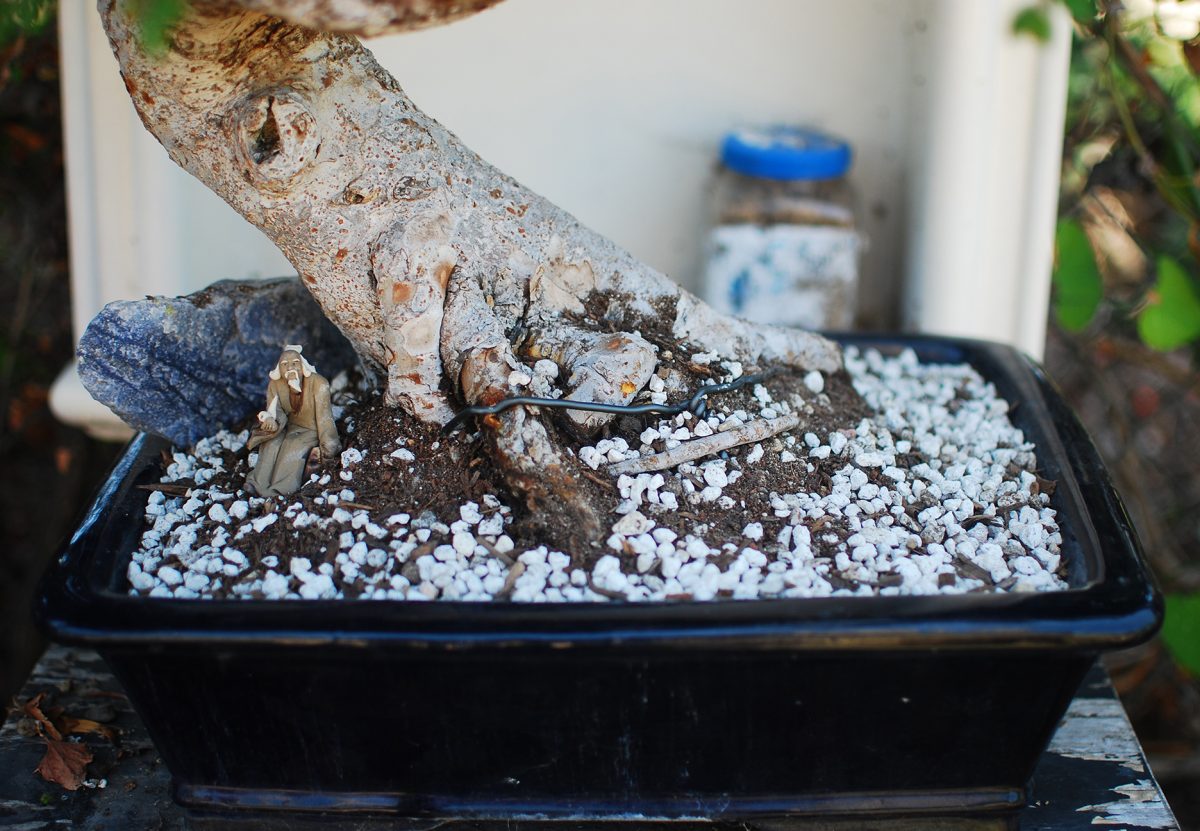
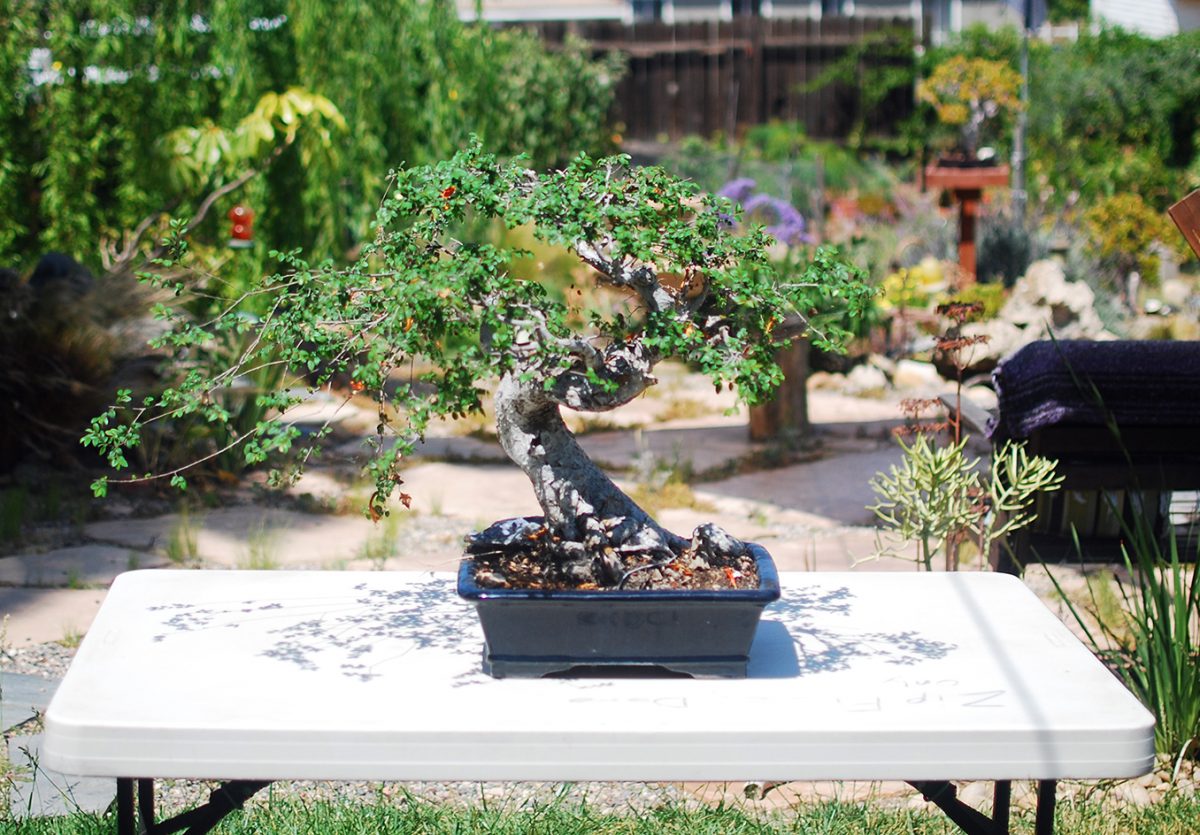
And here we are! A fresh new start for our bonsai to grow up big (well, small) and strong. Once you’ve finished, it’s a good idea to gently mist the soil so all the loose bits fall into place. Don’t use the “jet” setting for this task. Slow and steady, remember?
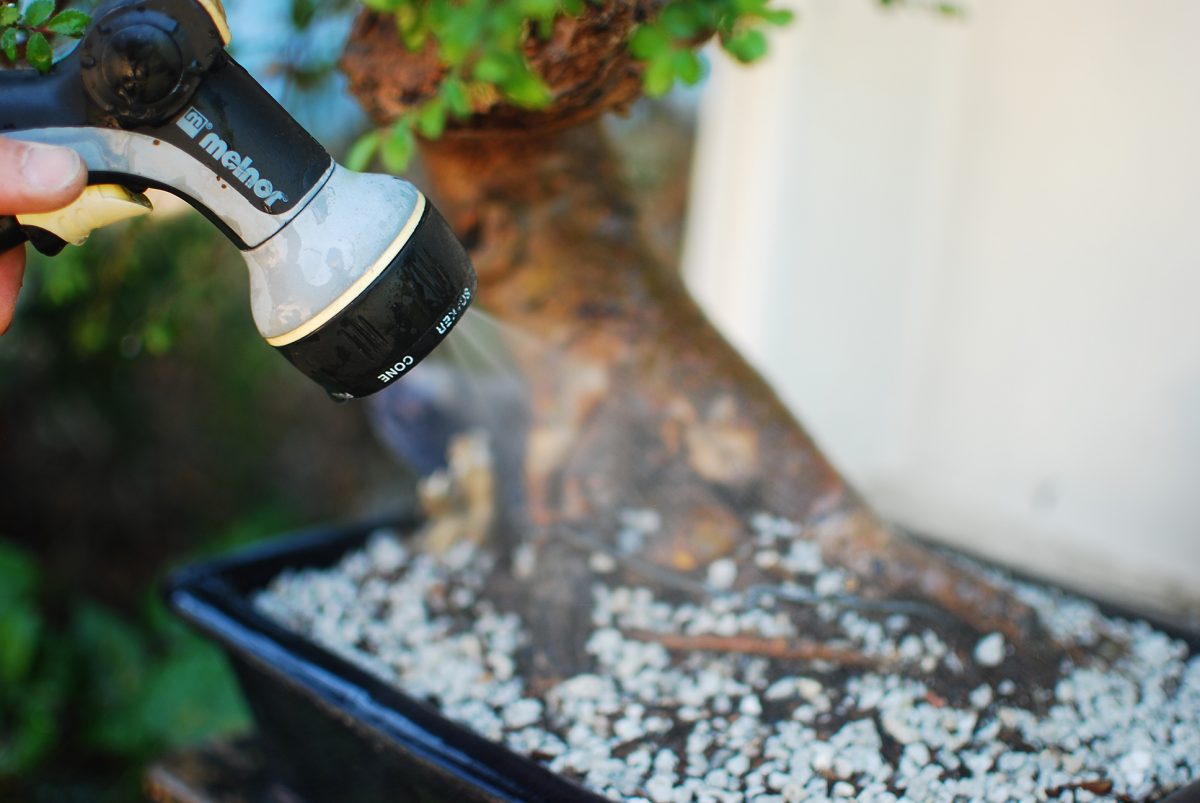
Once you’ve got a good soak with the mist, you can increase to a gentle shower until the water is freely flowing out the bottom of the pot. make sure that as you do this, there is no pooling at all, the water should flow as quickly as it’s being added. If it doesn’t you have a drainage problem you have to deal with. Here we are all finished.

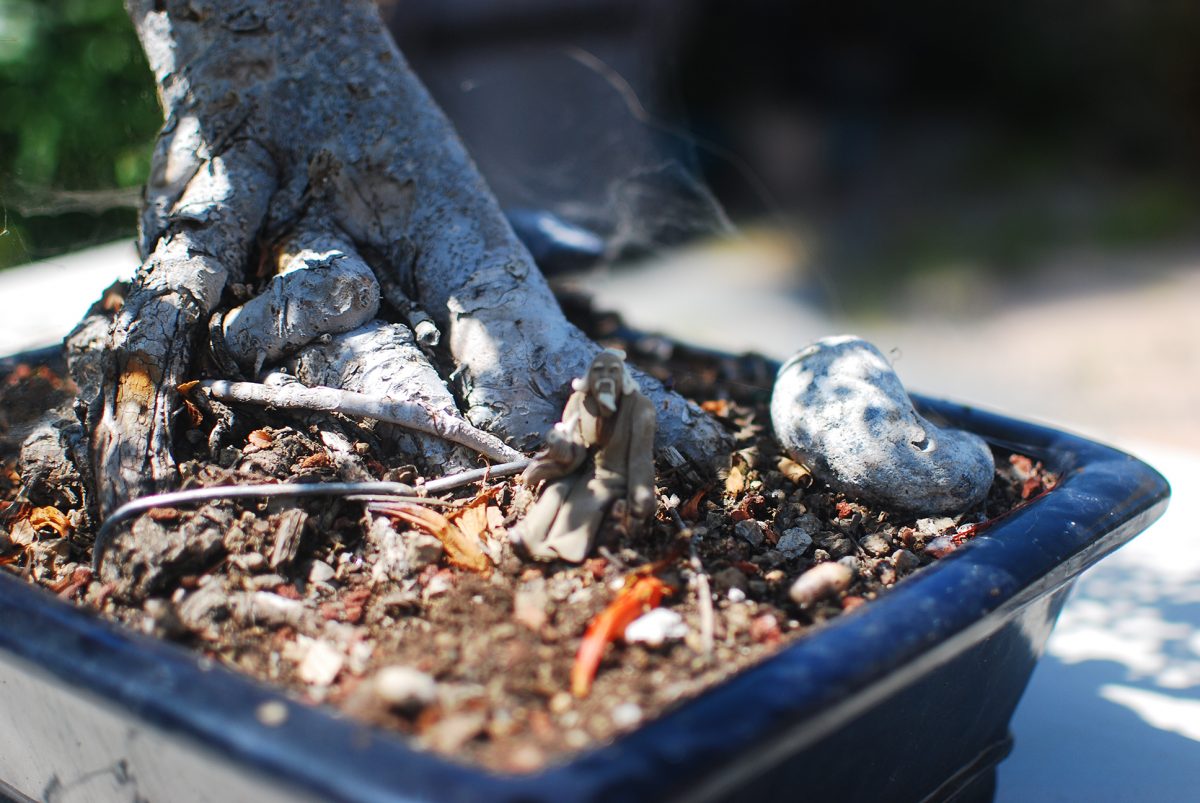
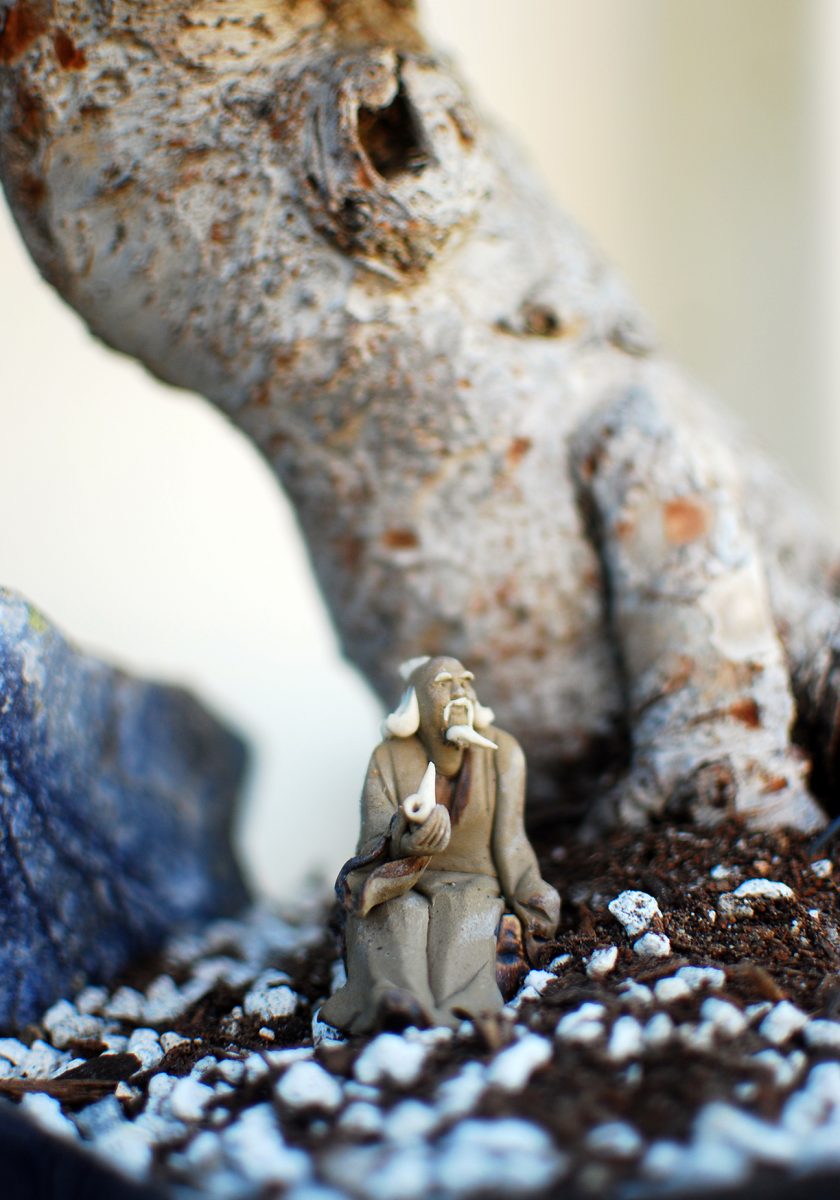
And look how happy my little pipe-smoking friend is!
Oh my goodness, I had no idea bonsai’s were such complex things! It looks very happy now, as does it’s pipe smoking buddy.
They can be! Chinese Elms are much easier than other species. A good beginners bonsai. They’re predisposed to have smaller leaves and excellent ramification of branches. Good traits for bonsai. They also can take some punishment with pruning and general care. Within reason.
My friend, everything about changing the elm soil was excellent, but you did not explain the time to change the soil or the elm pot. Good luck.
Reblogged this on Wolf's Birding and Bonsai Blog and commented:
Great post. Enjoy.
It’s such a long and complex process…I had no idea. It seems that is a cool way to exercise mindfulness…
I’m just scraping the surface too. Some bonsai are hundreds of years old. I just read about one that’s 300 and survived the bomb in Hiroshima. I got into bonsai when I had nothing but a small cement porch to grow on. Small plants seemed appropriate. I was also trying to quit smoking and it helped to ease my mind and keep my hands busy.
Here’s a cool tidbit about the origins of bonsai. In ancient China, there was always one overlord taking over from another. Lands and people were in a constant state of flux. If you’re a farmer that has a special kind of fruit tree that’s been in the family for generations, losing your land would be devastating. You’re signature crop would be lost.
They figured out a way to keep a genetic copy of the big trees in a miniature form so when the hammer came down, they can grab it and skidaddle. A bonsai is much easier to travel with and when the settled again, they could start all over with clones. Thus the art was born.
Although it’s mostly known to come from Japan, it originated in China. How cool is that?
That is absolutely fascinating, love it!
Thanks for this post. I am looking at repotting my newly bought Chinese elm (first bonsai, complete beginner). I’m suspecting the soil is poor quality and too dense, as its leaves are going a little yellow and brittle, and the water does run off the pot a little. So I think I’ll go off your advice on the soil mix to use. I’m afraid the roots won’t be completely root bound though. Any advice is appreciated.
Hi Conor. If the soil is poor or the drainage is poor then you should definitely replace it. No need to wait if it’s root bound in your situation.
The leaves of the Chinese Elm will also burn if it’s getting too much hot sun. At least they do in San Diego inland. Last summer did a lot of damage to all my bonsai. Record heat and drought was a bear.
Just keep an eye on yours after repotting and keep me posted if anything looks like it’s taking a bad turn.
Thanks for your very quick reply. I’m in the UK, we think of sun as a fond memory of what used to be…
But any glimpse of sun we have, I make sure the bonsai gets to be in it.
I’m currently looking at mixtures to use for potting, akadama and kyodama seem to be recommended and tried and true. I realise there are plenty of other things and variations, but of course there are 1000s of people and with all very different opinions. The akadama isn’t as expensive as people seem to make it out and my bonsai and pot are only small so I don’t need much. I’ve been advised a 50-50 mix of the 2 is what many people quite like. My worry is that it doesn’t meet your advice of inorganic and organic, as they are both inorganic I think?
Your guide is definitely being bookmarked. Thanks for your advice.
Ah, so I’d wager that too much sun is not the problem. Right. Moving on then.
It’s true that there are tons of recipes out there and you should use what’s available to you locally when you can. You can even use cat litter provided it’s the right kind.
But you would be right about your recipe being two parts inorganic. Not an impossible scenario provided you replace the lost nutrients that organic material would provide. A weak fertilizer applied more often then a regular strength fertilizer would be my advice if you go that route.
Inorganic material is typically for both drainage as well as moisture retention. It makes for an excellent substrate but does nothing to feed hungry roots.
Thanks for your advice.
I am going to go with a different mix, also because I can get the other bits I would like, in with it too, (mesh, root hook, wire). It’s 1 part pumice, 1 part perlite and 2 parts compost. So that seems to me like it’ll be a good mix to have.
Then I’ll just have to get used to telling when it needs water and when it doesn’t.
Thanks for your advice, you’ve been a great help.
I’ll need to sign up to a forum of some sort for future advice as I can see myself really liking this for a hobby and getting more in the future.
Thanks again,
Conor.
Anytime Conor! I’ll be here to help whenever you need it. Be sure to follow Mind Your Dirt as well as your bonsai forums 😉 Best of luck with your Chinese Elm! You’re going to get hooked…
That’s beautiful is the tree still ok now, where did you get the mudman from it’s perfect. well done. I have just purchased a Chinese elm. It is my first bonsai.
The mudman came from a local nursery. I had to go up in scale for this tree due to the trunk thickness.
You chose a good species to start with! Elms are very hardy and easy to train. Enjoy!
Hi Jen can you tell me where you got the pipe smoking ornament, I have tried online and would love one. Elaine
Hi Elaine, this is actually my lil guy with the pipe. The search term you’re wanting is “mudmen”. They have a couple different scales so make sure you’re looking at the appropriate size when shopping.
Nurseries sometimes carry them as well.